Homelab Hardware Updates

So much for regular posts to this blog in 2021.
A lot of what I intended to write about this year hinged on access to better hardware. Not that I couldn't have done it with the N54L, it was more a case of only wanting to do it once instead of twice. So instead I focused on updating my homelab with the intent of writing about it once everything was in place.
Yeah. That took a little longer than anticipated. Months longer.
But hey, better late than never, right? Lets get into it.
Please note: this article is going to be focused on hardware. Software and networking configurations will be covered in a subsequent post.
Updated Demarcation Point
Well before signing up for Ziply fiber in 2019, my father and I made a weekend project of running some conduit vertically though the house from the mechanical room in the basement to the attic for horizontal cable runs throughout the house.
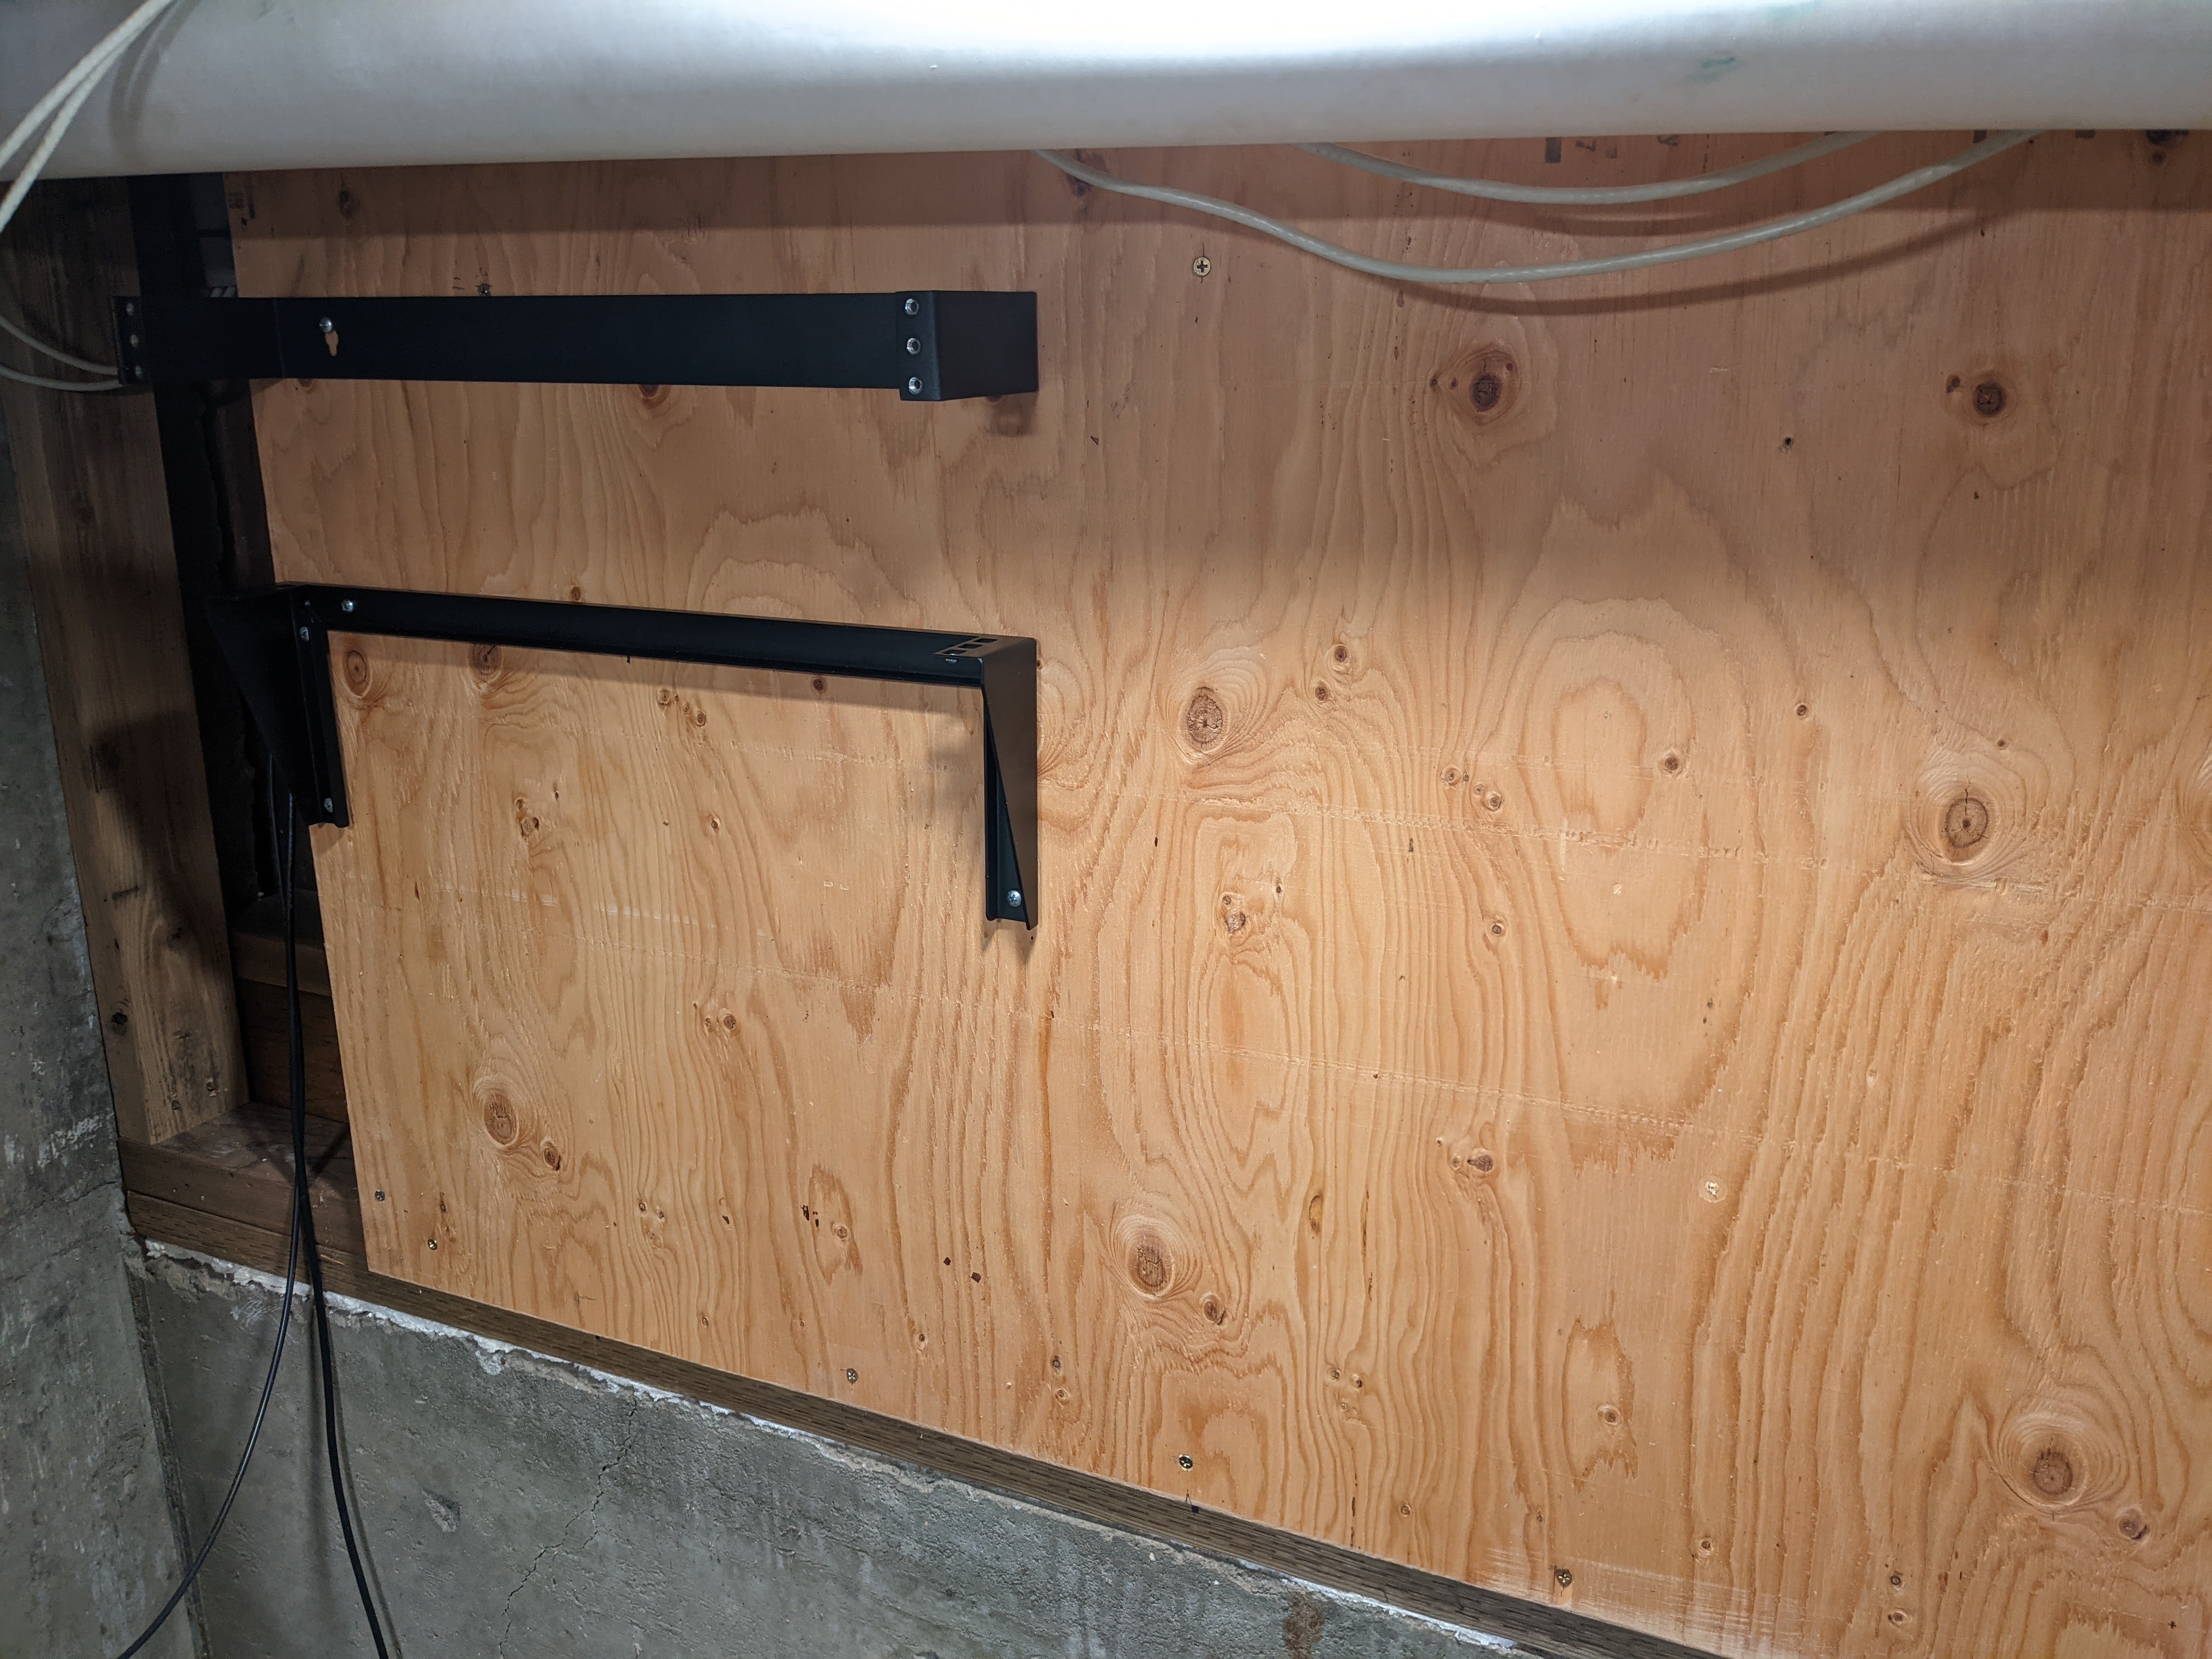
This turned out to be quite fortunate, since Optical Network Terminals need to be powered, and there was no readily available circuits on the external wall where my installer initially wanted to place the ONT. I volunteered installing the ONT in the mechanical room instead, and after running one additional conduit through the attic for the fiber and placing up some plywood, that's exactly what I got.
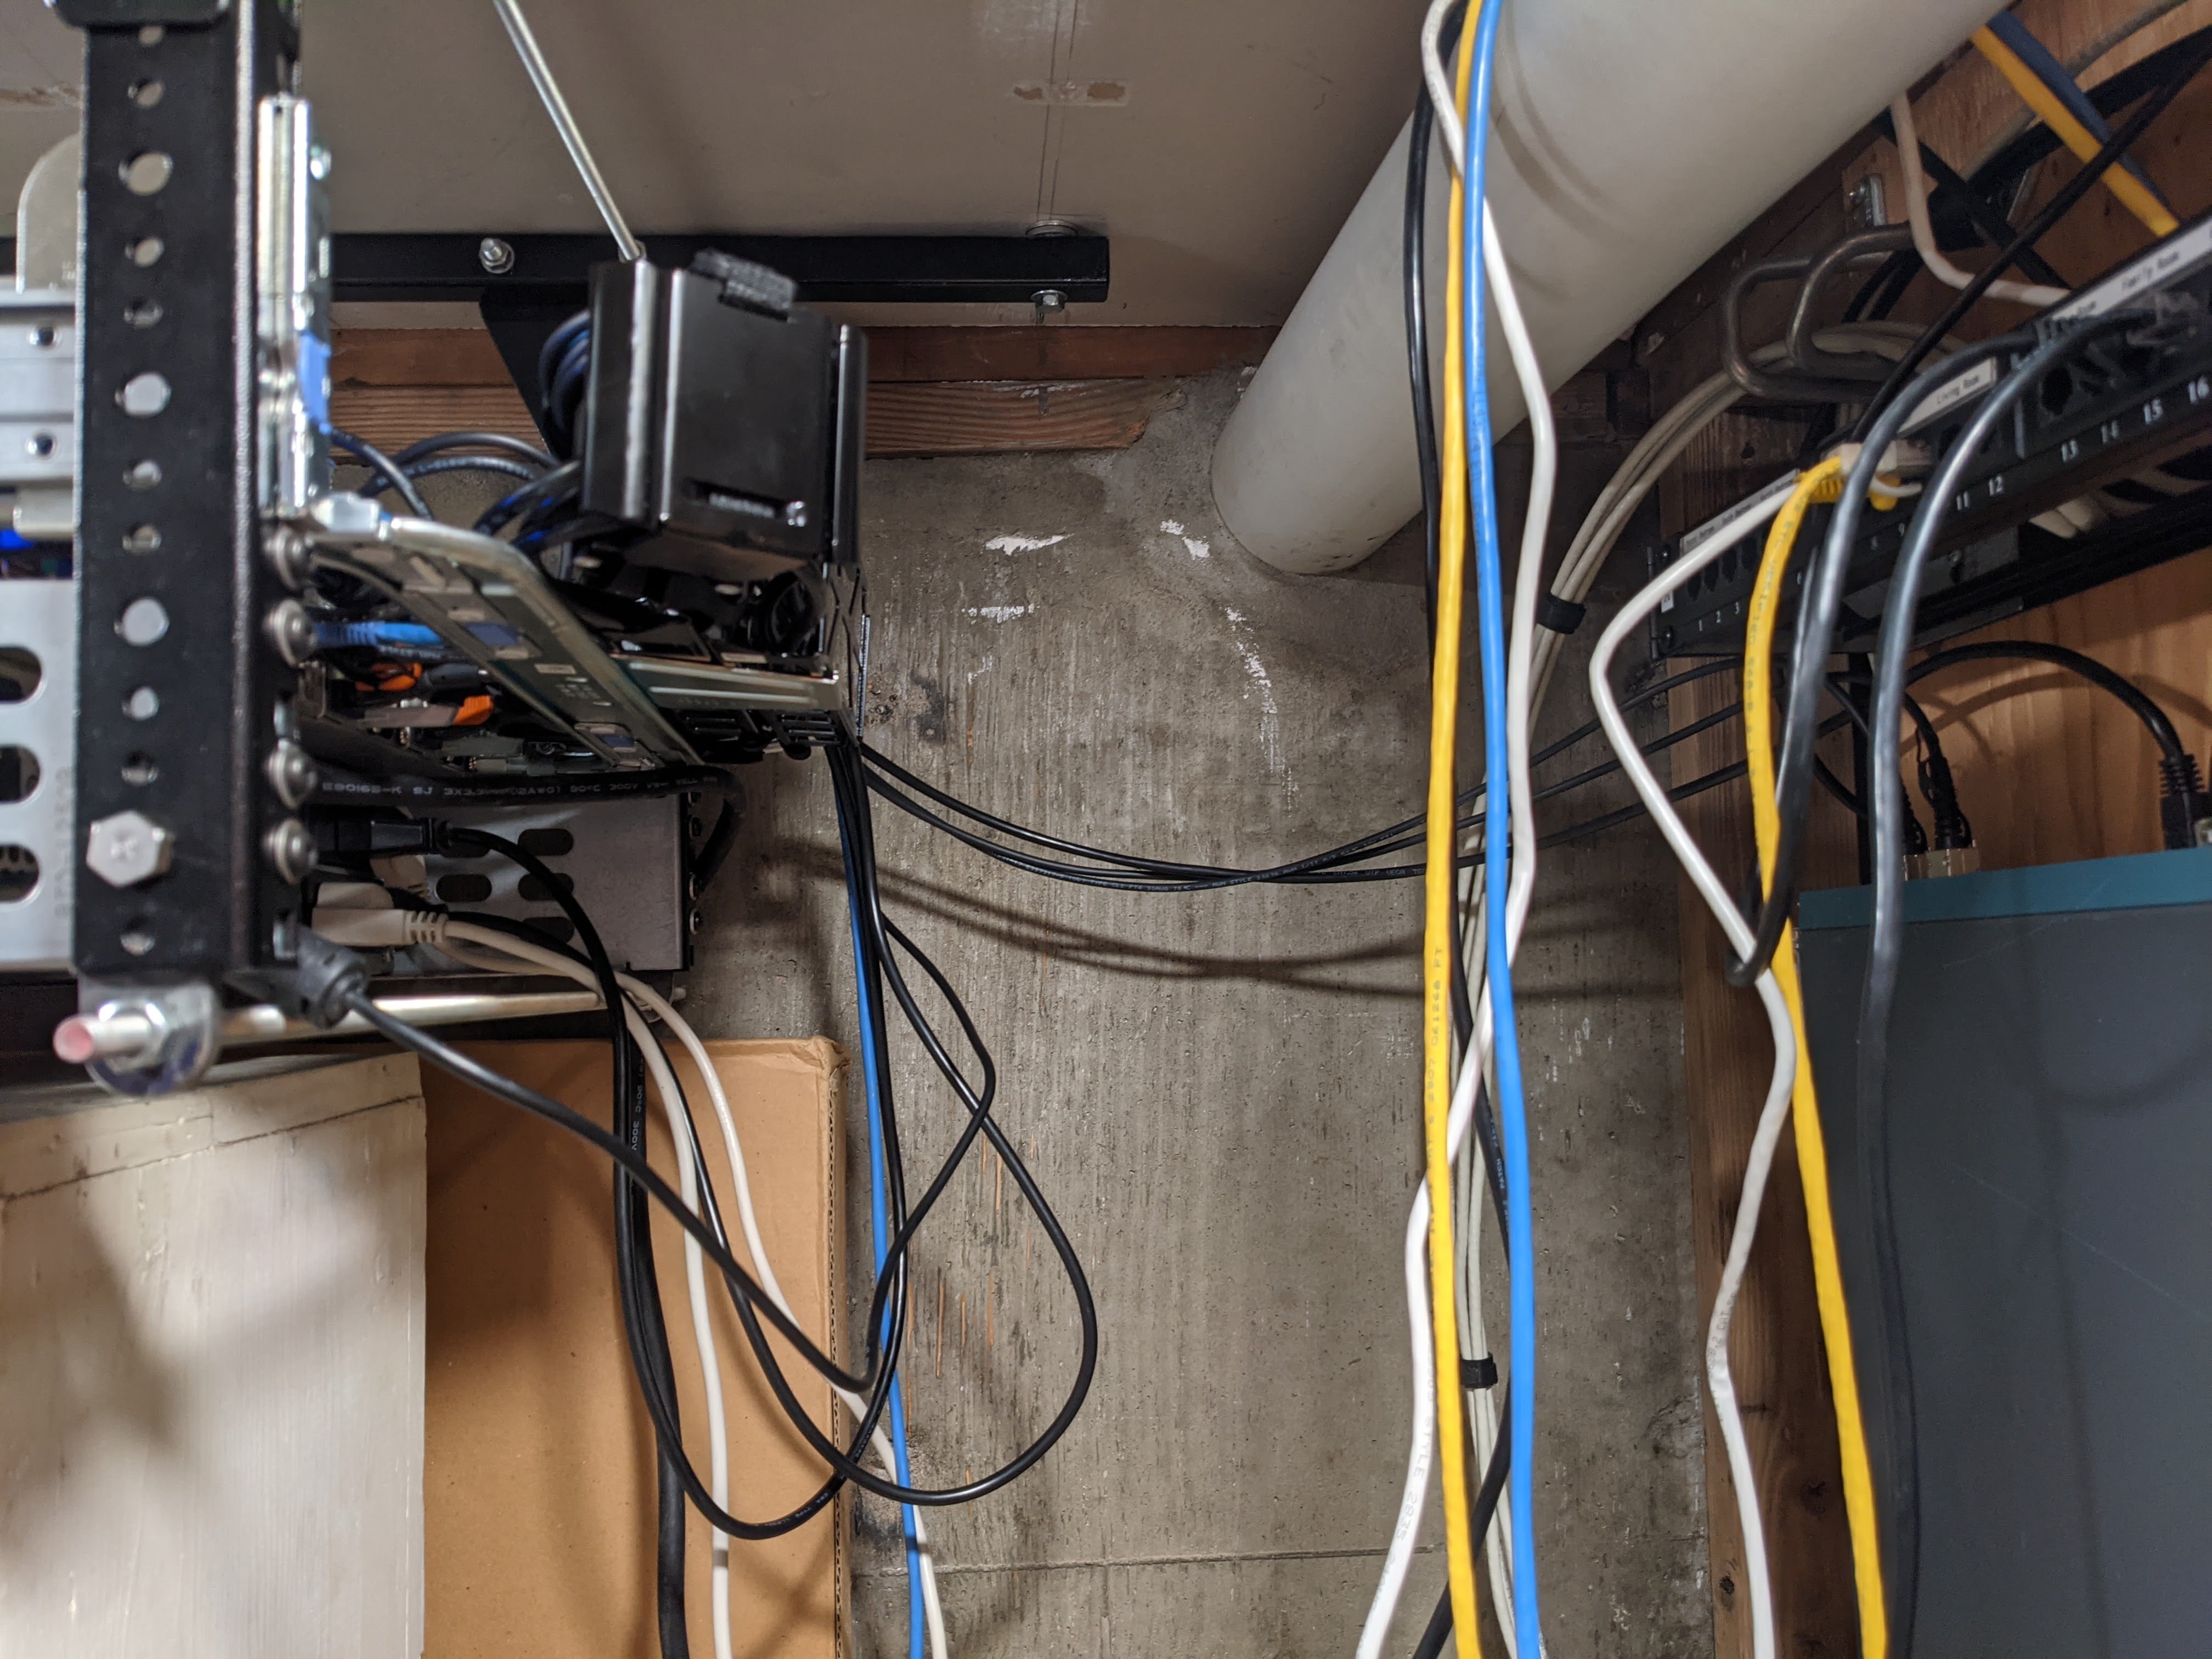
That ONT looked a little lonely up there all by itself, so I just had to add a few more things. These are some photos of the build, and what it looks like today.
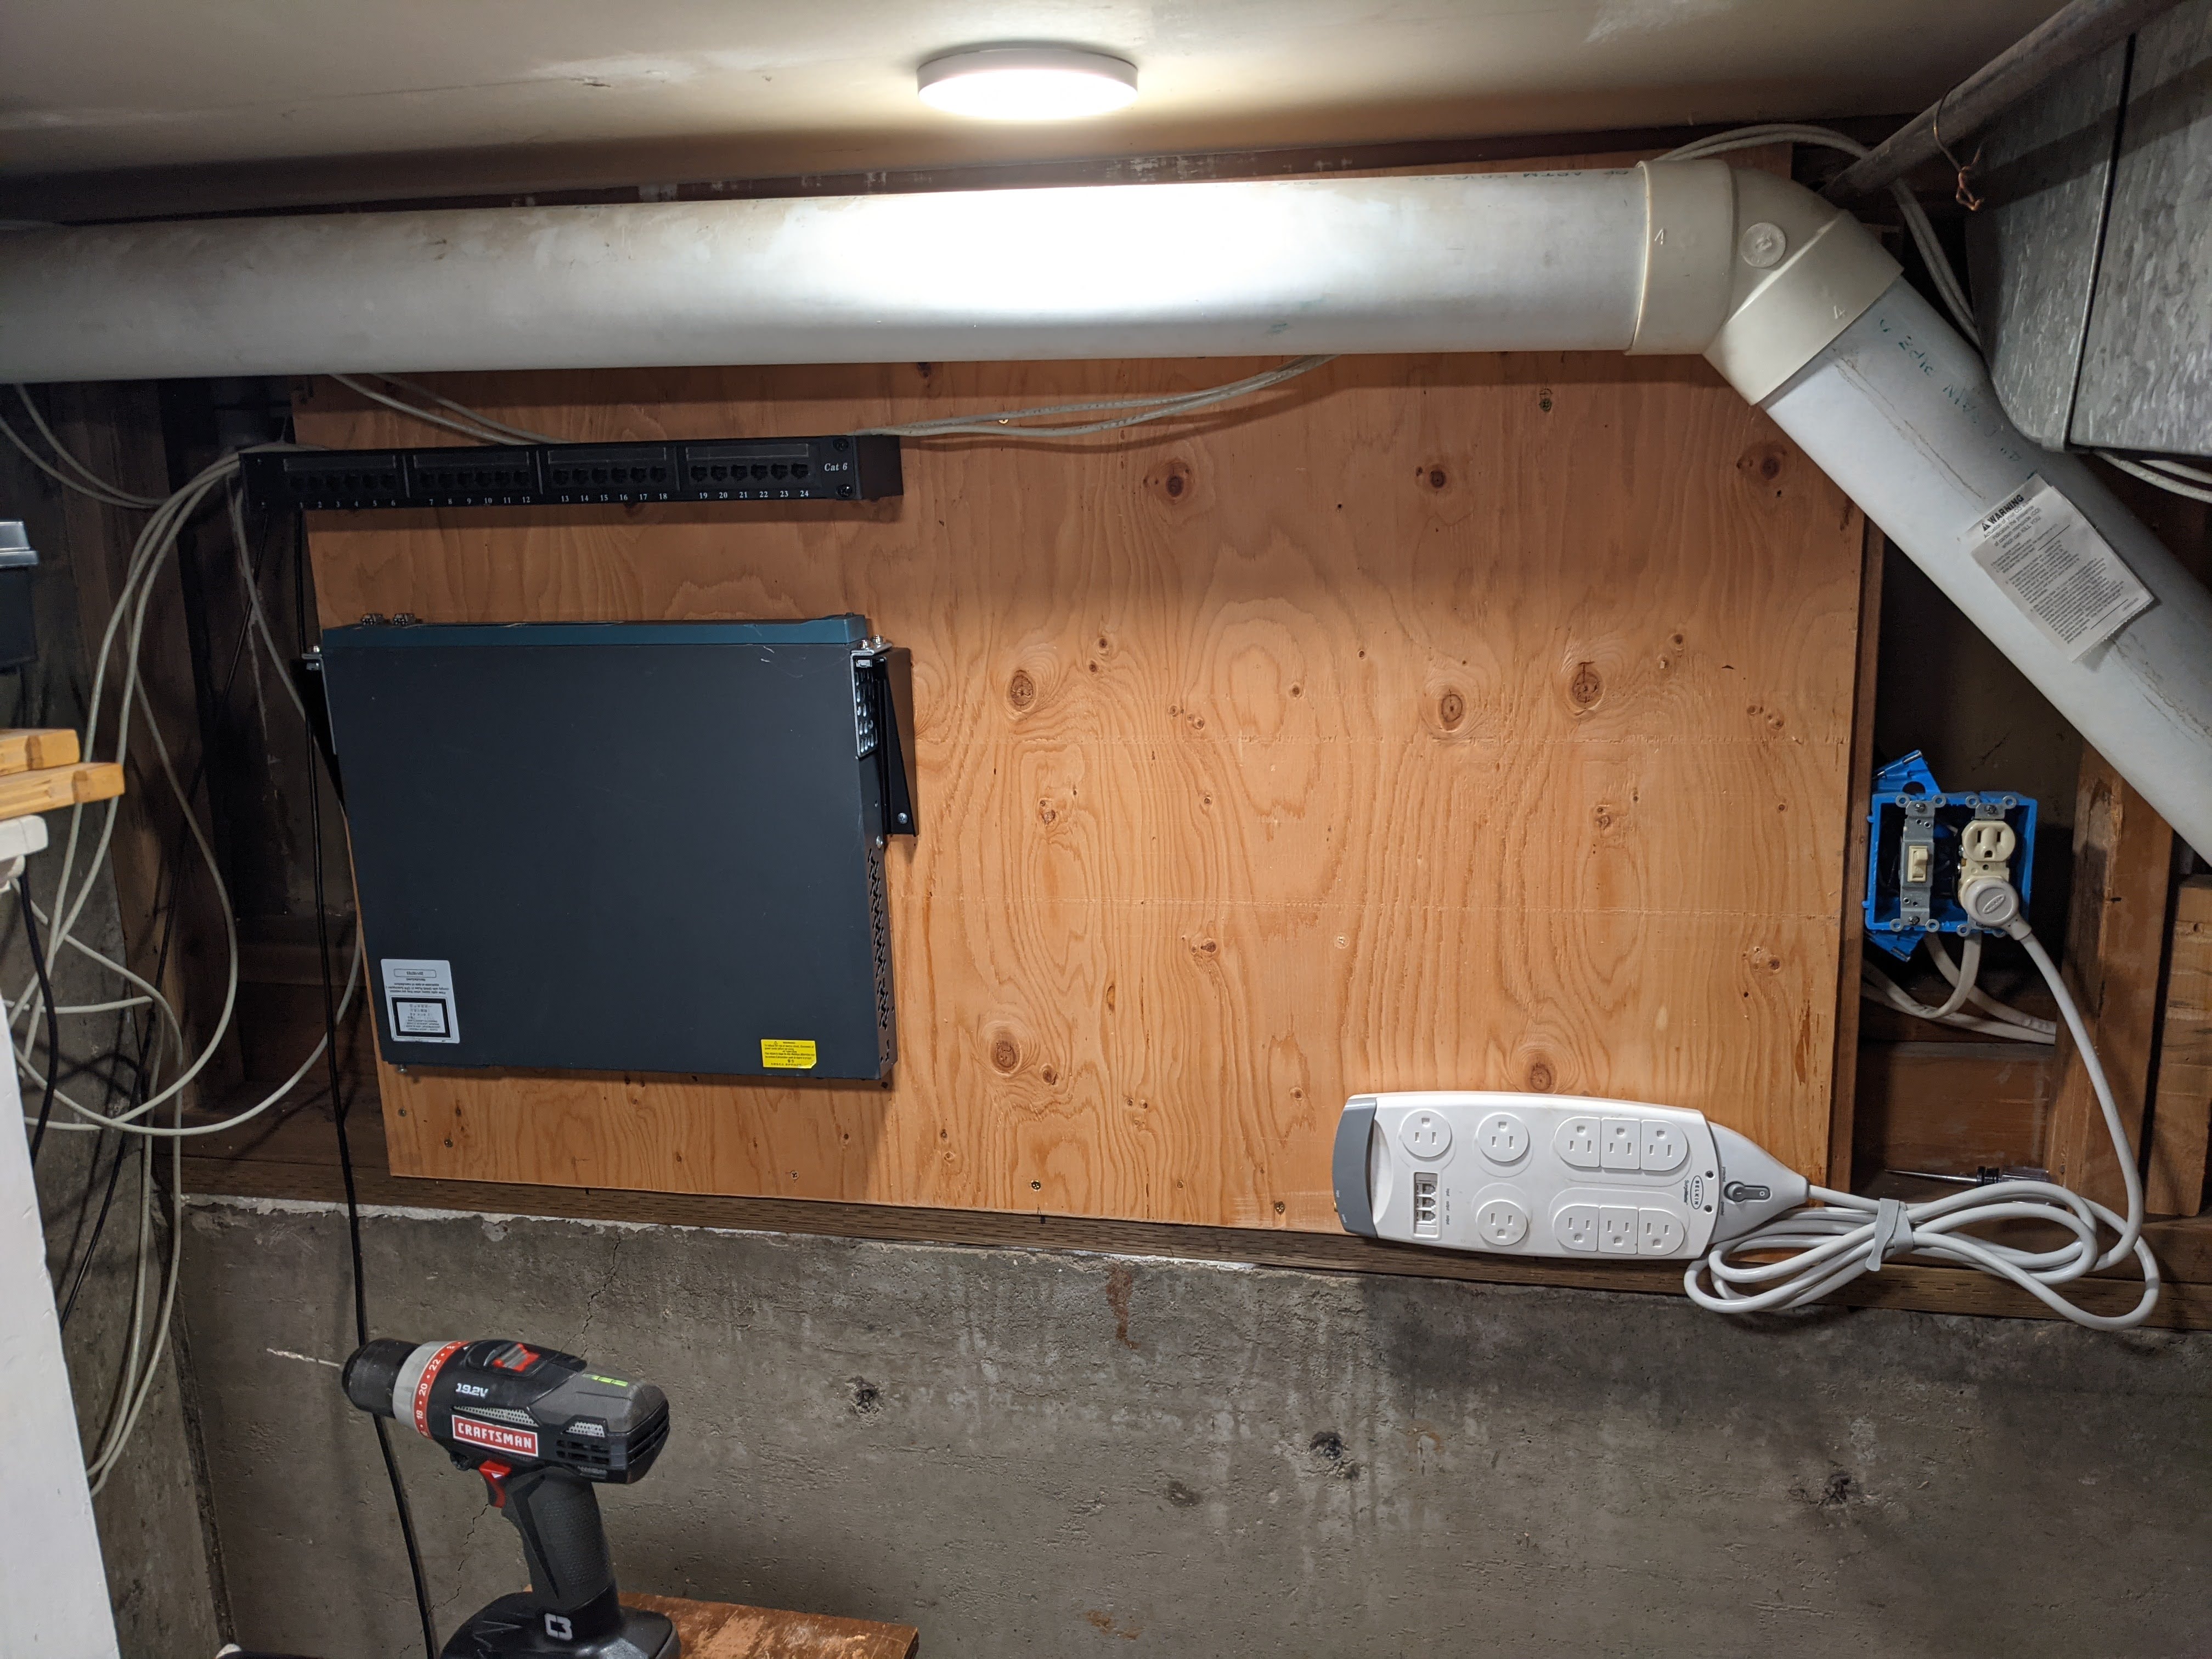
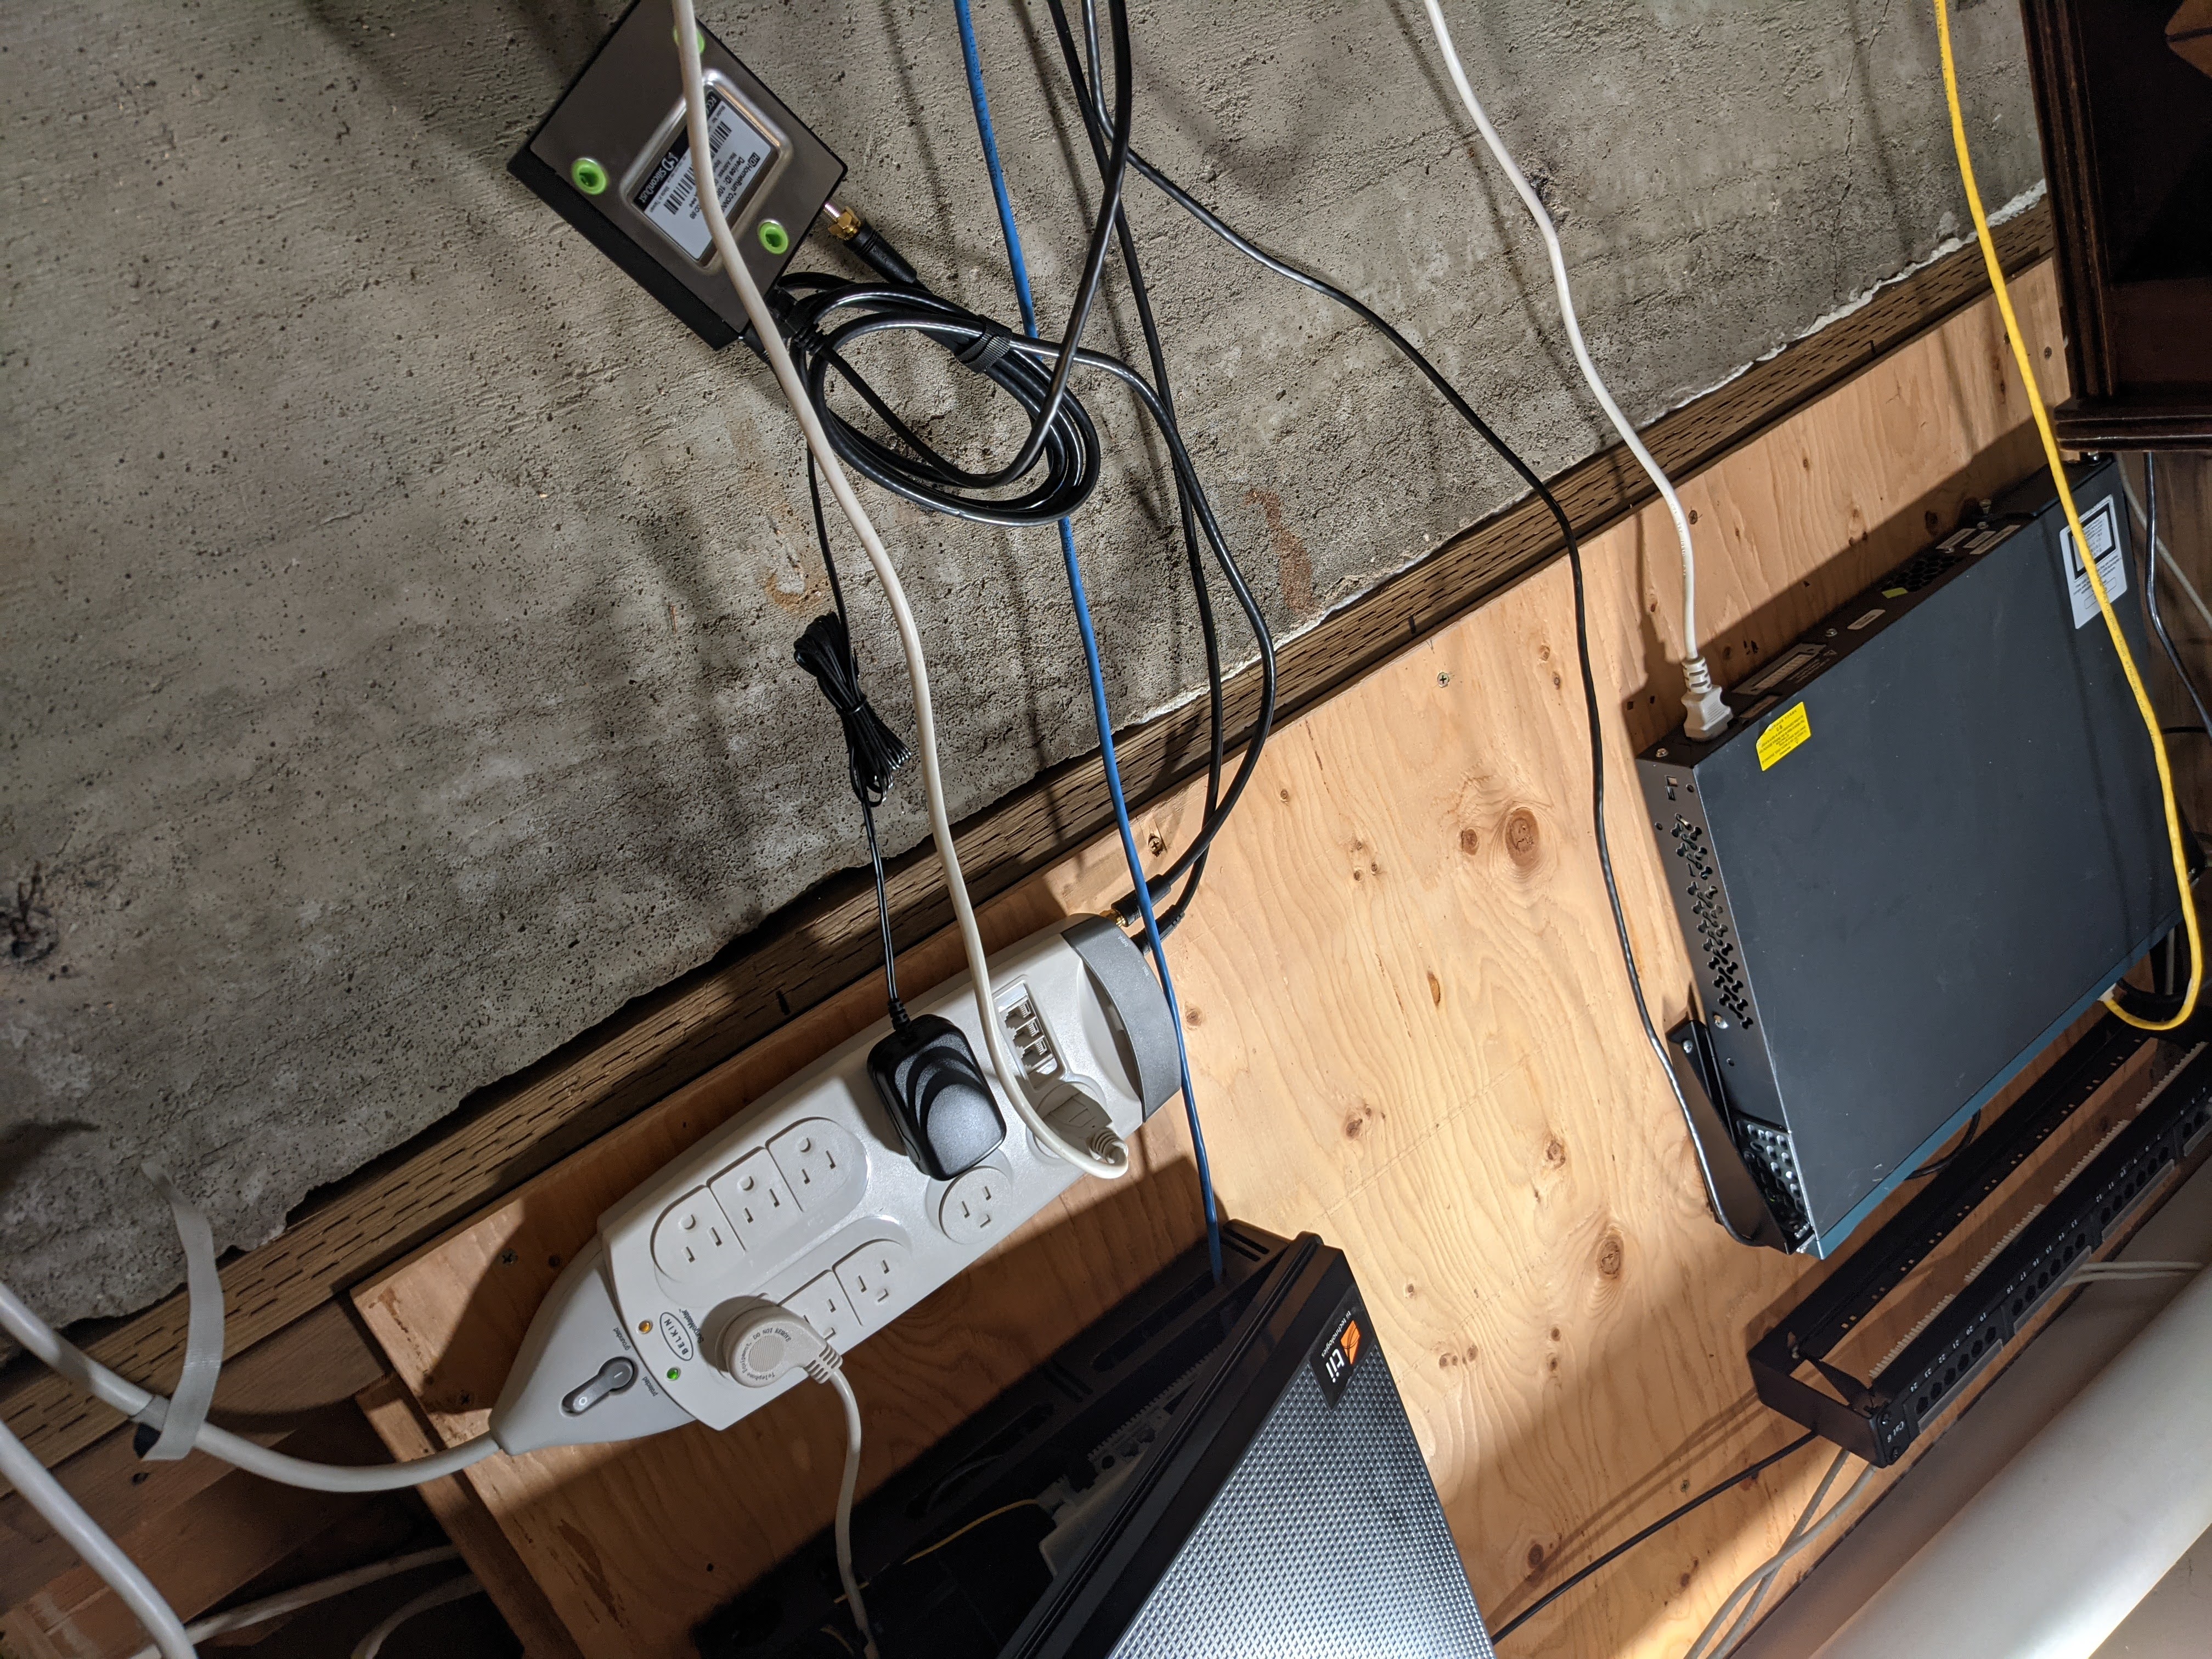
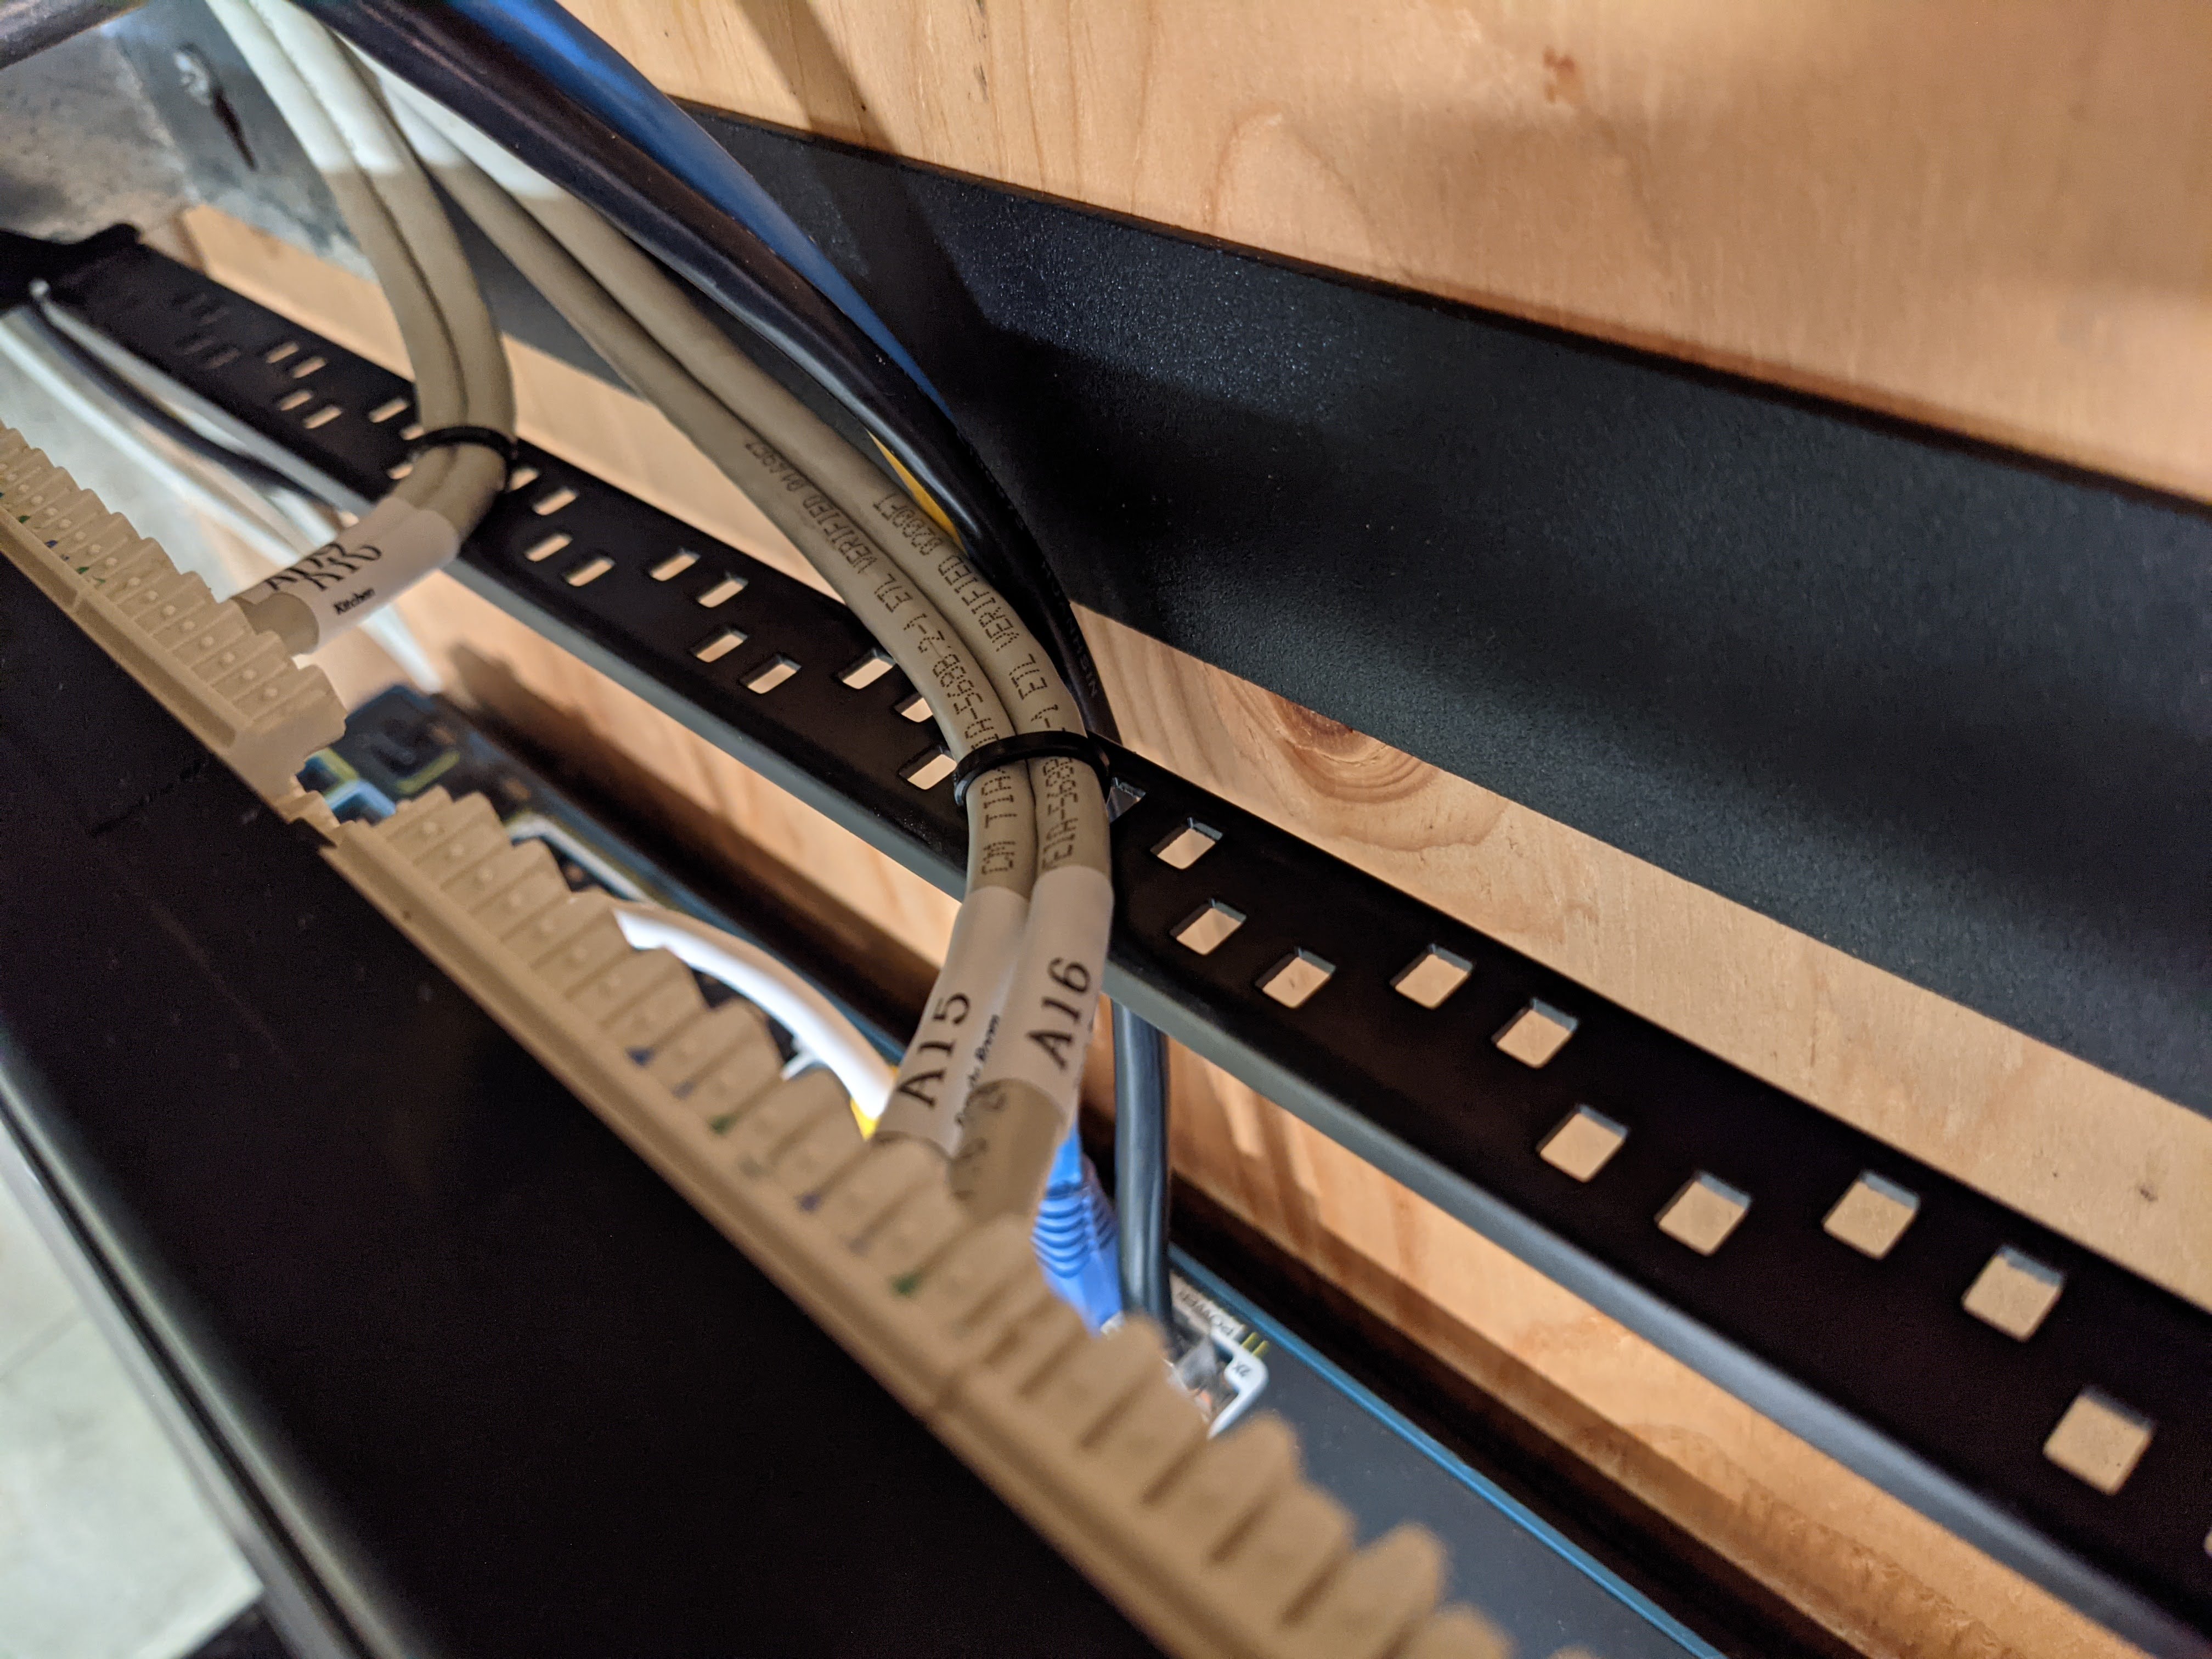
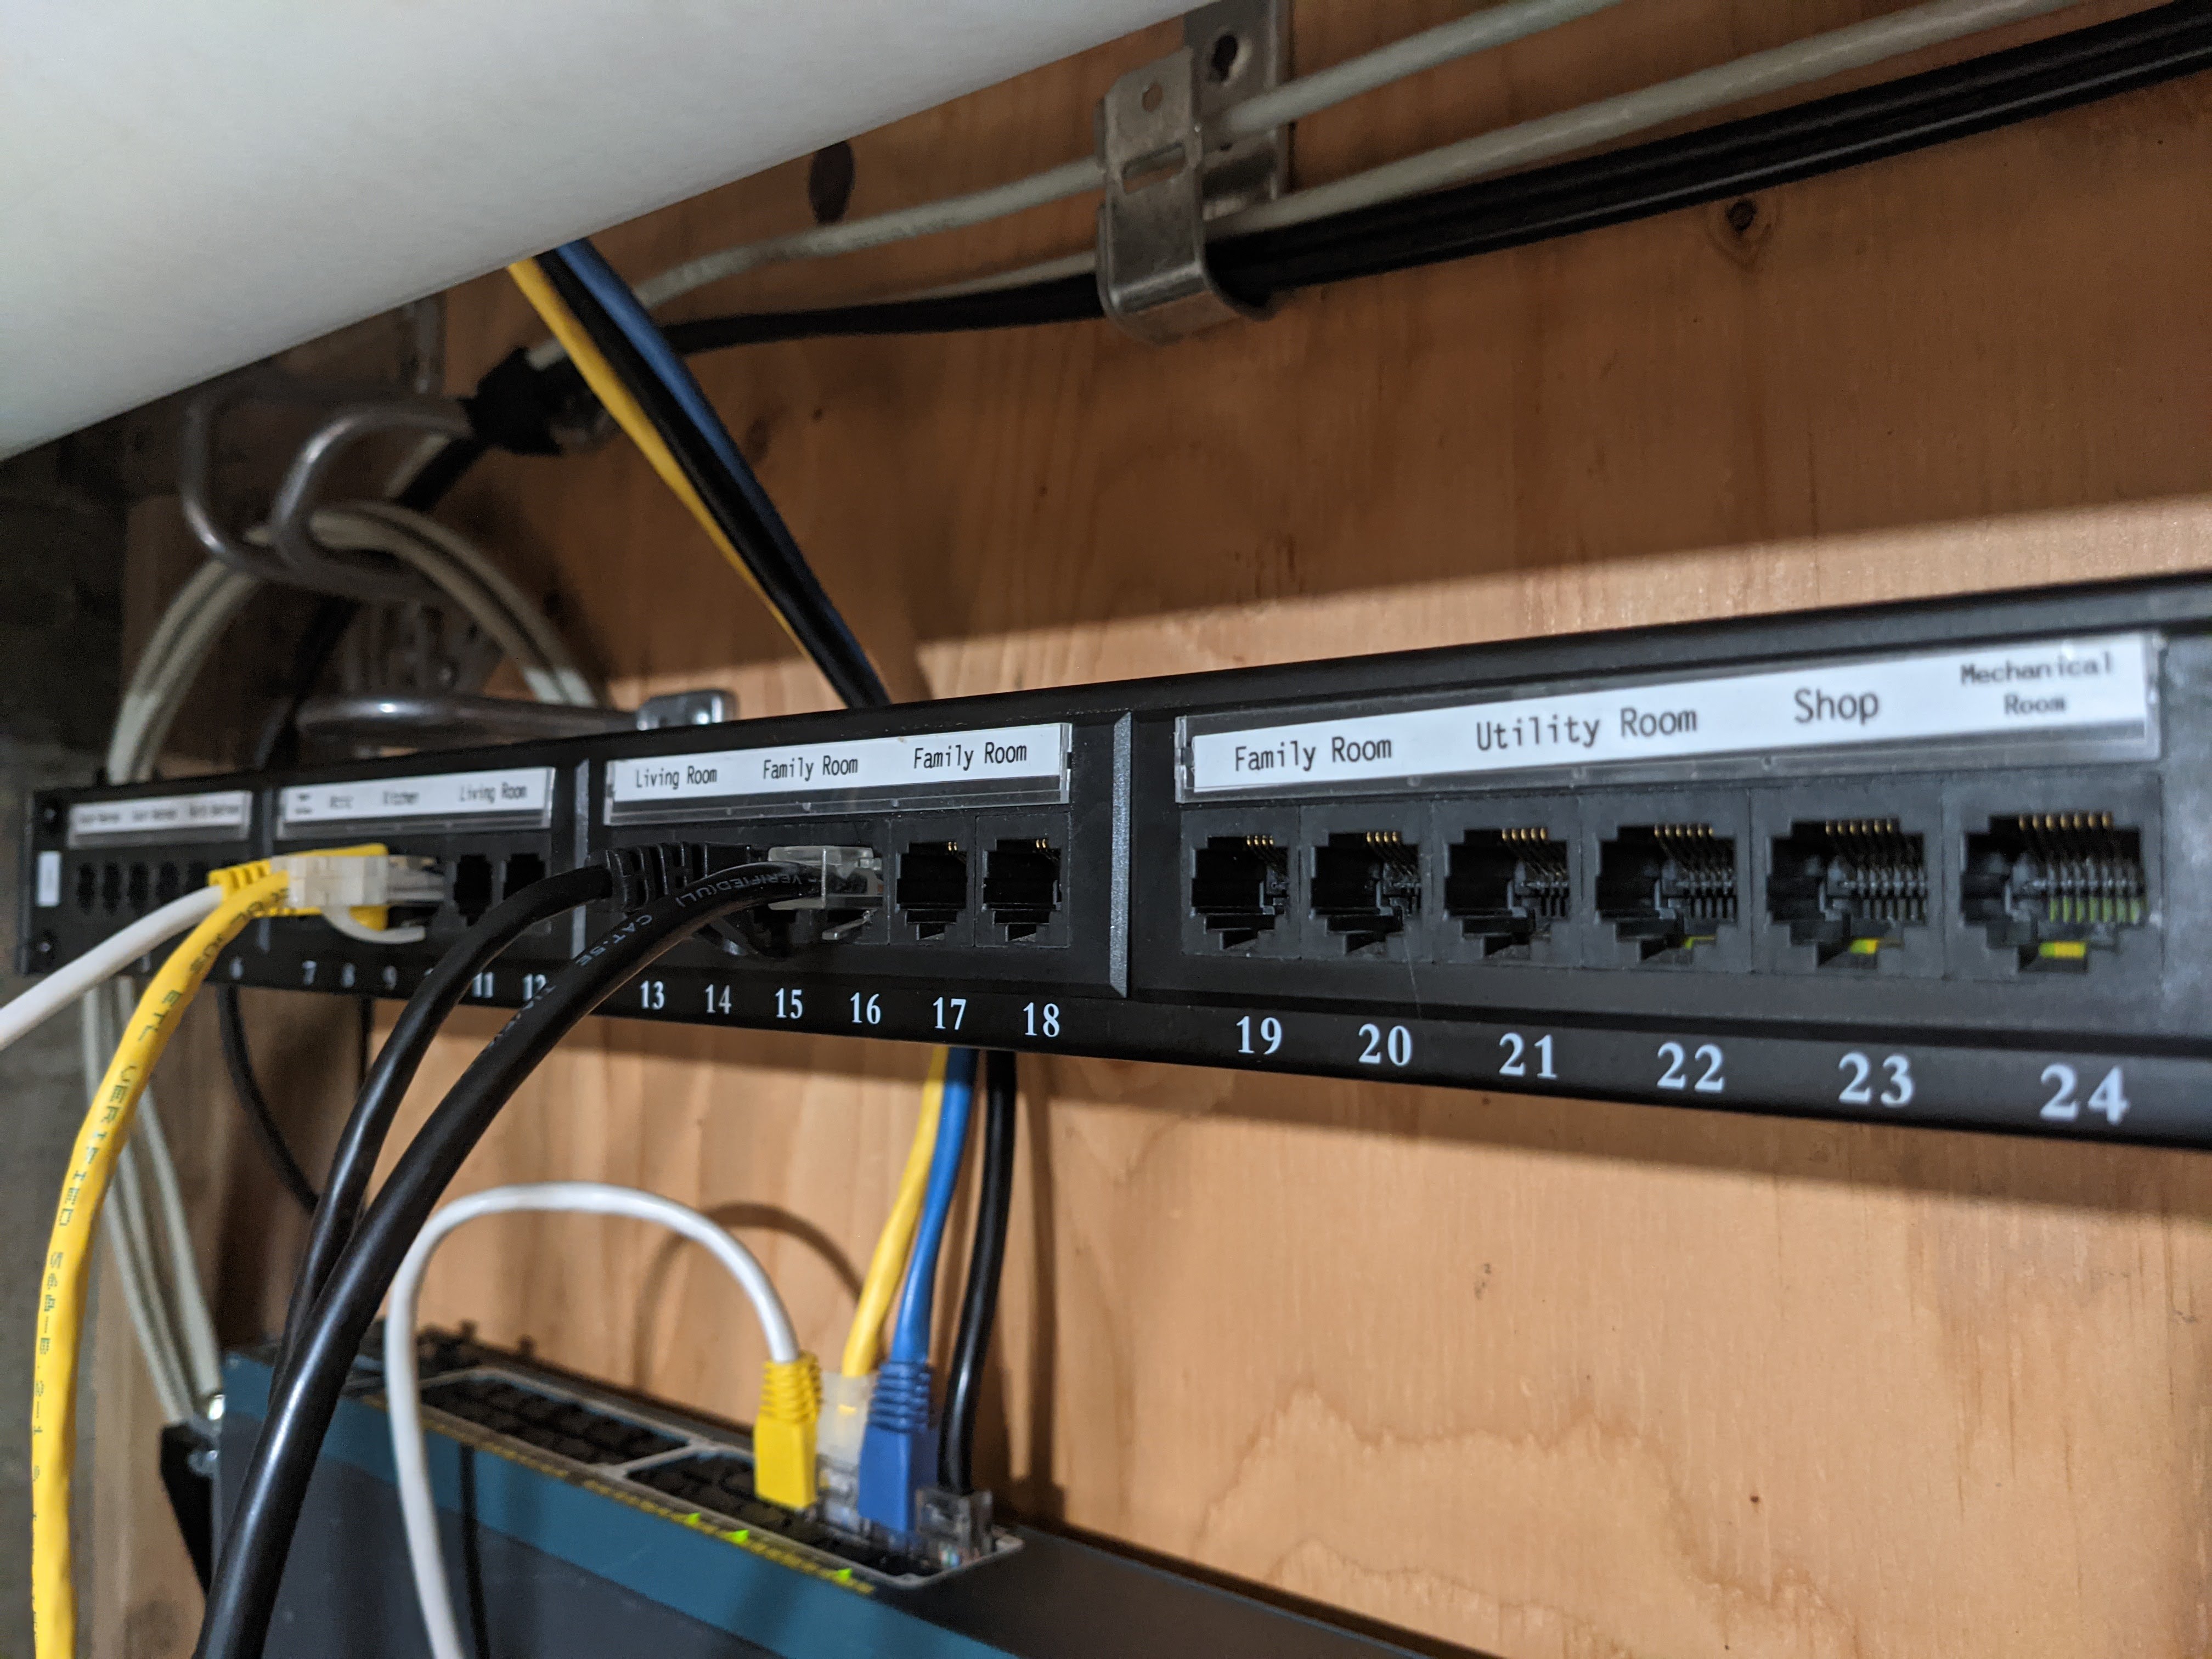
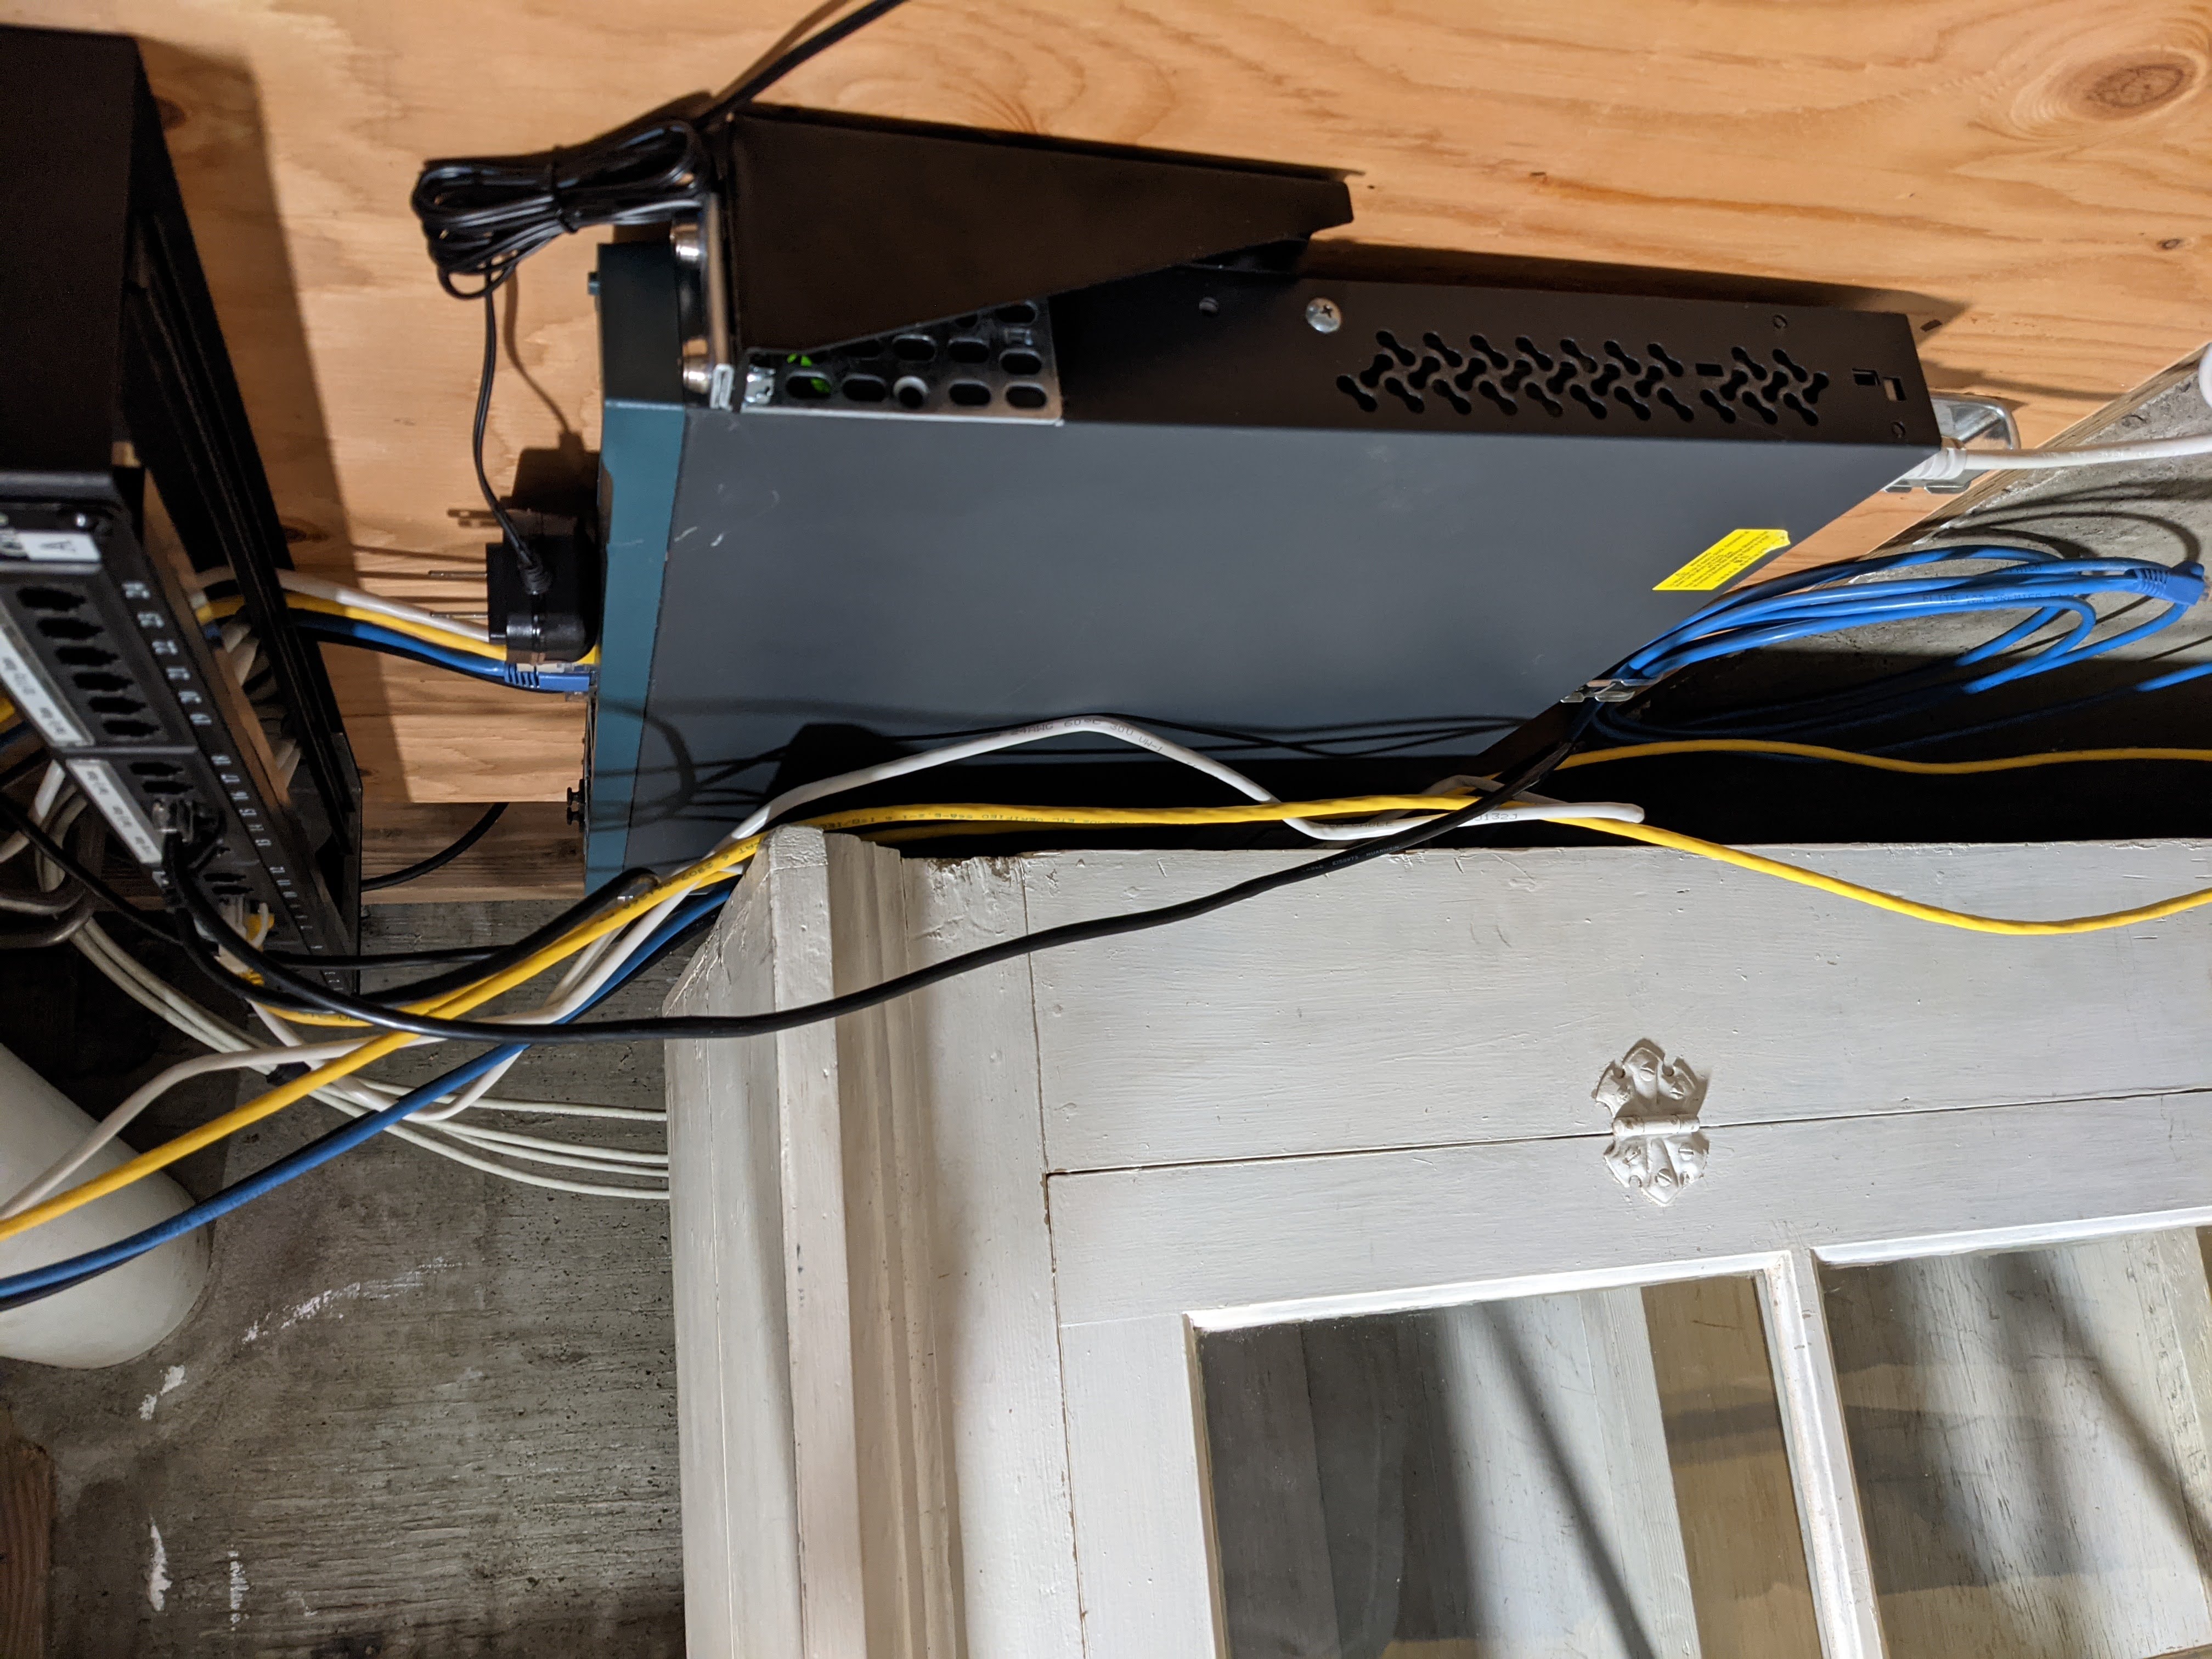
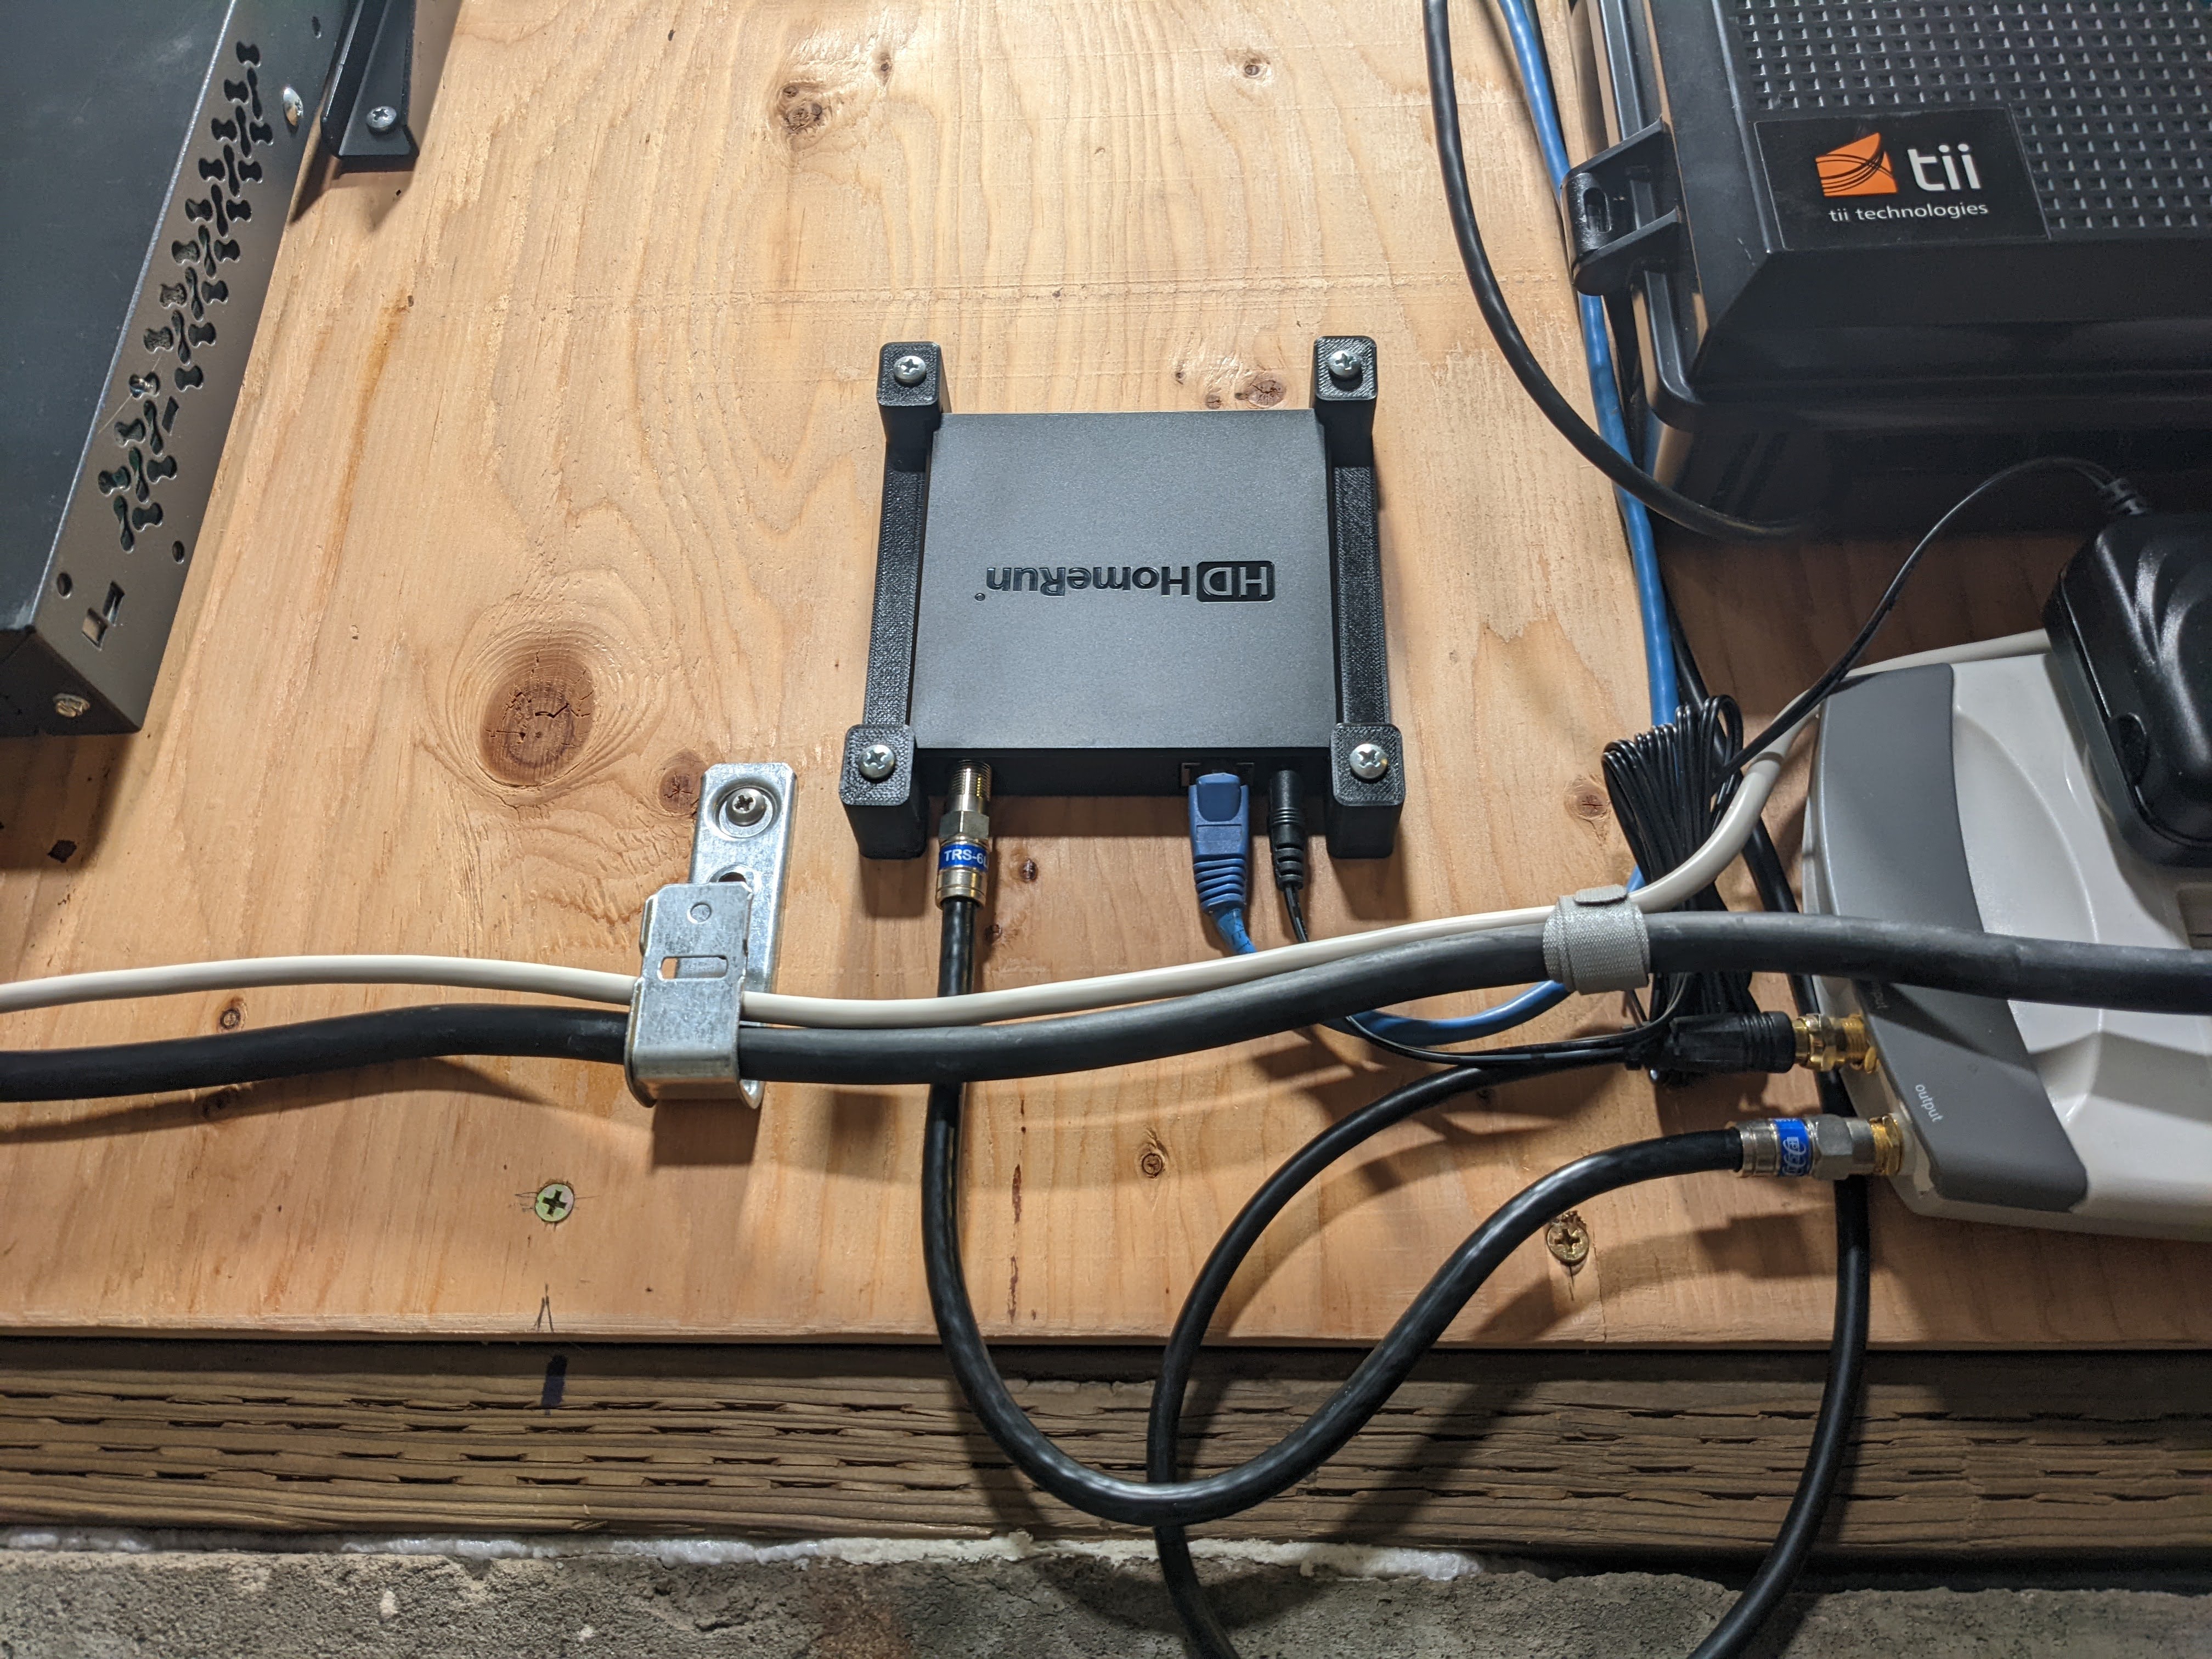
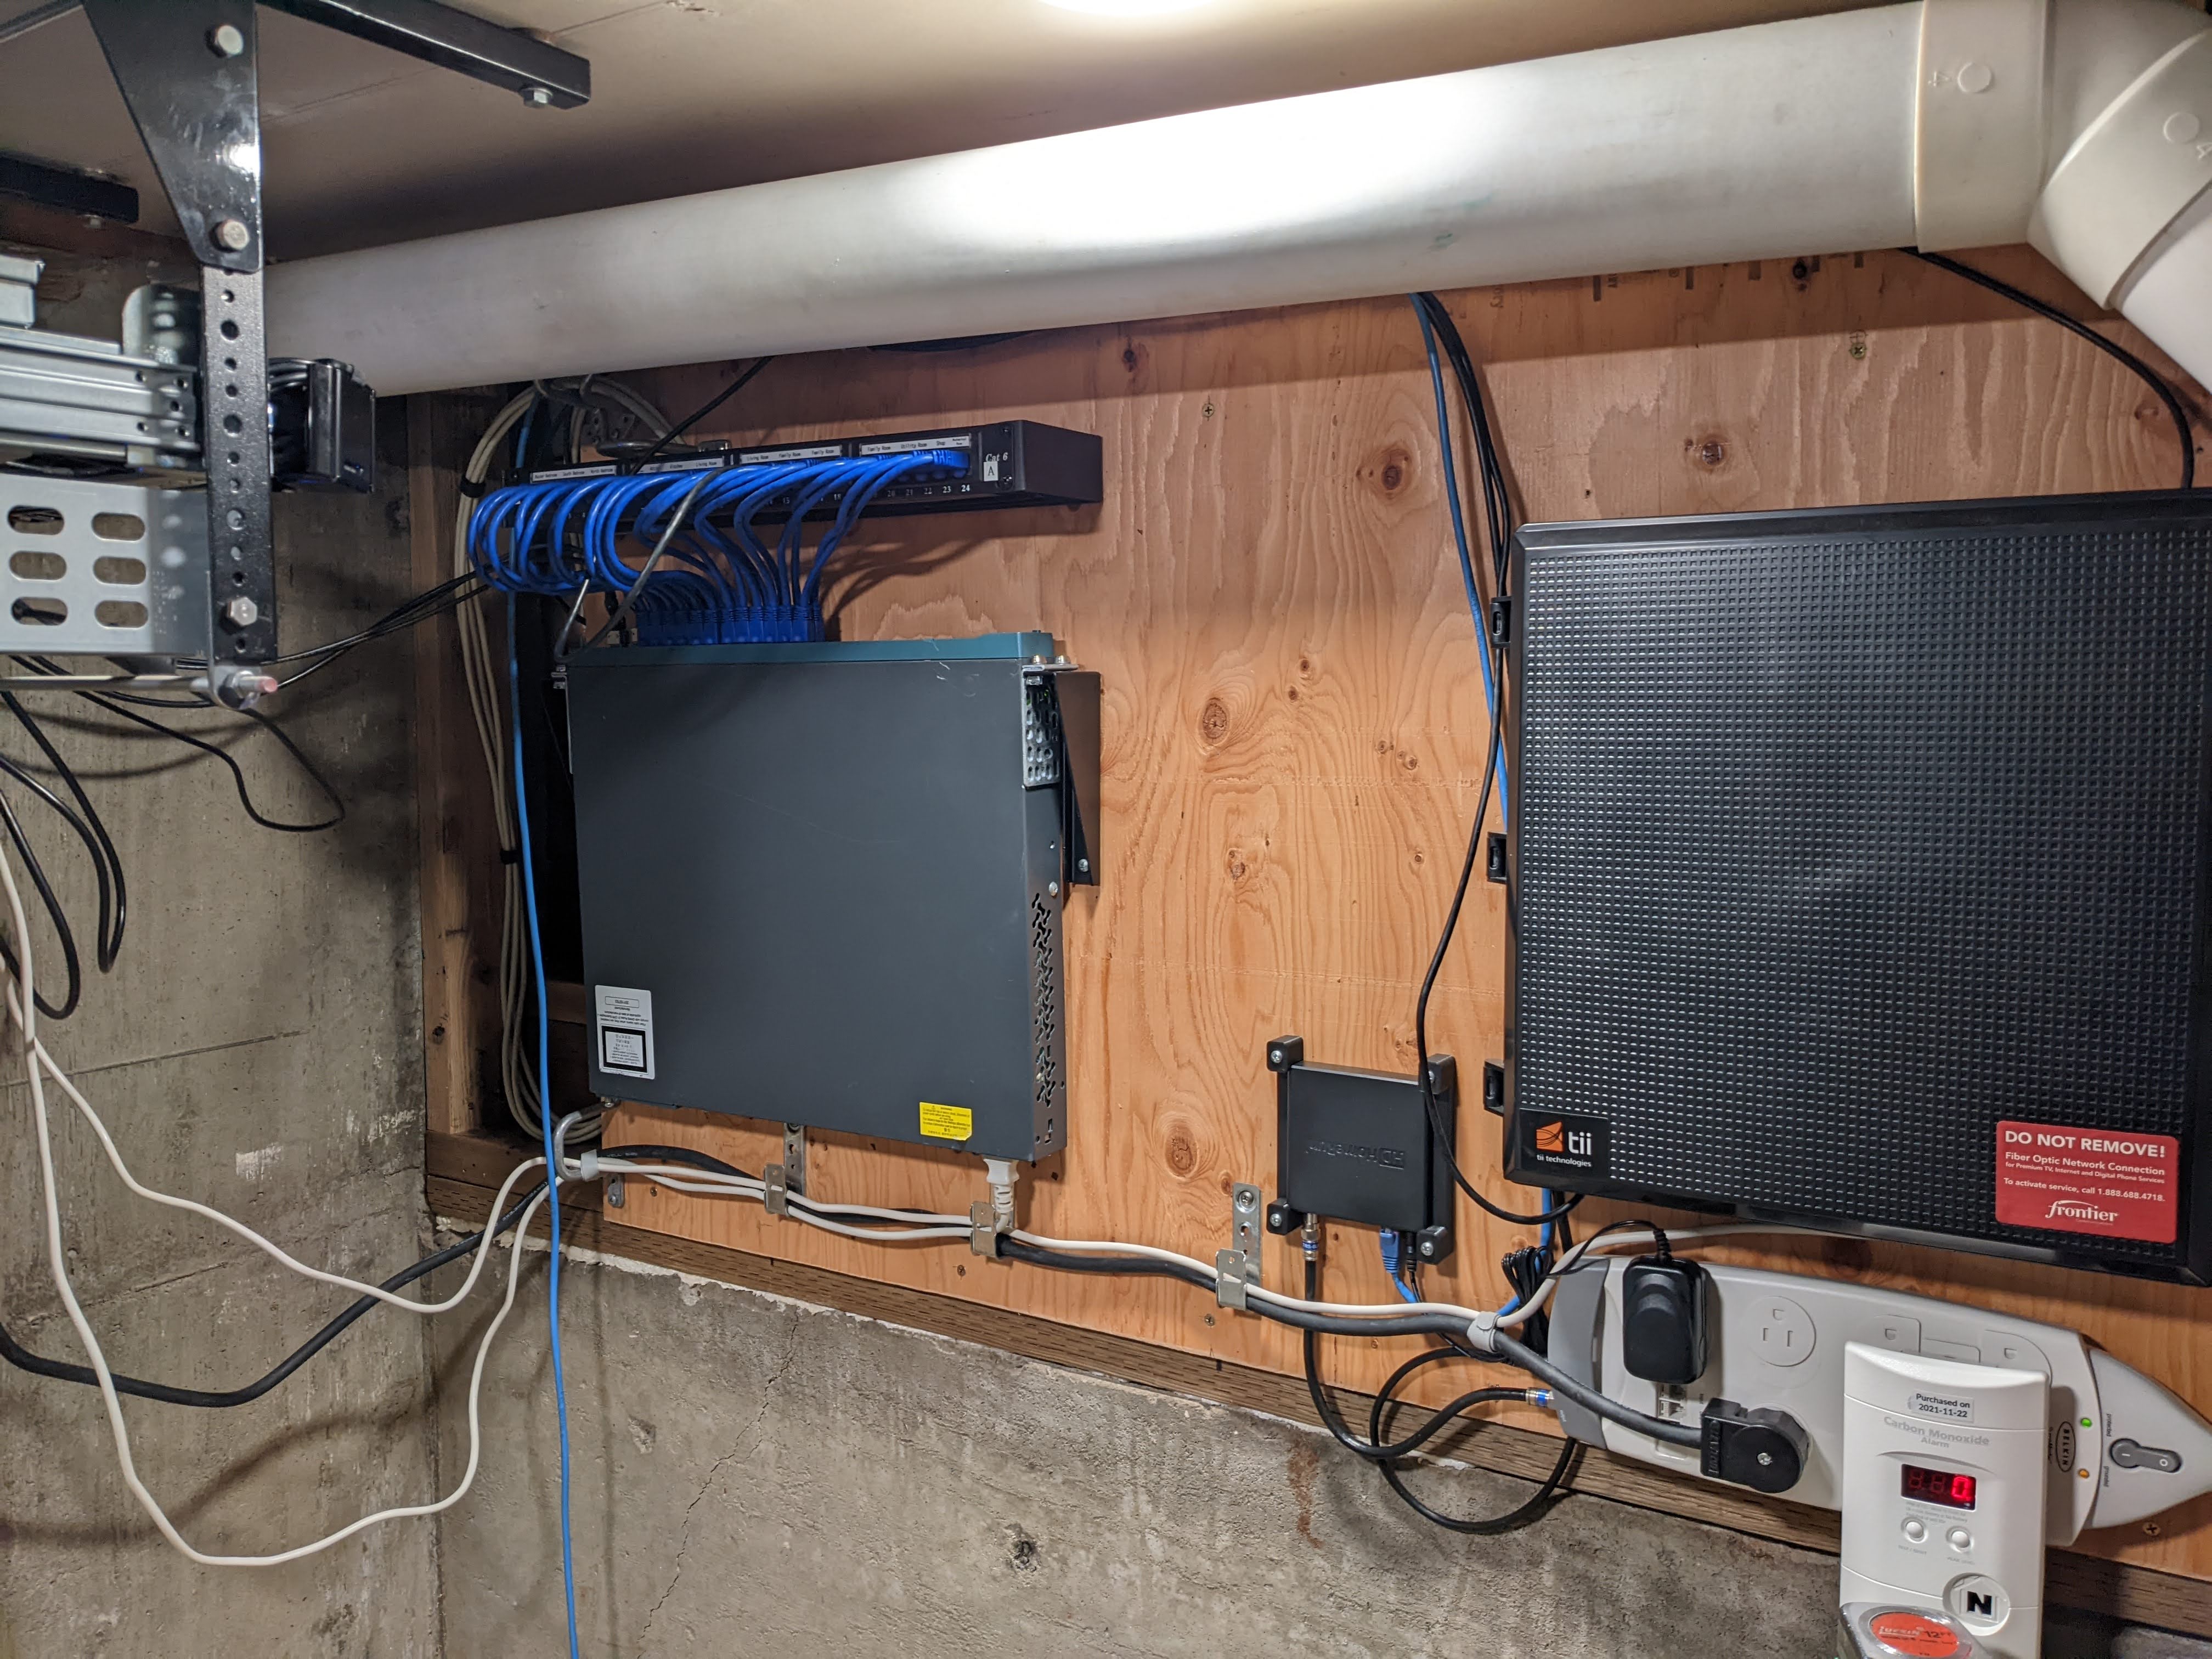
Major components from right to left: Ziply enclosure (housing a FOG420 ONT), SiliconDust HDHomeRun HDHR5-4K network tuner with 3D printed mounting bracket from an excellent manufacturer on eBay, vertically mounted Cisco Catalyst 2960-S-24PD-L PoE switch on a 1U vertical mounting bracket. Power is routed along the bottom and data is routed along the top supported with Southwire J-Hooks and Allen Tel Distribution Rings on the left side of the board. Cables are secured to the distribution rings using Velcro straps.
The major regions of this board are ethernet on the left, coax (from a large antenna in the attic) in the middle, and the Gigabit Passive Optical Network (GPON) ONT on the right. There's still plenty of room in the middle of the board for additional network tuners or even a cable modem if I'm desperate.
Additional things to do on the demarcation point:
- Dress and properly anchor the antenna coax, and ethernet cables that run vertically down between the HDHomeRun and the ONT.
- Obtain the correct power cable for the server to bypass the UPS with one of it's power supplies. Might just do this with a flush cable extension, more on that later.
- Properly dress the power cables going along the bottom of the board.
Updated An Actual Core Switch
I've been running without a proper switch for years now. While this generally hadn't been an issue, I recently upgraded to EnGenius Wi-Fi 6 2x2 EWS357AP access points, and my new home hypervisor hardware has 10GBE ports, meaning I was going to outgrow the desktop switch I had sitting next to my current server. Any core switch was going to have the following requirements:
- 802.3af PoE support for Access Points and IP Phones. 802.3at PoE support a bonus, but no specific requirement for it.
- SFP+ ports to connect to the nearby hypervisor via DAC cables.
- 802.3ad Link Aggregation Control Protocol (LACP) support, because why connect a server over a single 10GBE link when you can connect over two?
- 802.1Q VLAN support so that I can properly sequester devices and run multiple isolated SSIDs.
While there are plenty of new switches that would fulfil these requirements, they can end up being pretty expensive. Enter the Cisco Catalyst 2960-S-24PD-L, a switch that has every feature I was looking for at a fraction of the cost on the used market.
Sure it's loud, and takes forever to boot up, but my new server is louder, and how often will I be rebooting this switch? My only real complaint with it so far is how generally finicky Cisco IOS is. This is probably just learning curve though, and again, is probably inconsequential once I get the switch configured as I need it.
A New Ceiling-Mounted Rack
I wanted to ensure that all of my homelab gear took up as little space as possible, as close to the demarcation point as possible. The natural solution was to bolt it all right to the ceiling.
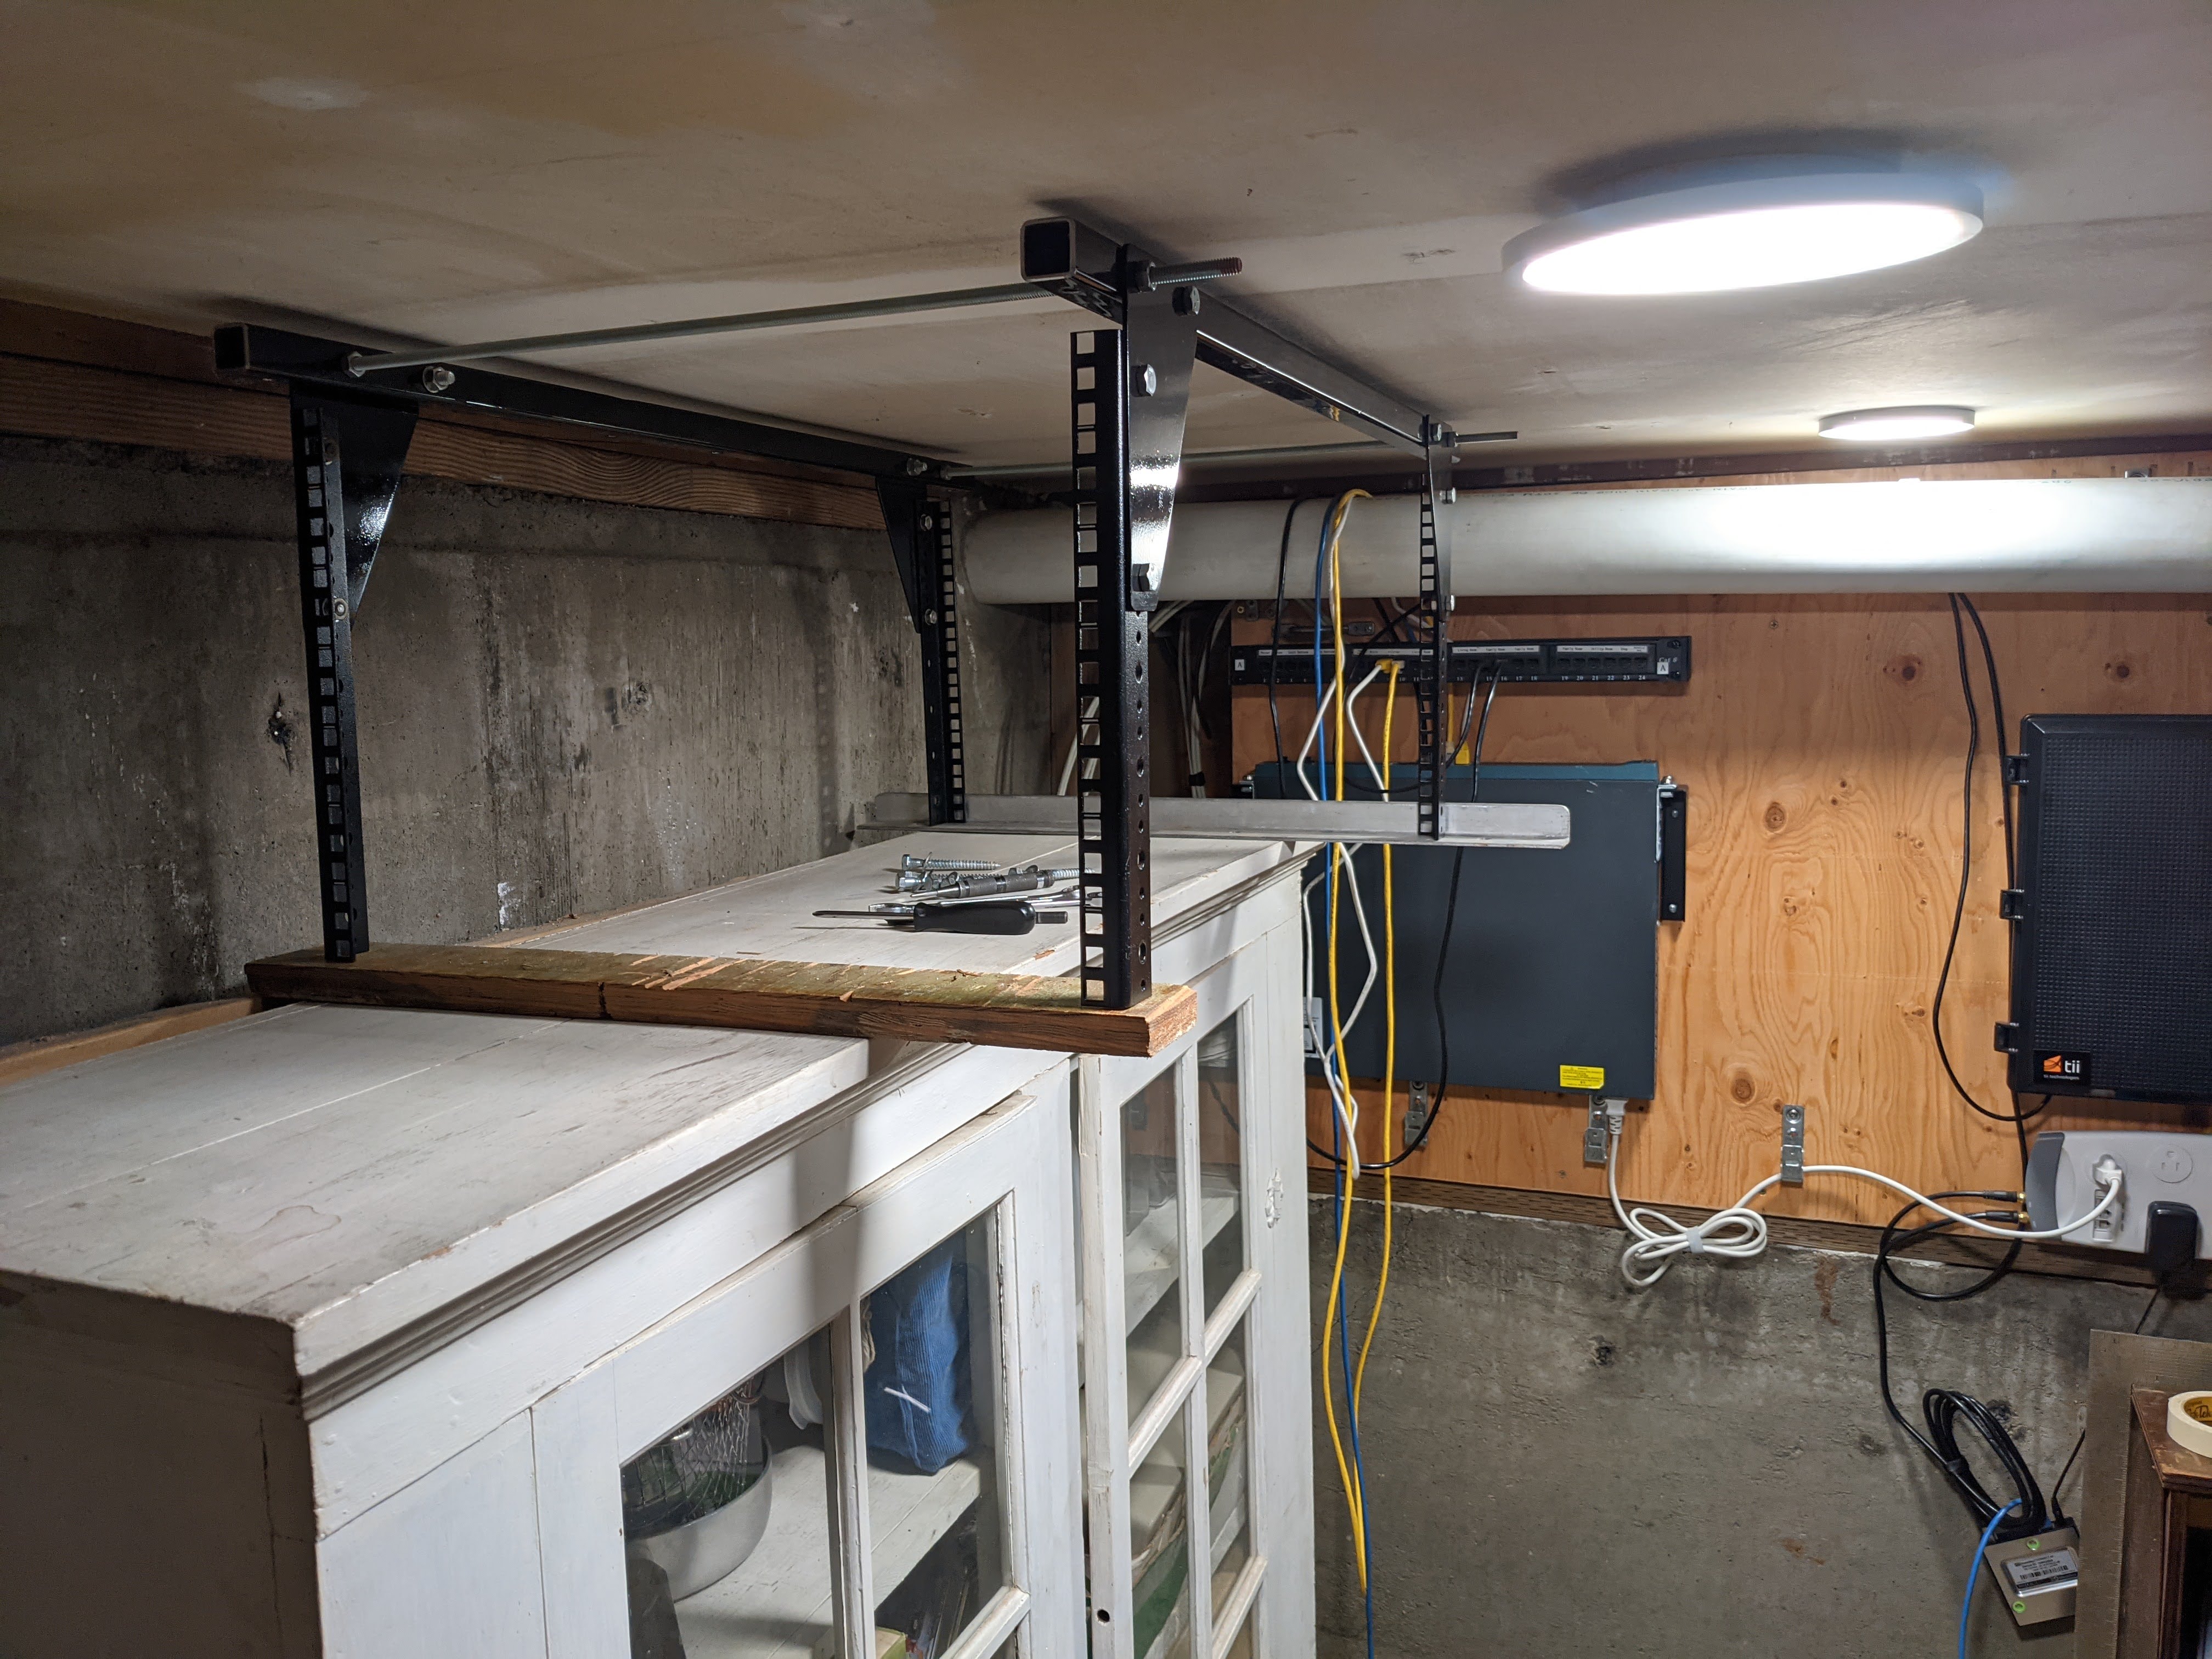
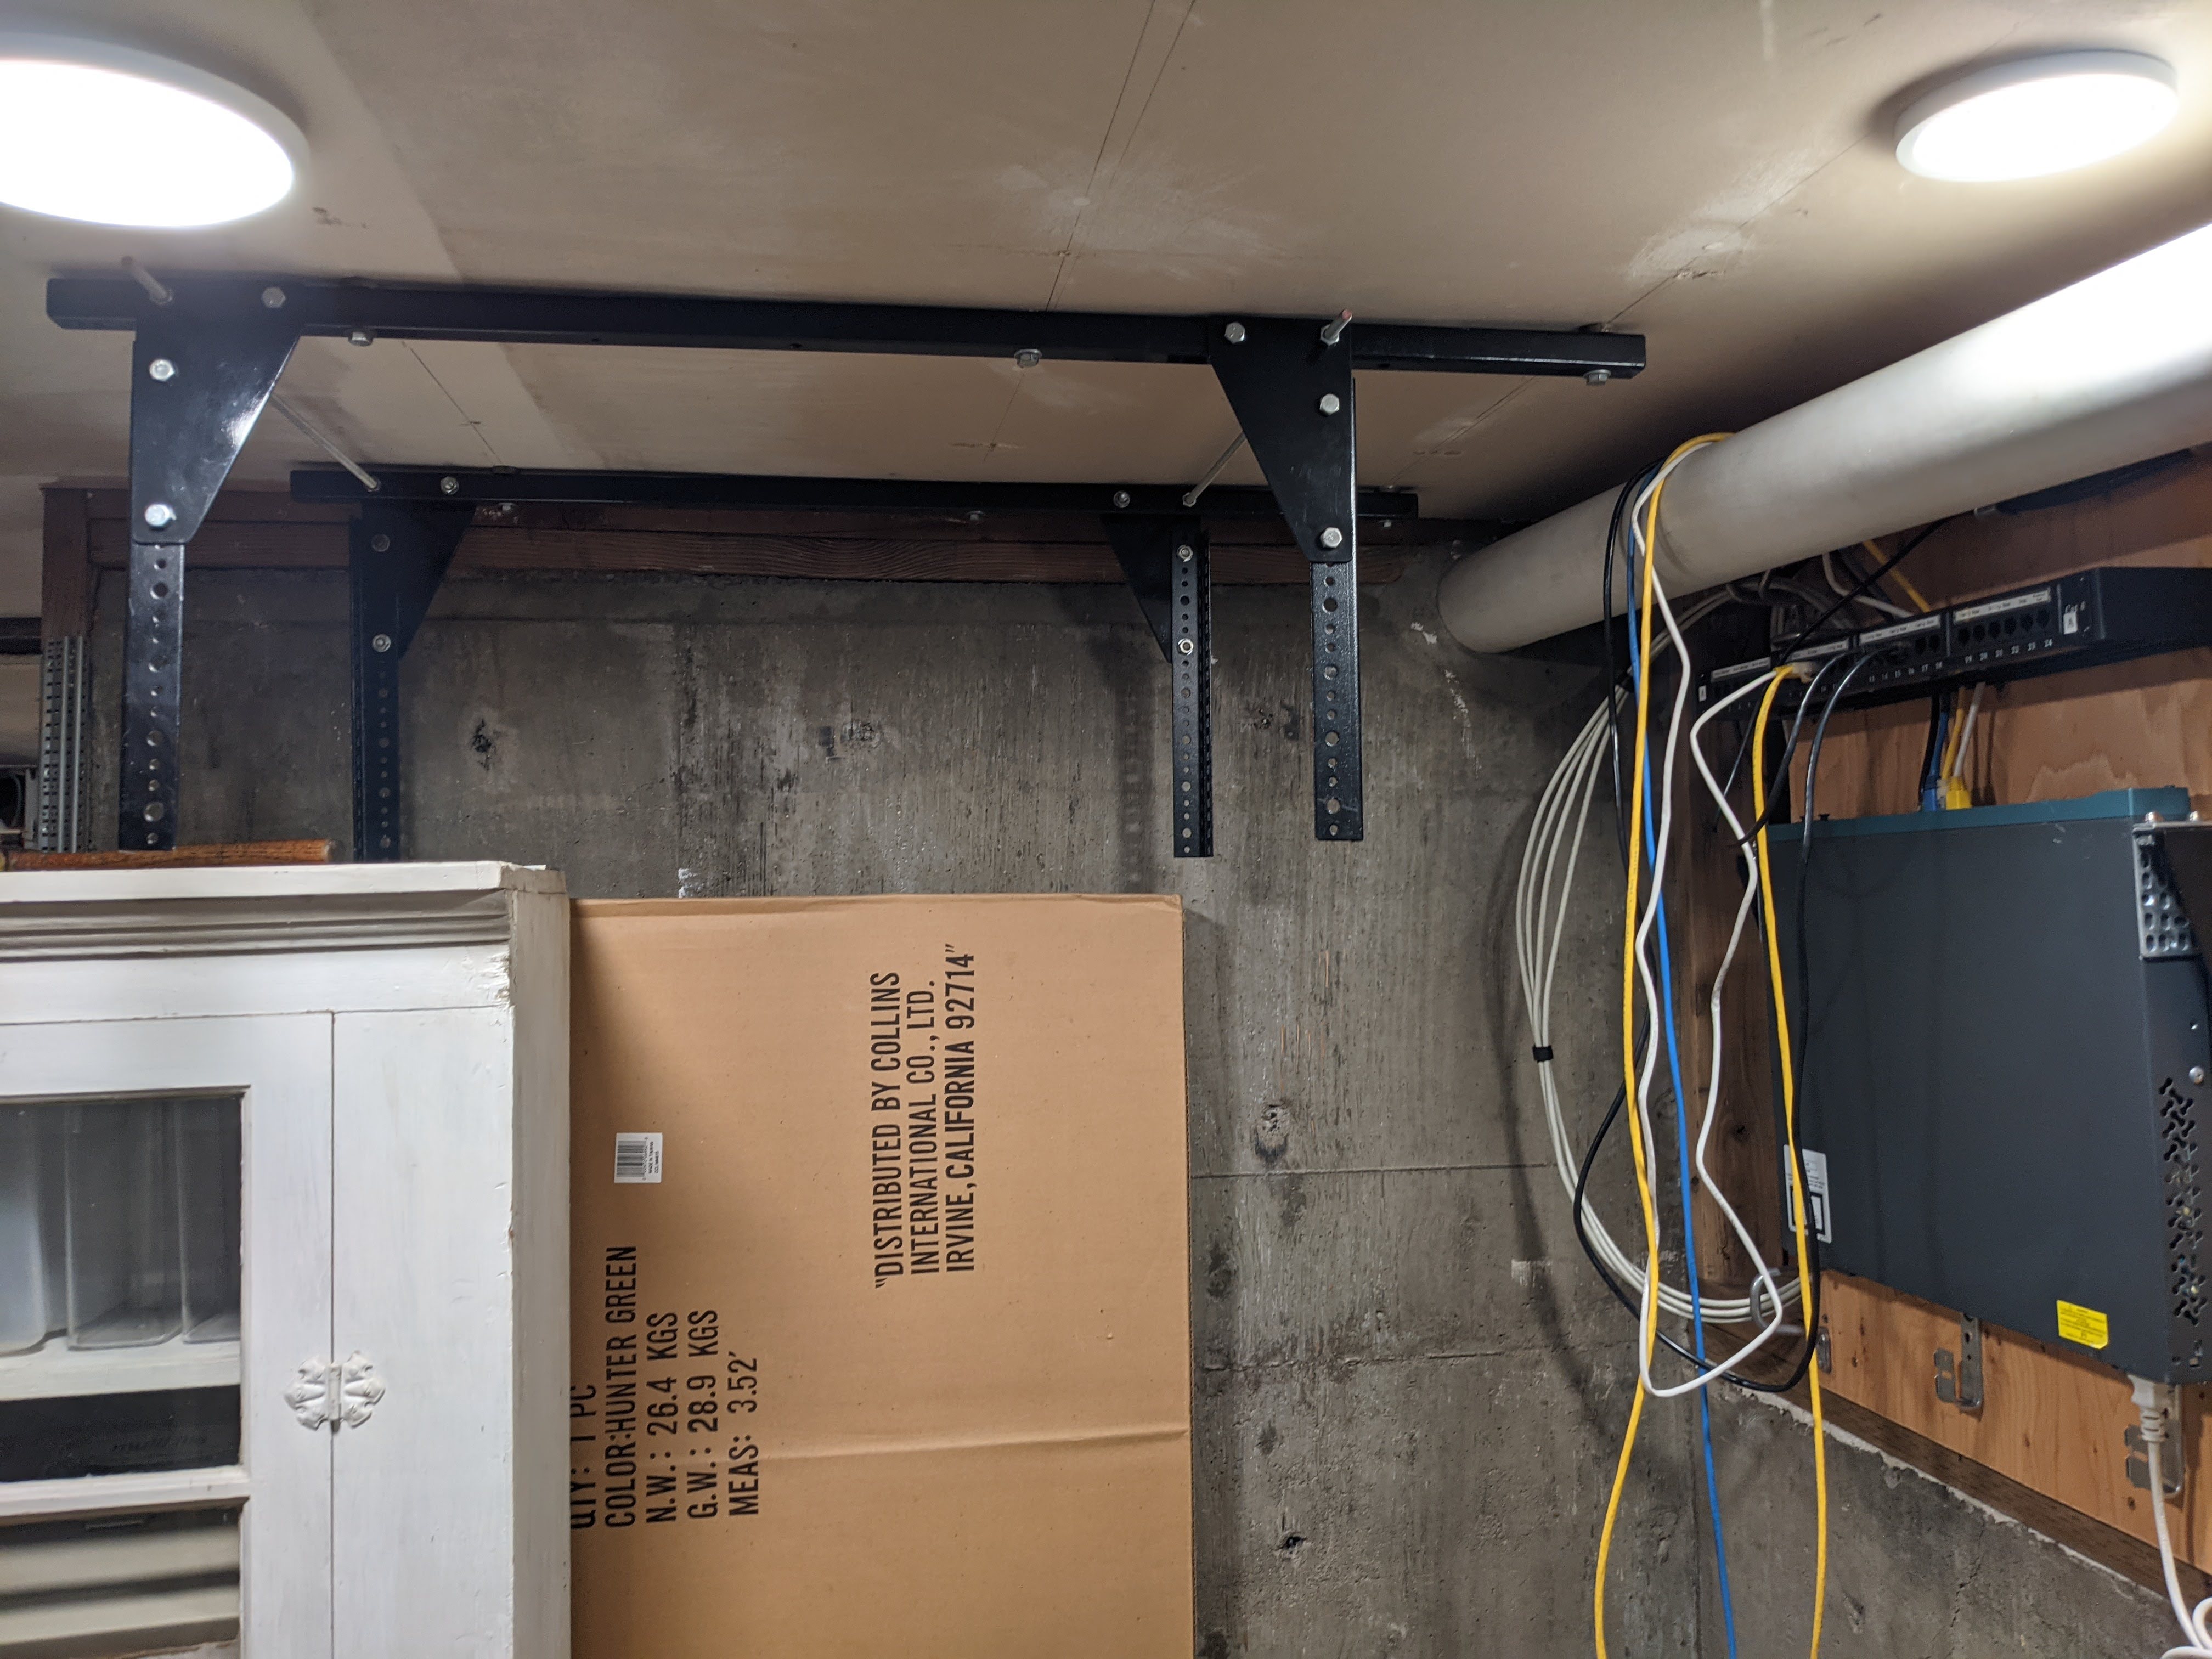
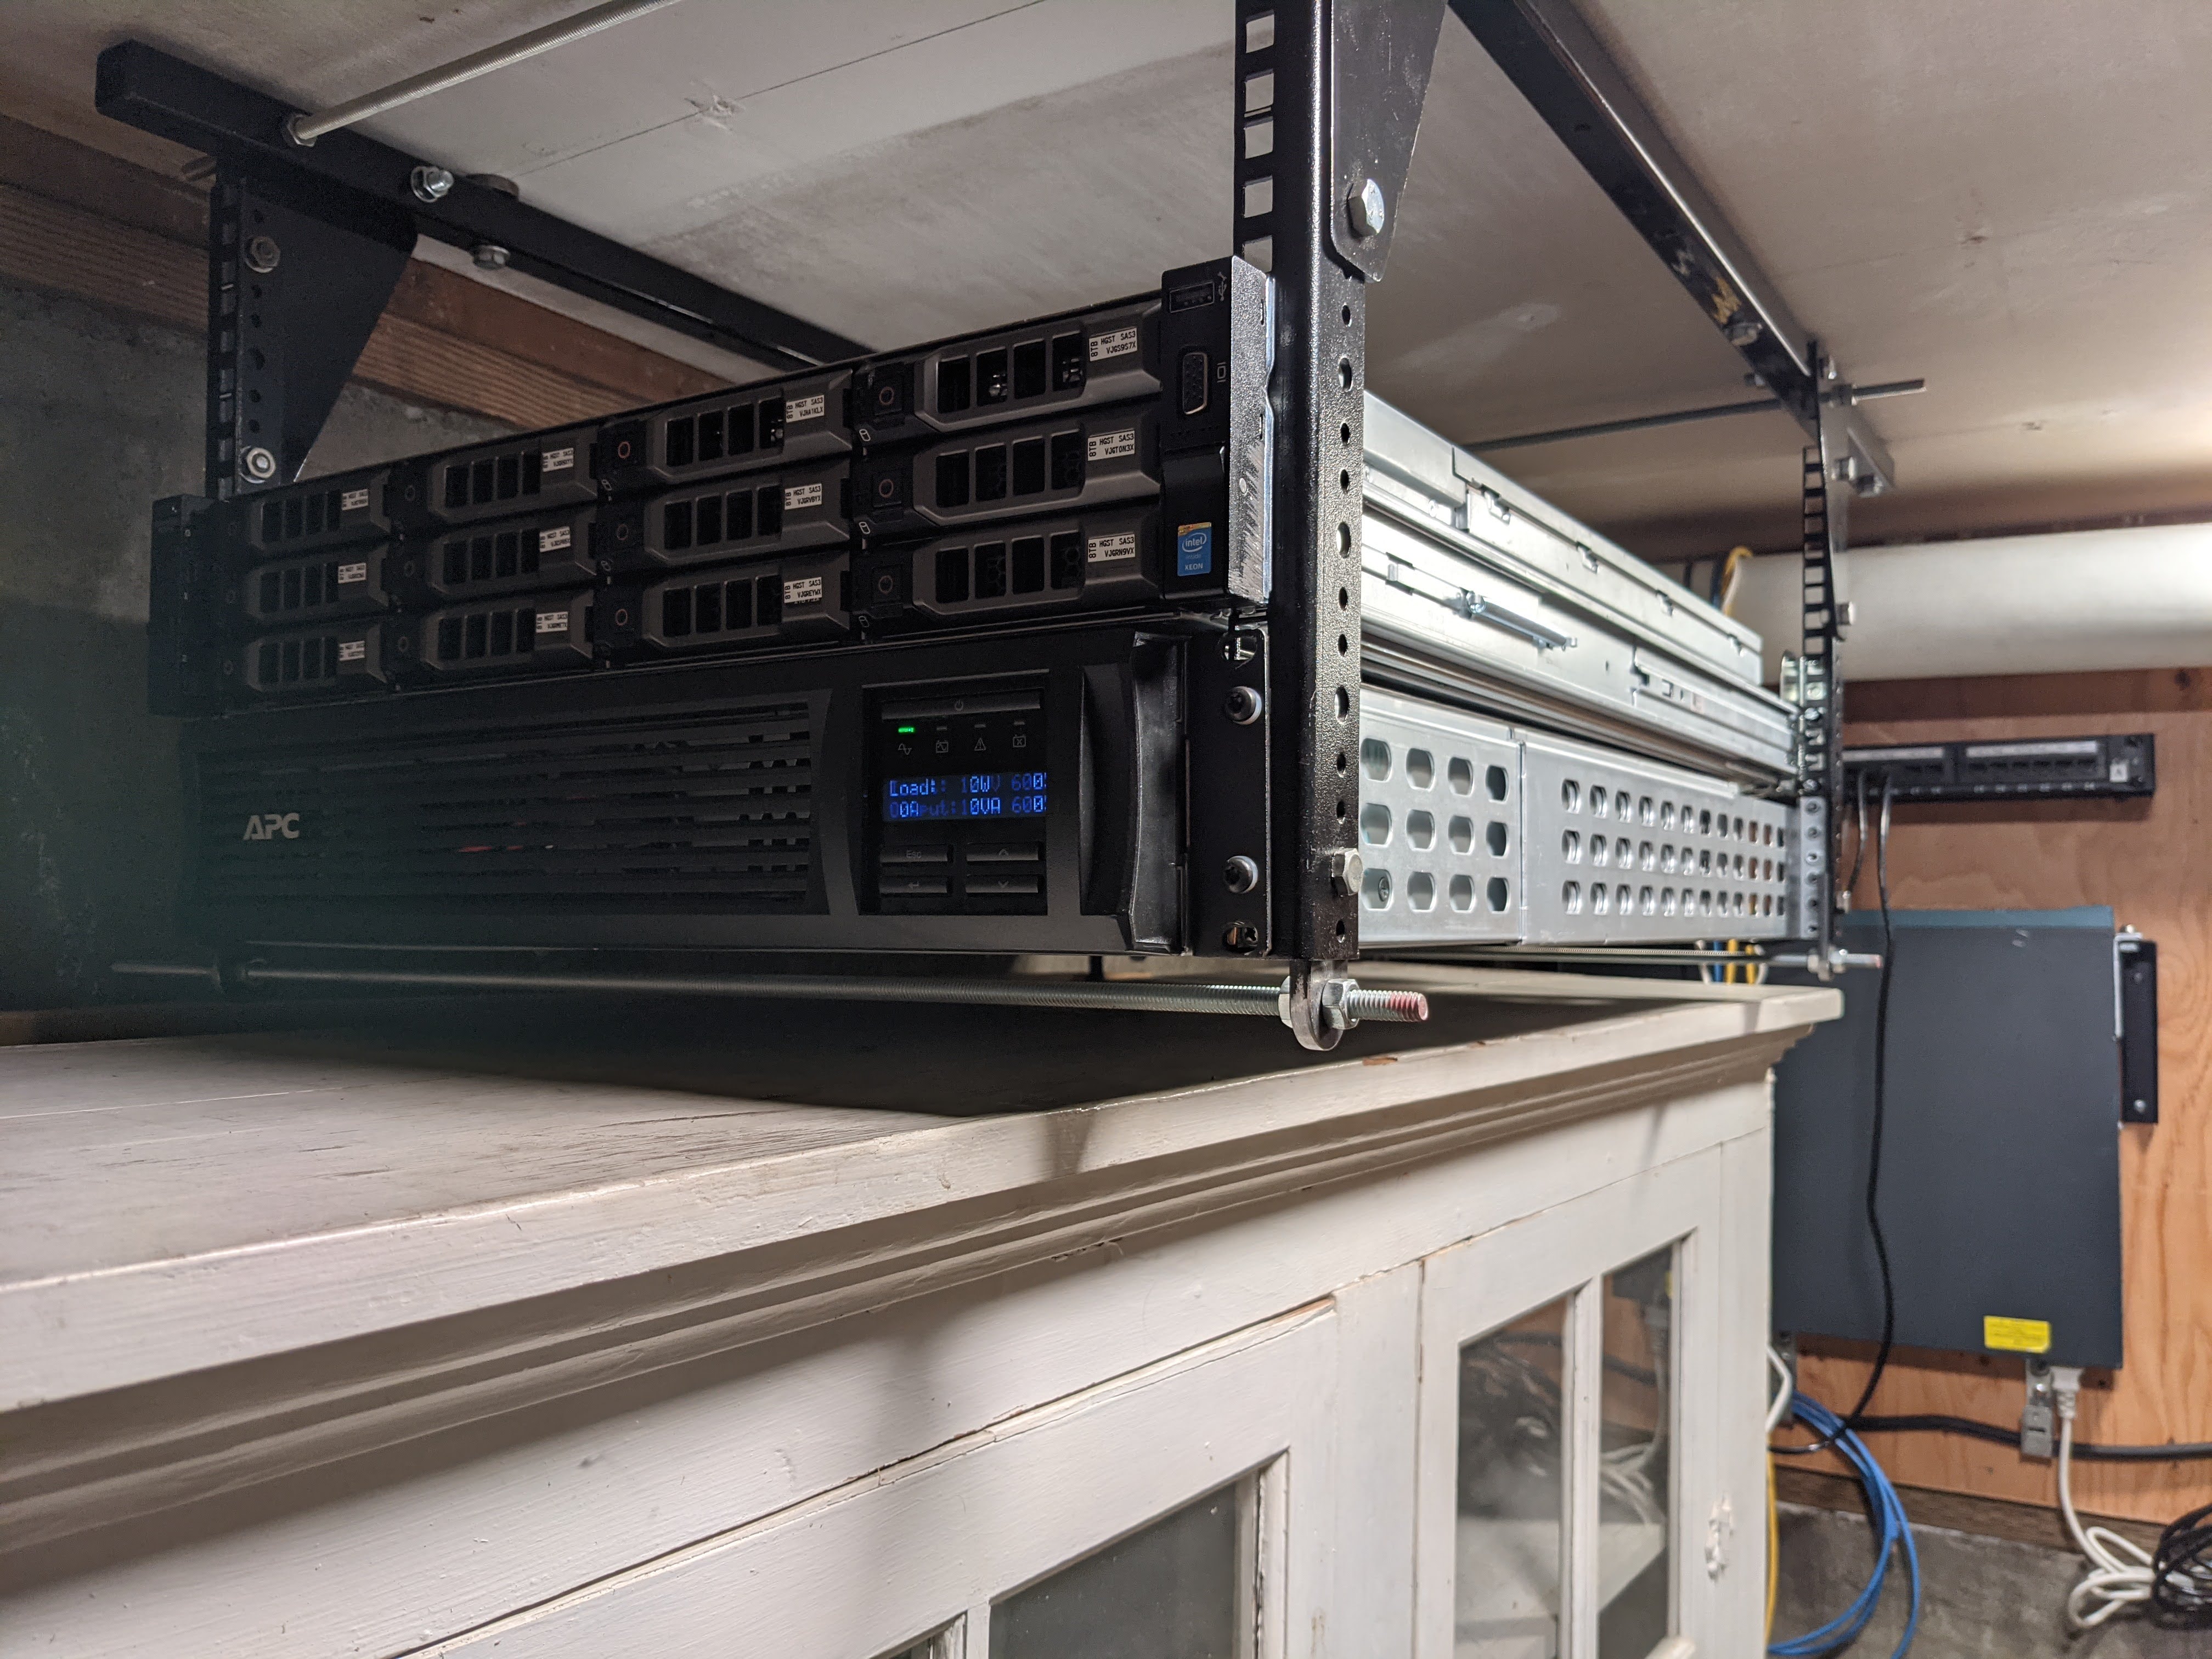
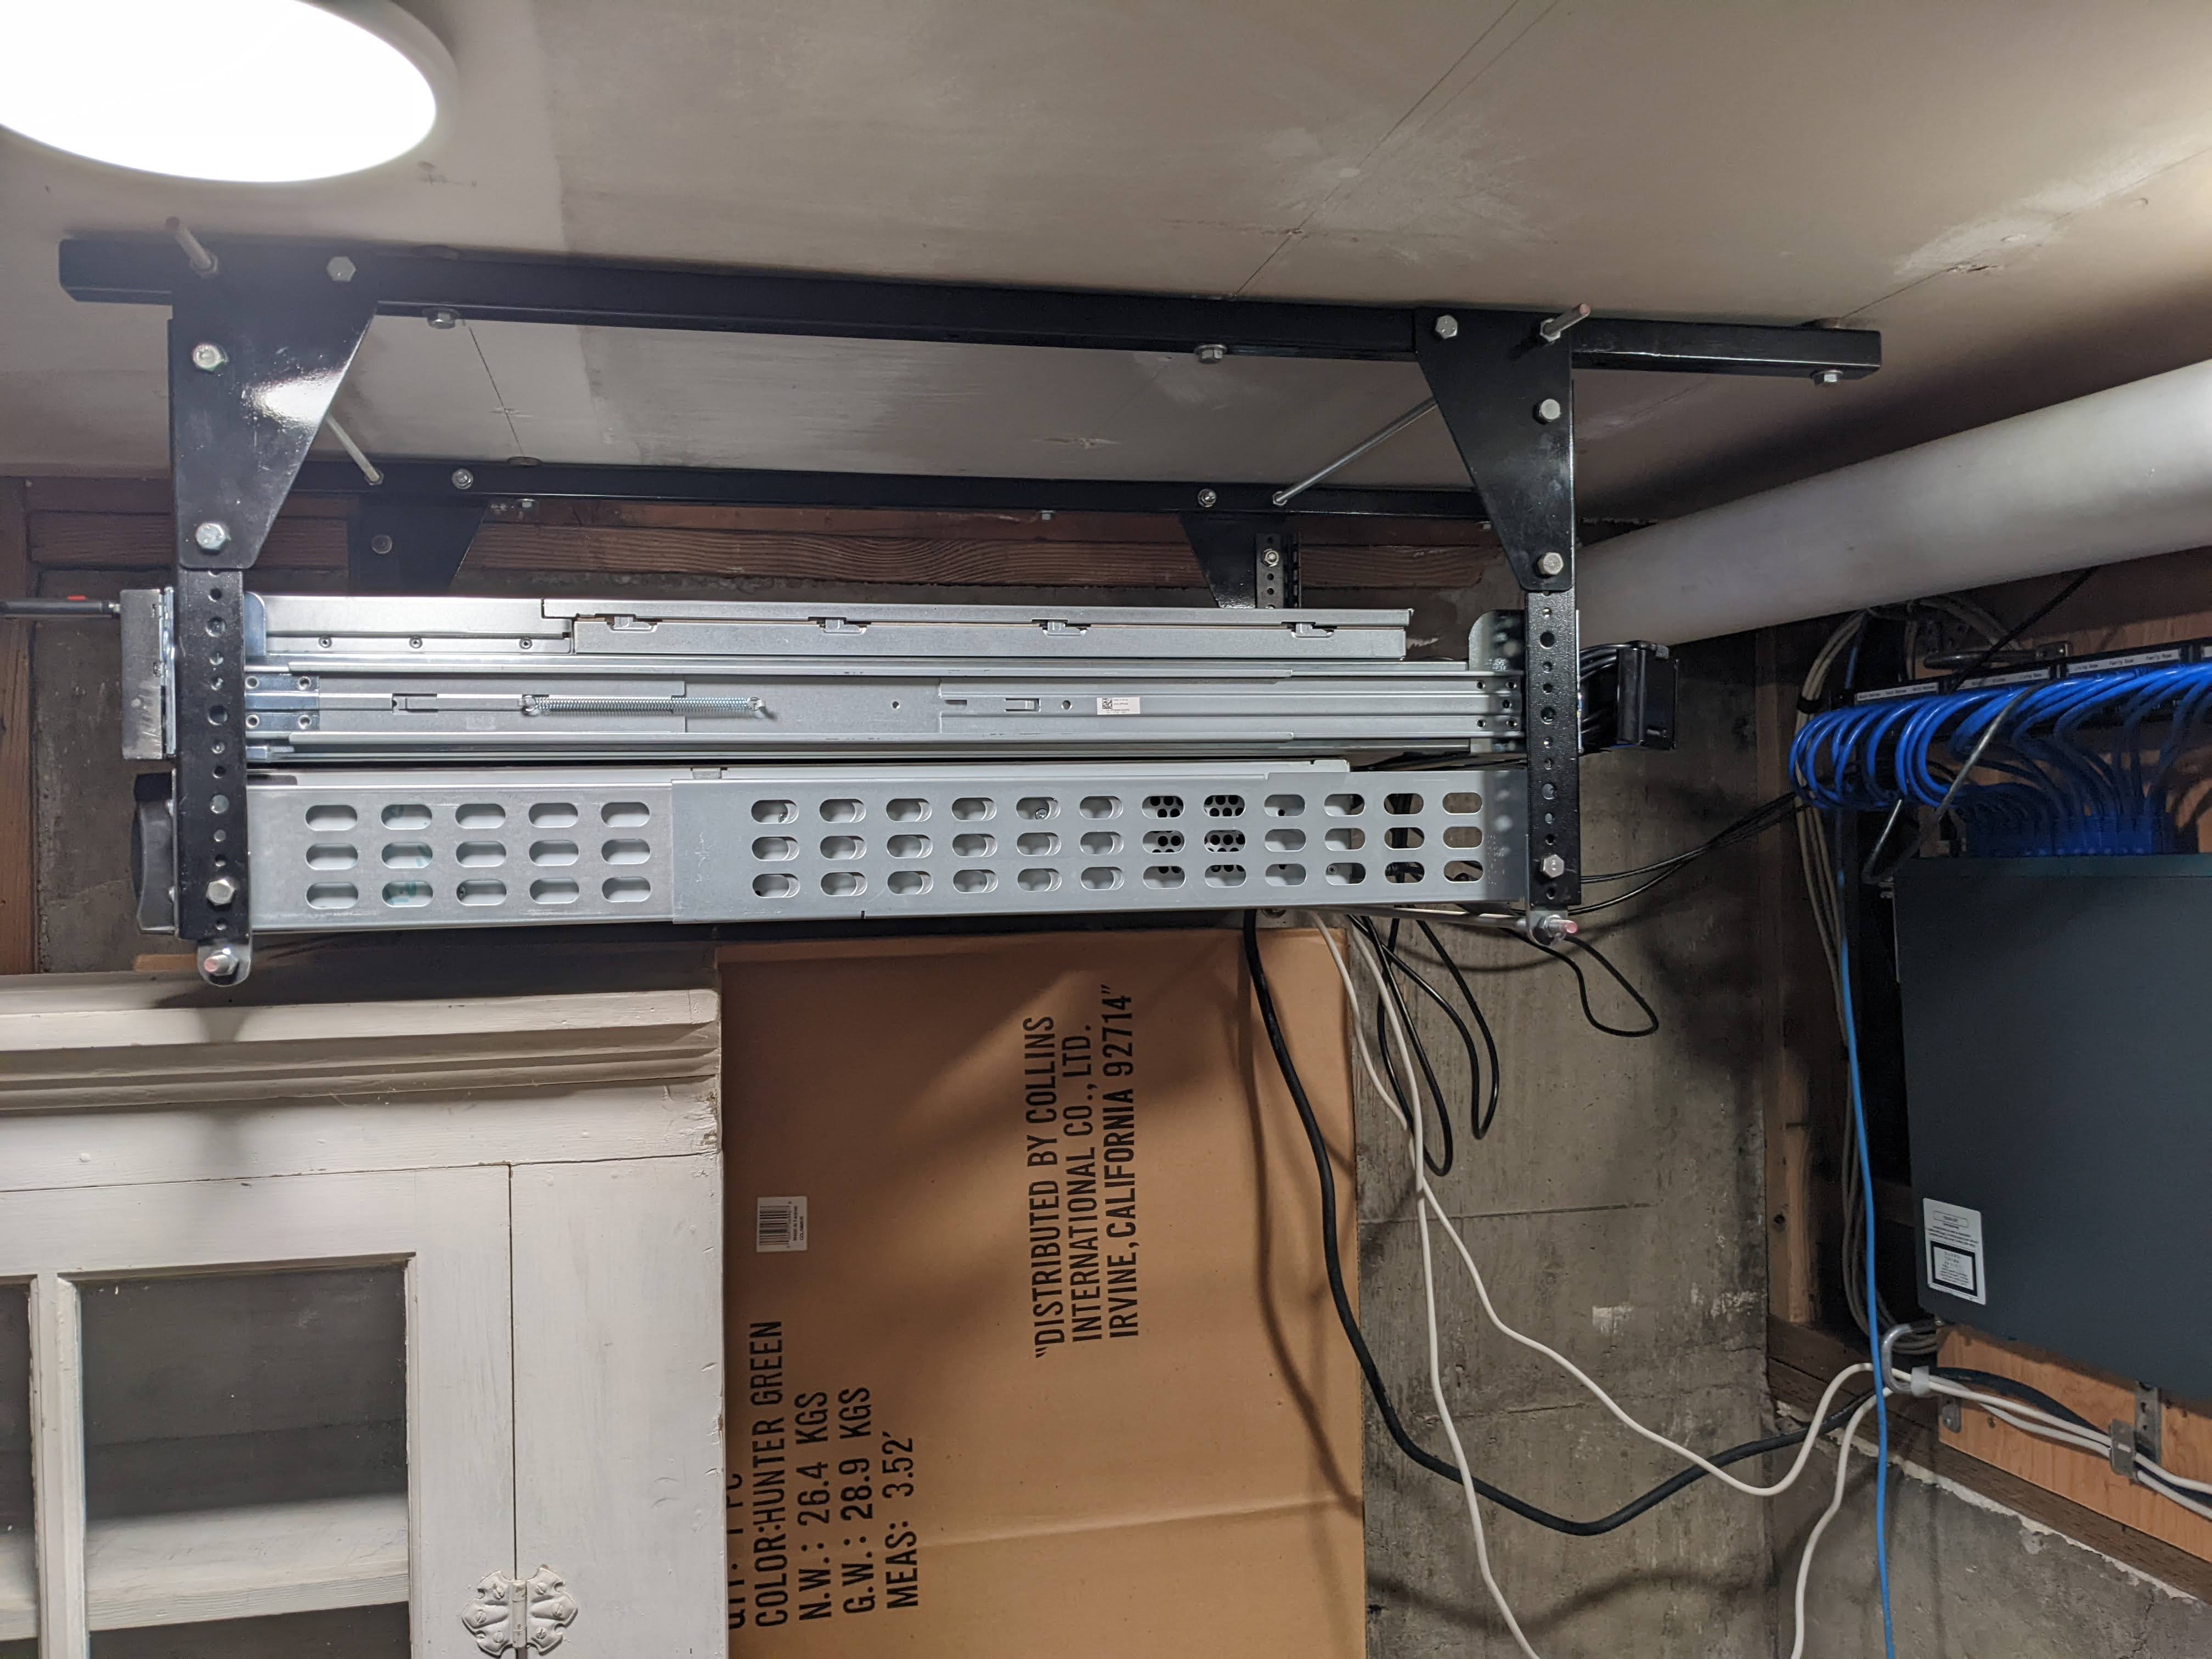
This custom 7U (with room for an additional 1U above) rack is lag bolted to the ceiling joists. It perfectly occupies the space here; providing just enough clearance around the front and back of the rack for servicing the demarcation point, the back of the rack, and deploying gear into and removing gear from the front of the rack. While 7U may seem like an odd decision, it's just enough space for two 2U UPSes, a 2U (or two 1U) server, and an automatic transfer switch for any critical components that don't have redundant power supplies, which is the likely maximum deployment of hardware to this space.
Updated Server Hardware
While I'm still very fond of my HP N54L, I realistically outgrew it for a core hypervisor years ago in all categories:
- CPU (AMD Turion II Neo, 2-cores, 2.2Ghz): I can peg one core and nearly peg the other when running a speedtest over uncapped GPON using a SmartOS zone as a NATing router, which only hits around 75% advertised bandwidth. Real-time Plex transcoding is out of the question, as is line-speed rsync (via rsyncd, so no ssh overhead) over gigabit, all due to CPU limitations.
- Memory (16GB DDR3 ECC): Upon getting this system I immediately upgraded the memory to the maximum supported 16GB. This was great at the time, and I'd often see ZFS ARC hit rates of 99%, but as time went on and I ran more and more workloads on it, I found my
cvalues and hit rates dropping, sometimes as low as 90% for stretches. I know, 90%, boo-hoo! This was more an issue that there's no additional room for memory upgrades if the need arises. - Storage capacity (4x HGST 8TB SATA Hard Drives): I've been running at over 90% capacity on my ZFS pool for a year, and 99% for the last few months on a 4-drive RAIDZ based pool.
- Storage bandwidth: Besides some weird missing space issues in this pool, probably due to the disadvantageous 4-drive RAIDZ layout, the system doesn't have the best sequential read performance either, topping out at just over 300MBps. While this is perfectly fine for a gigabit limited network file server, it's less suitable for local containers, and a complete non-starter for any significant network upgrades.
- IO Expandability: The N54L comes with a single on-board gigabit ethernet port and PCIe 3.0 x16 and x1 ports. While the x1 port is pretty suitable for a second gigabit ethernet NIC, the fact that there's only a single x16 port means you're going to either be limited to improved networking (a quad 10GBE NIC or dual 40GBE NIC) or improved storage (NVMe card), but not both, which defeats the purpose of either.
Fortunately, a good friend was selling a server he had just grown out of for an excellent price. Enter the Dell R730XD that came with the following configuration:
- 2x Intel Xeon E5-2678v3 CPUs. Base clock 2.5GHz Turbo clock: 3.1GHz Cores: 12 Threads: 24 TDP: 120W
- 128GB DDR4 ECC Memory
- 16x Hitachi 8TB SAS Hard Drives
- Dell PERC H730 Mini Mono RAID Controller
- Dell F6PCP Emulex based Quad 10GBE SFP+ Network Daughter Card
- Dell iDRAC8 Enterprise
- Dell Rear Flex Bay 2.5" Drive Backplane Kit
- Two out of the three riser kits (missing Riser1)
- Dell PowerEdge 2U Ready Rails
I added the following additional hardware components:
- Dell 68M95 Intel X710 based Quad 10GBE SFP+ Network Daughter Card, as the Emulex based one wasn't recognized by drivers under Illumos and was flaky under FreeBSD. While this could probably be fixed, the Intel based card wasn't too expensive used and the cost could be recouped by selling the Emulex card.
- Dell PERC HBA330 Mini Mono Host Bus Adapter, as the H730 was flaky under Illumos while being load tested. The H730 could probably be resold for more than the cost of the HBA330, but I'm more apt to keep this around to try to figure out what's going on with the driver.
- Cisco QLogic QL45412HLCU dual port 40GB QSFP+ NIC intended for use in experiments with high speed connectivity to a single remote system (workstation) to see what that's like.
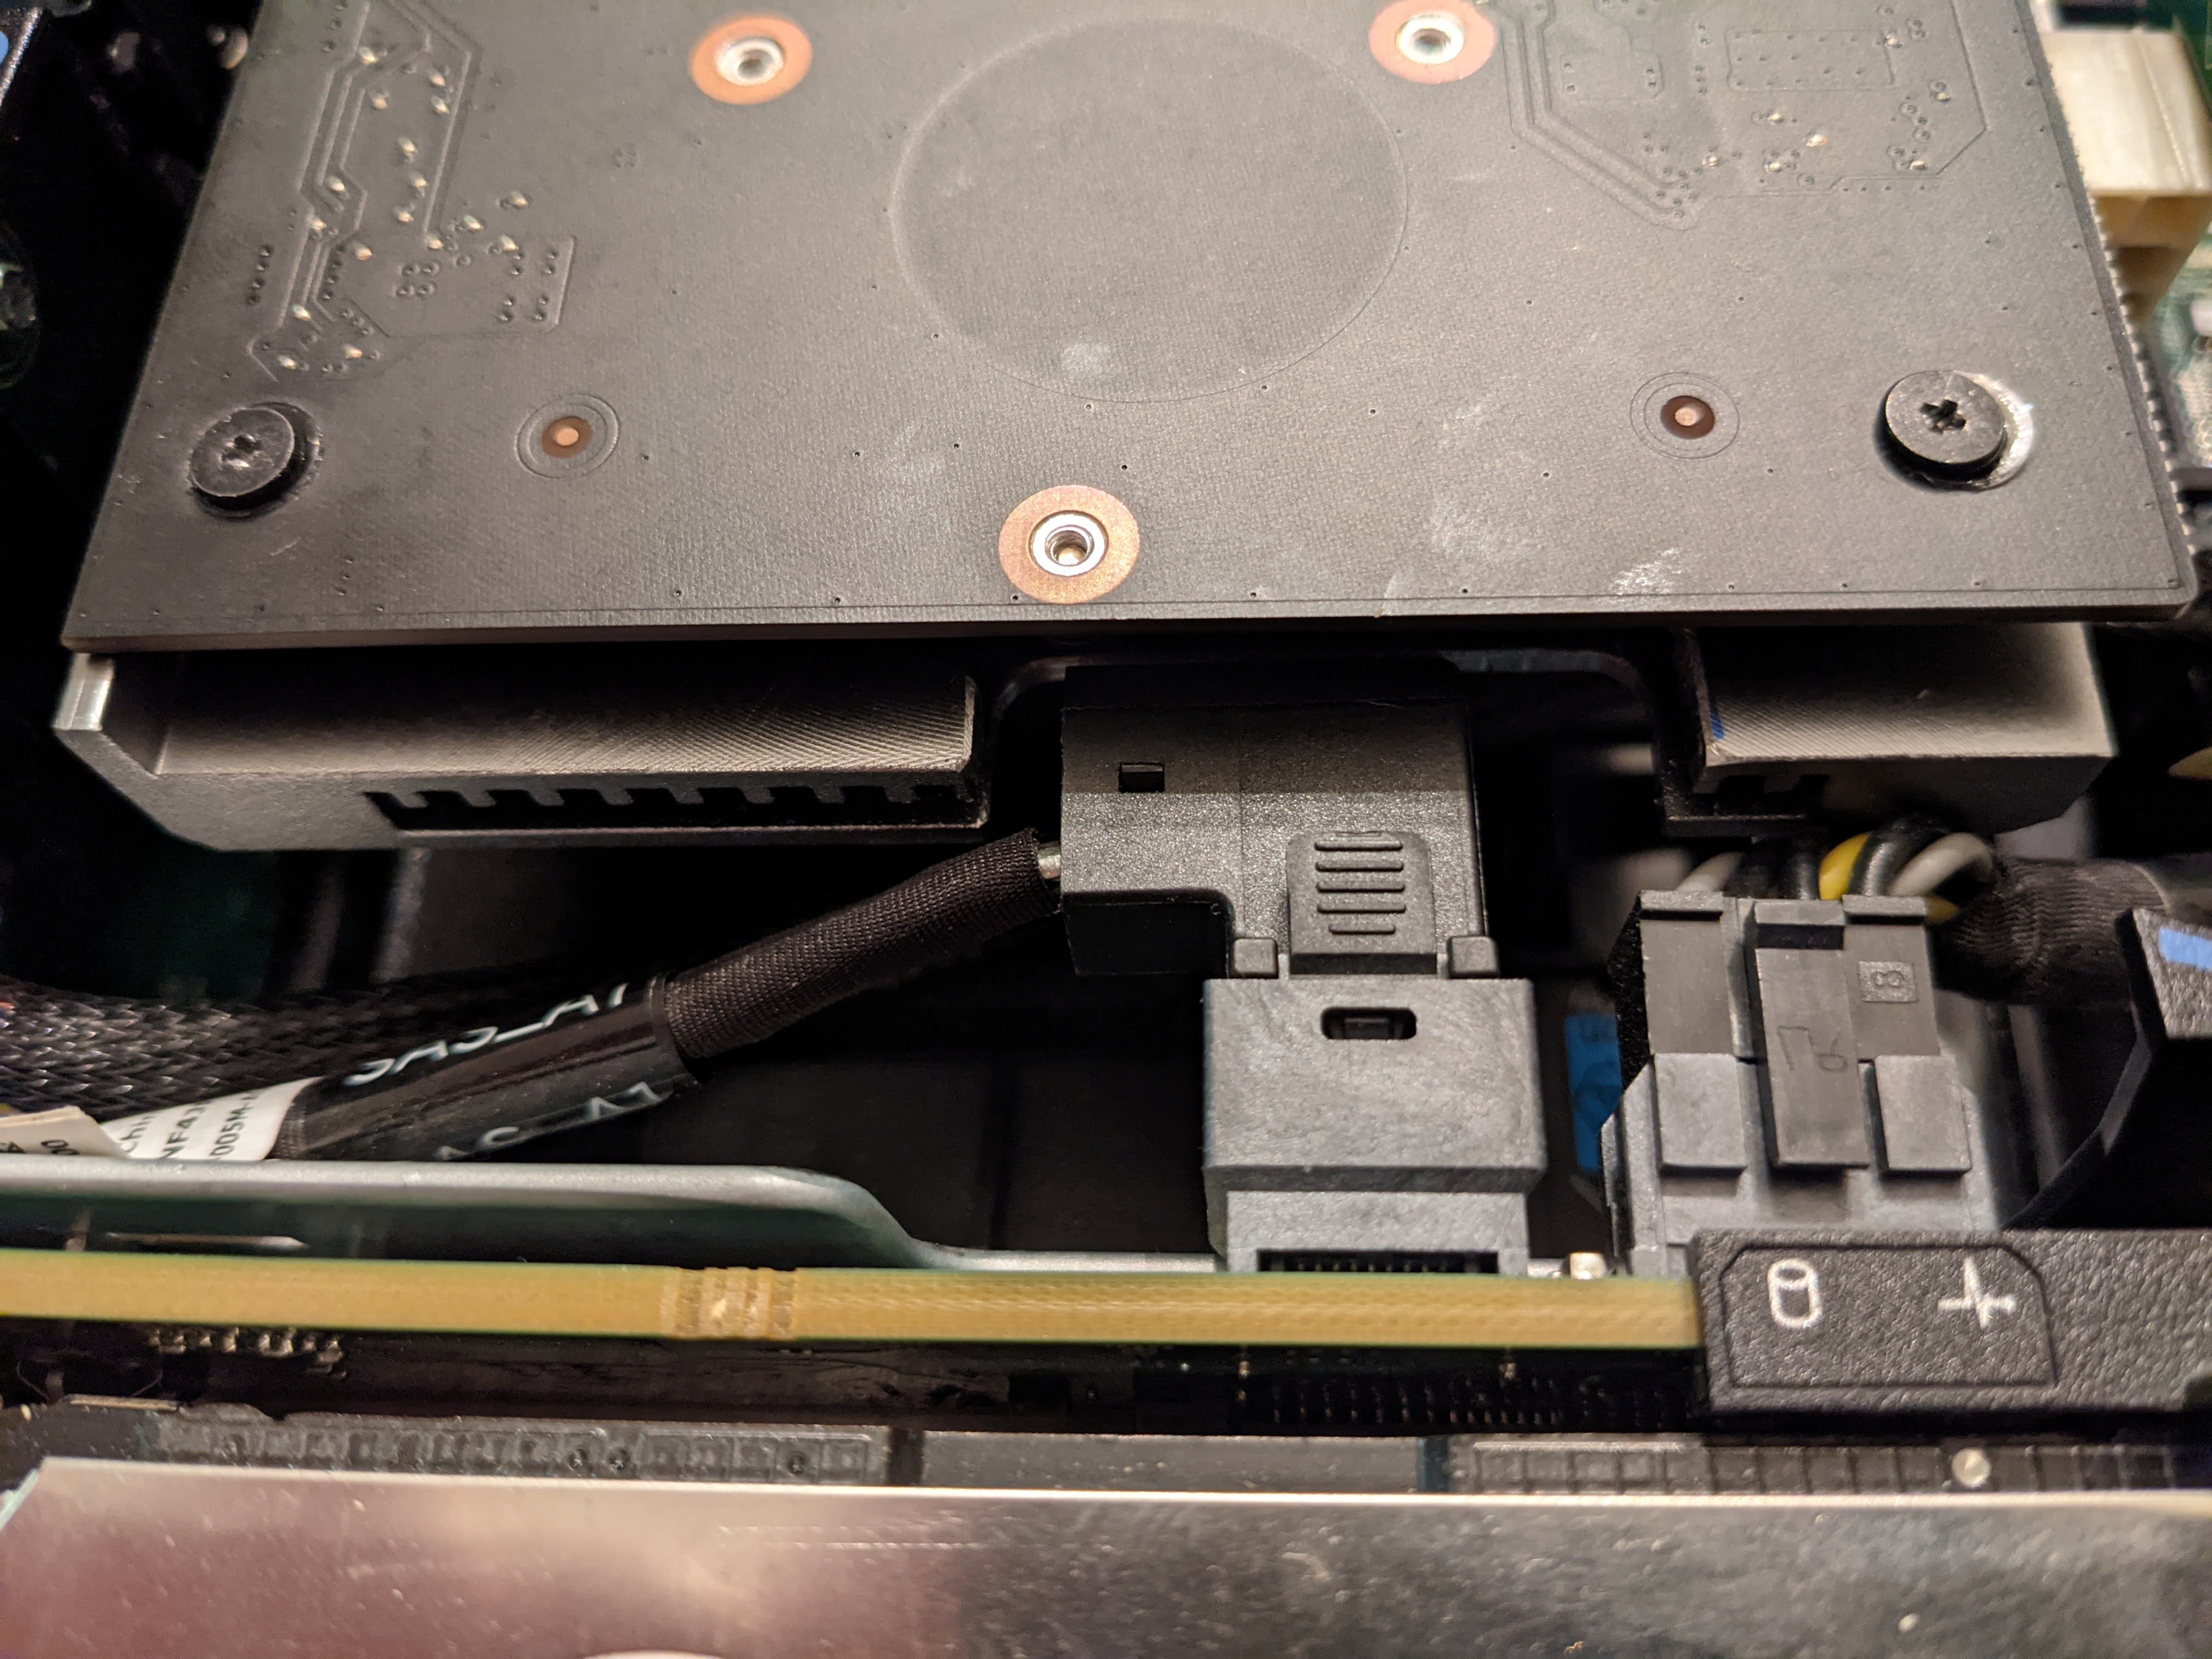
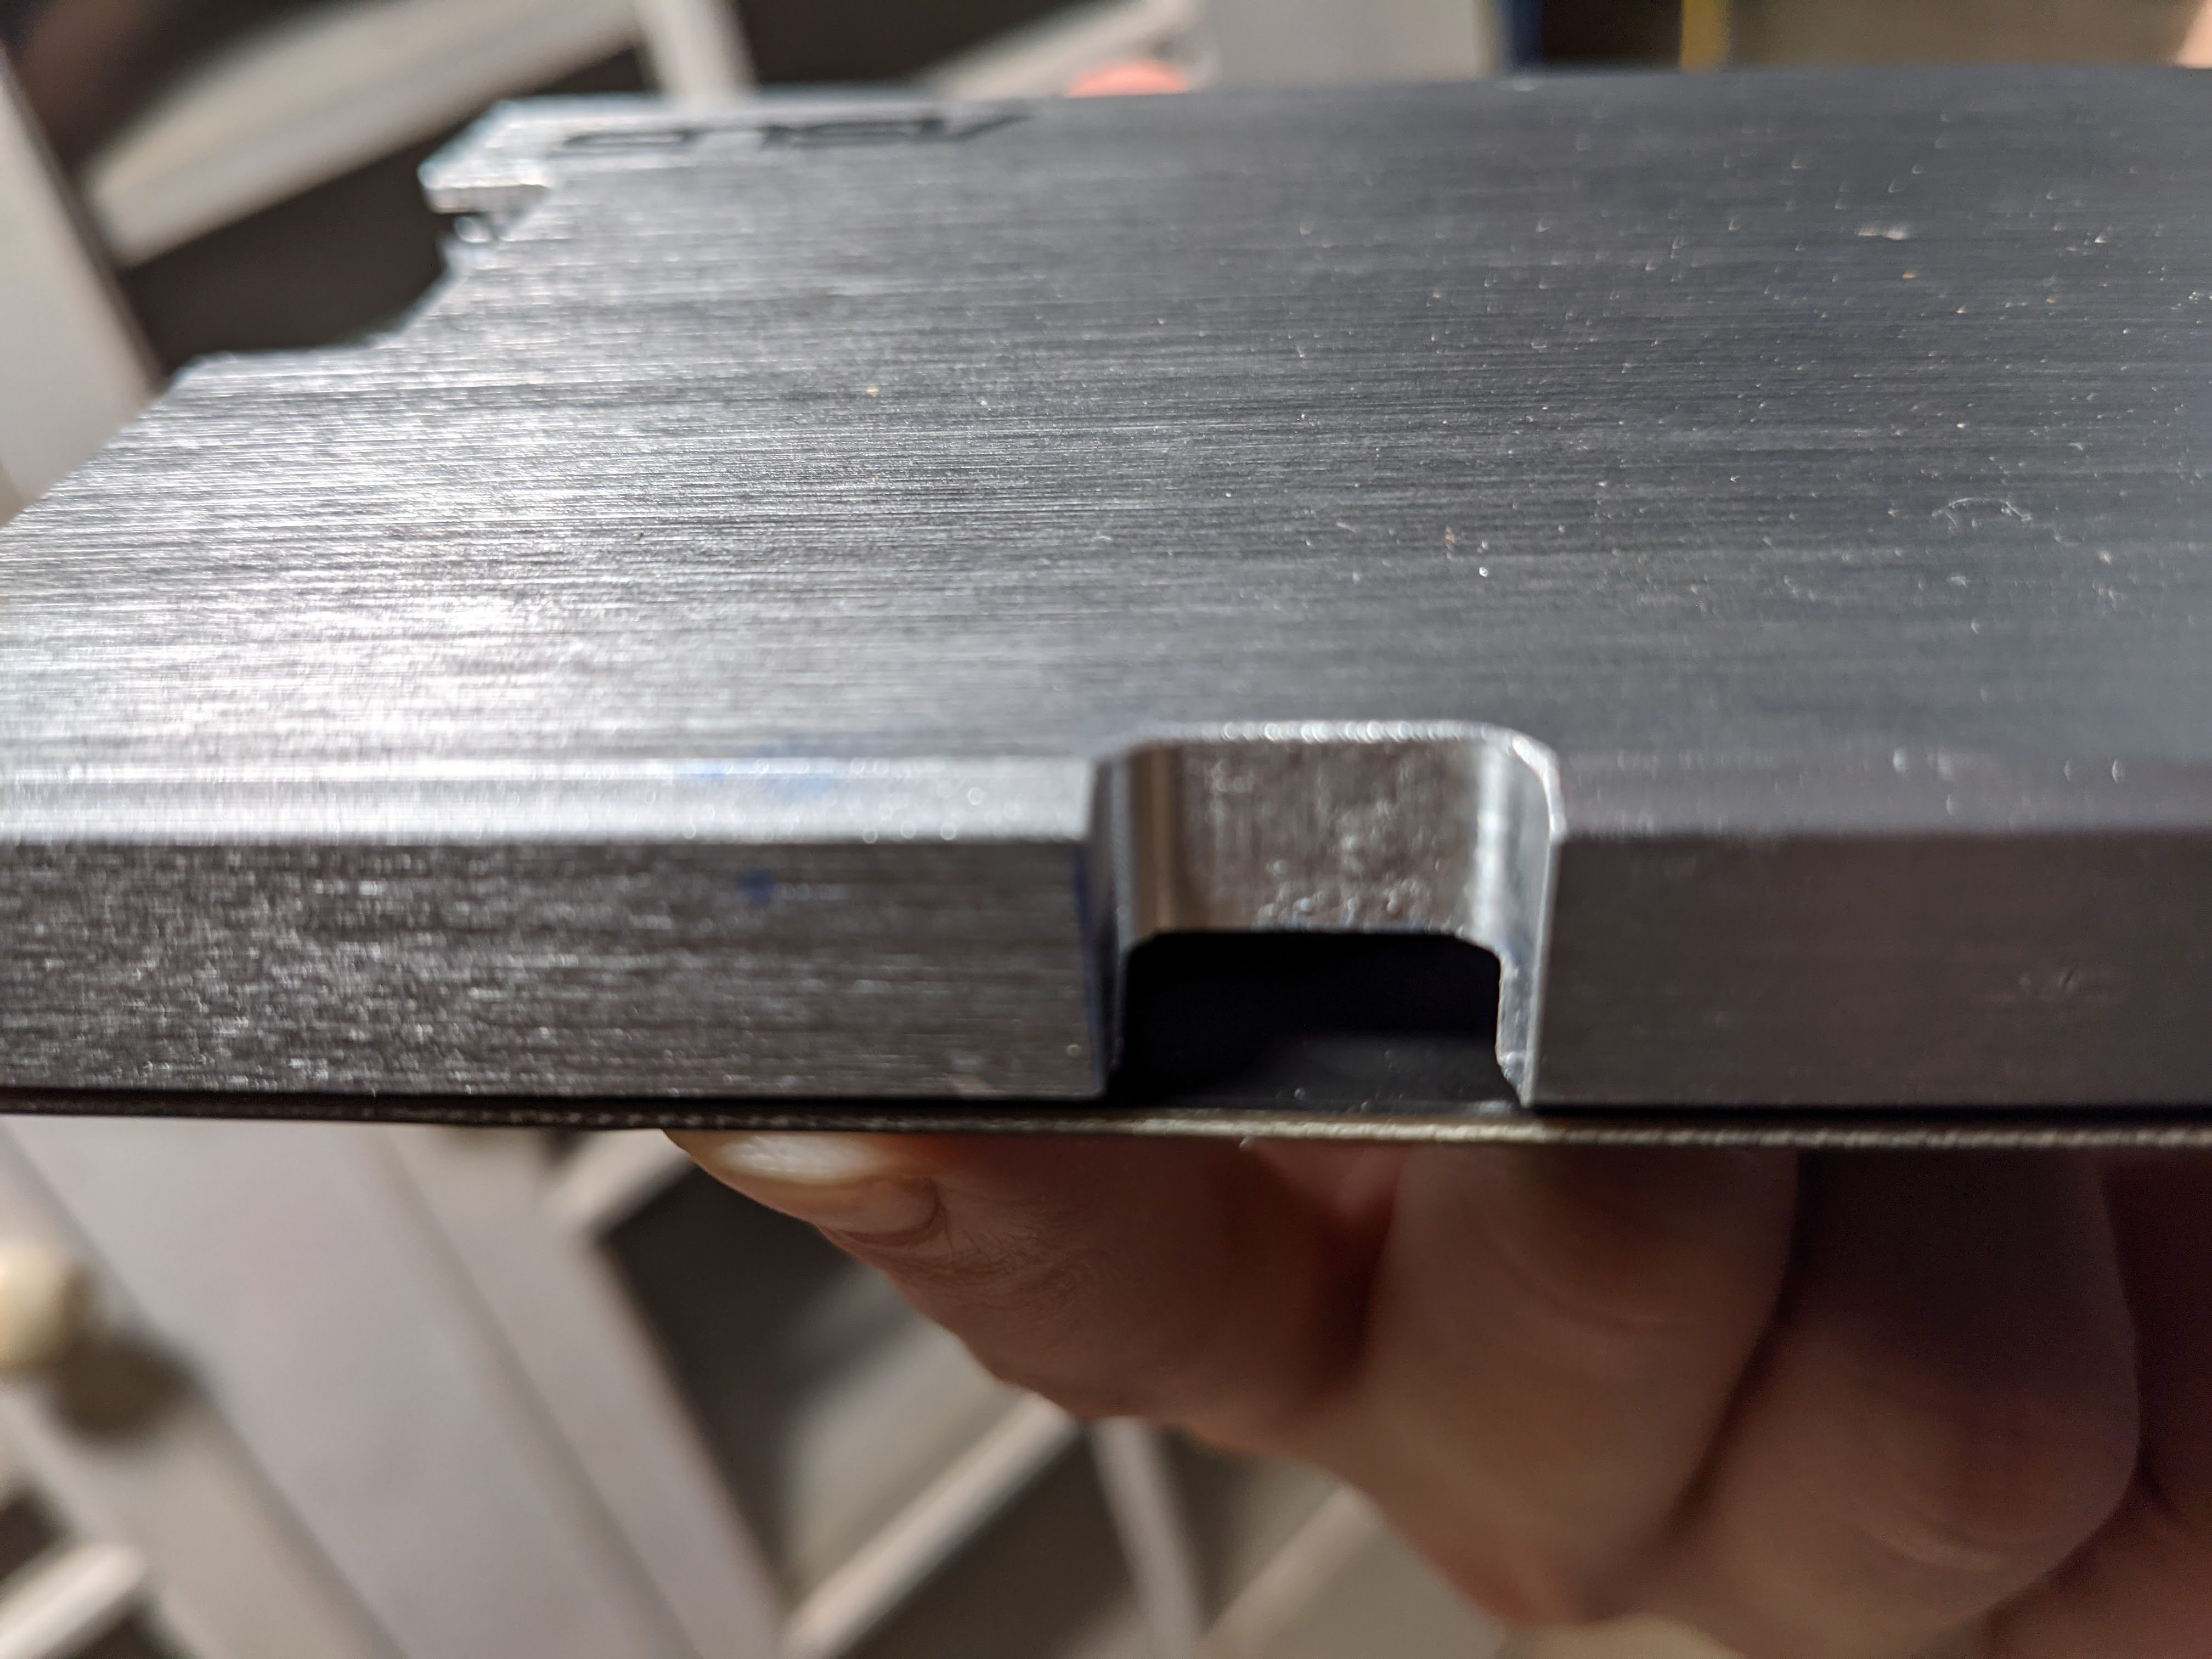
- ASUS Hyper M.2 x16 PCIe v3.0 x4 v2. A 4x4 M.2 NVMe to PCIe v3.0 x16 expansion card that allows for four M.2 NVMe drives to be connected to the host to experiment with special vdevs. This is the main reason I opted for the R730XD over the R720XD, as PCIe bifurcation is required to use this card effectively, and is only available on the later model.
- Dell Riser 1 (adding 3 PCIe v3.0 x8 slots) did this for the NV1604s mentioned below, but since I ended up not using them, this part wasn't required. I may end up loading them up with Supermicro AOC-SLG3-2M2 cards if I like special vdevs on ZFS and need more space, or perhaps Intel Optane drives to experiment with L2ARC/SLOG.
Two Flashtec NV1604 NVRAM PCIe v3.0 x8 NVMe drives for use as mirrored SLOG devices.After having re-read the documentation, it turns out that these cards need to be directed to store their contents to flash upon every power-loss event (I'm really wishing storage review mentioned that). While this does improve flash longevity, it's also quite unfortunate, as it makes them ill-suited for use as SLOG devices: either a third party process will have to run in the global zone to manage these cards, or ZFS will have to be extended to do so. Neither of these approaches are overly palatable, so for now I'm running without any dedicated logging devices.- Dell PowerEdge 2U Cable Management Arm. Completely unnecessary, but it makes the cable management that much better.
The ASUS Hyper card ended up conflicting with the power distribution cables of the drive midplane within the R730XD, so I had it milled down there, and around where the card support arm of the case would swing out to support the weight of the card. This is what it looks like after those modifications.
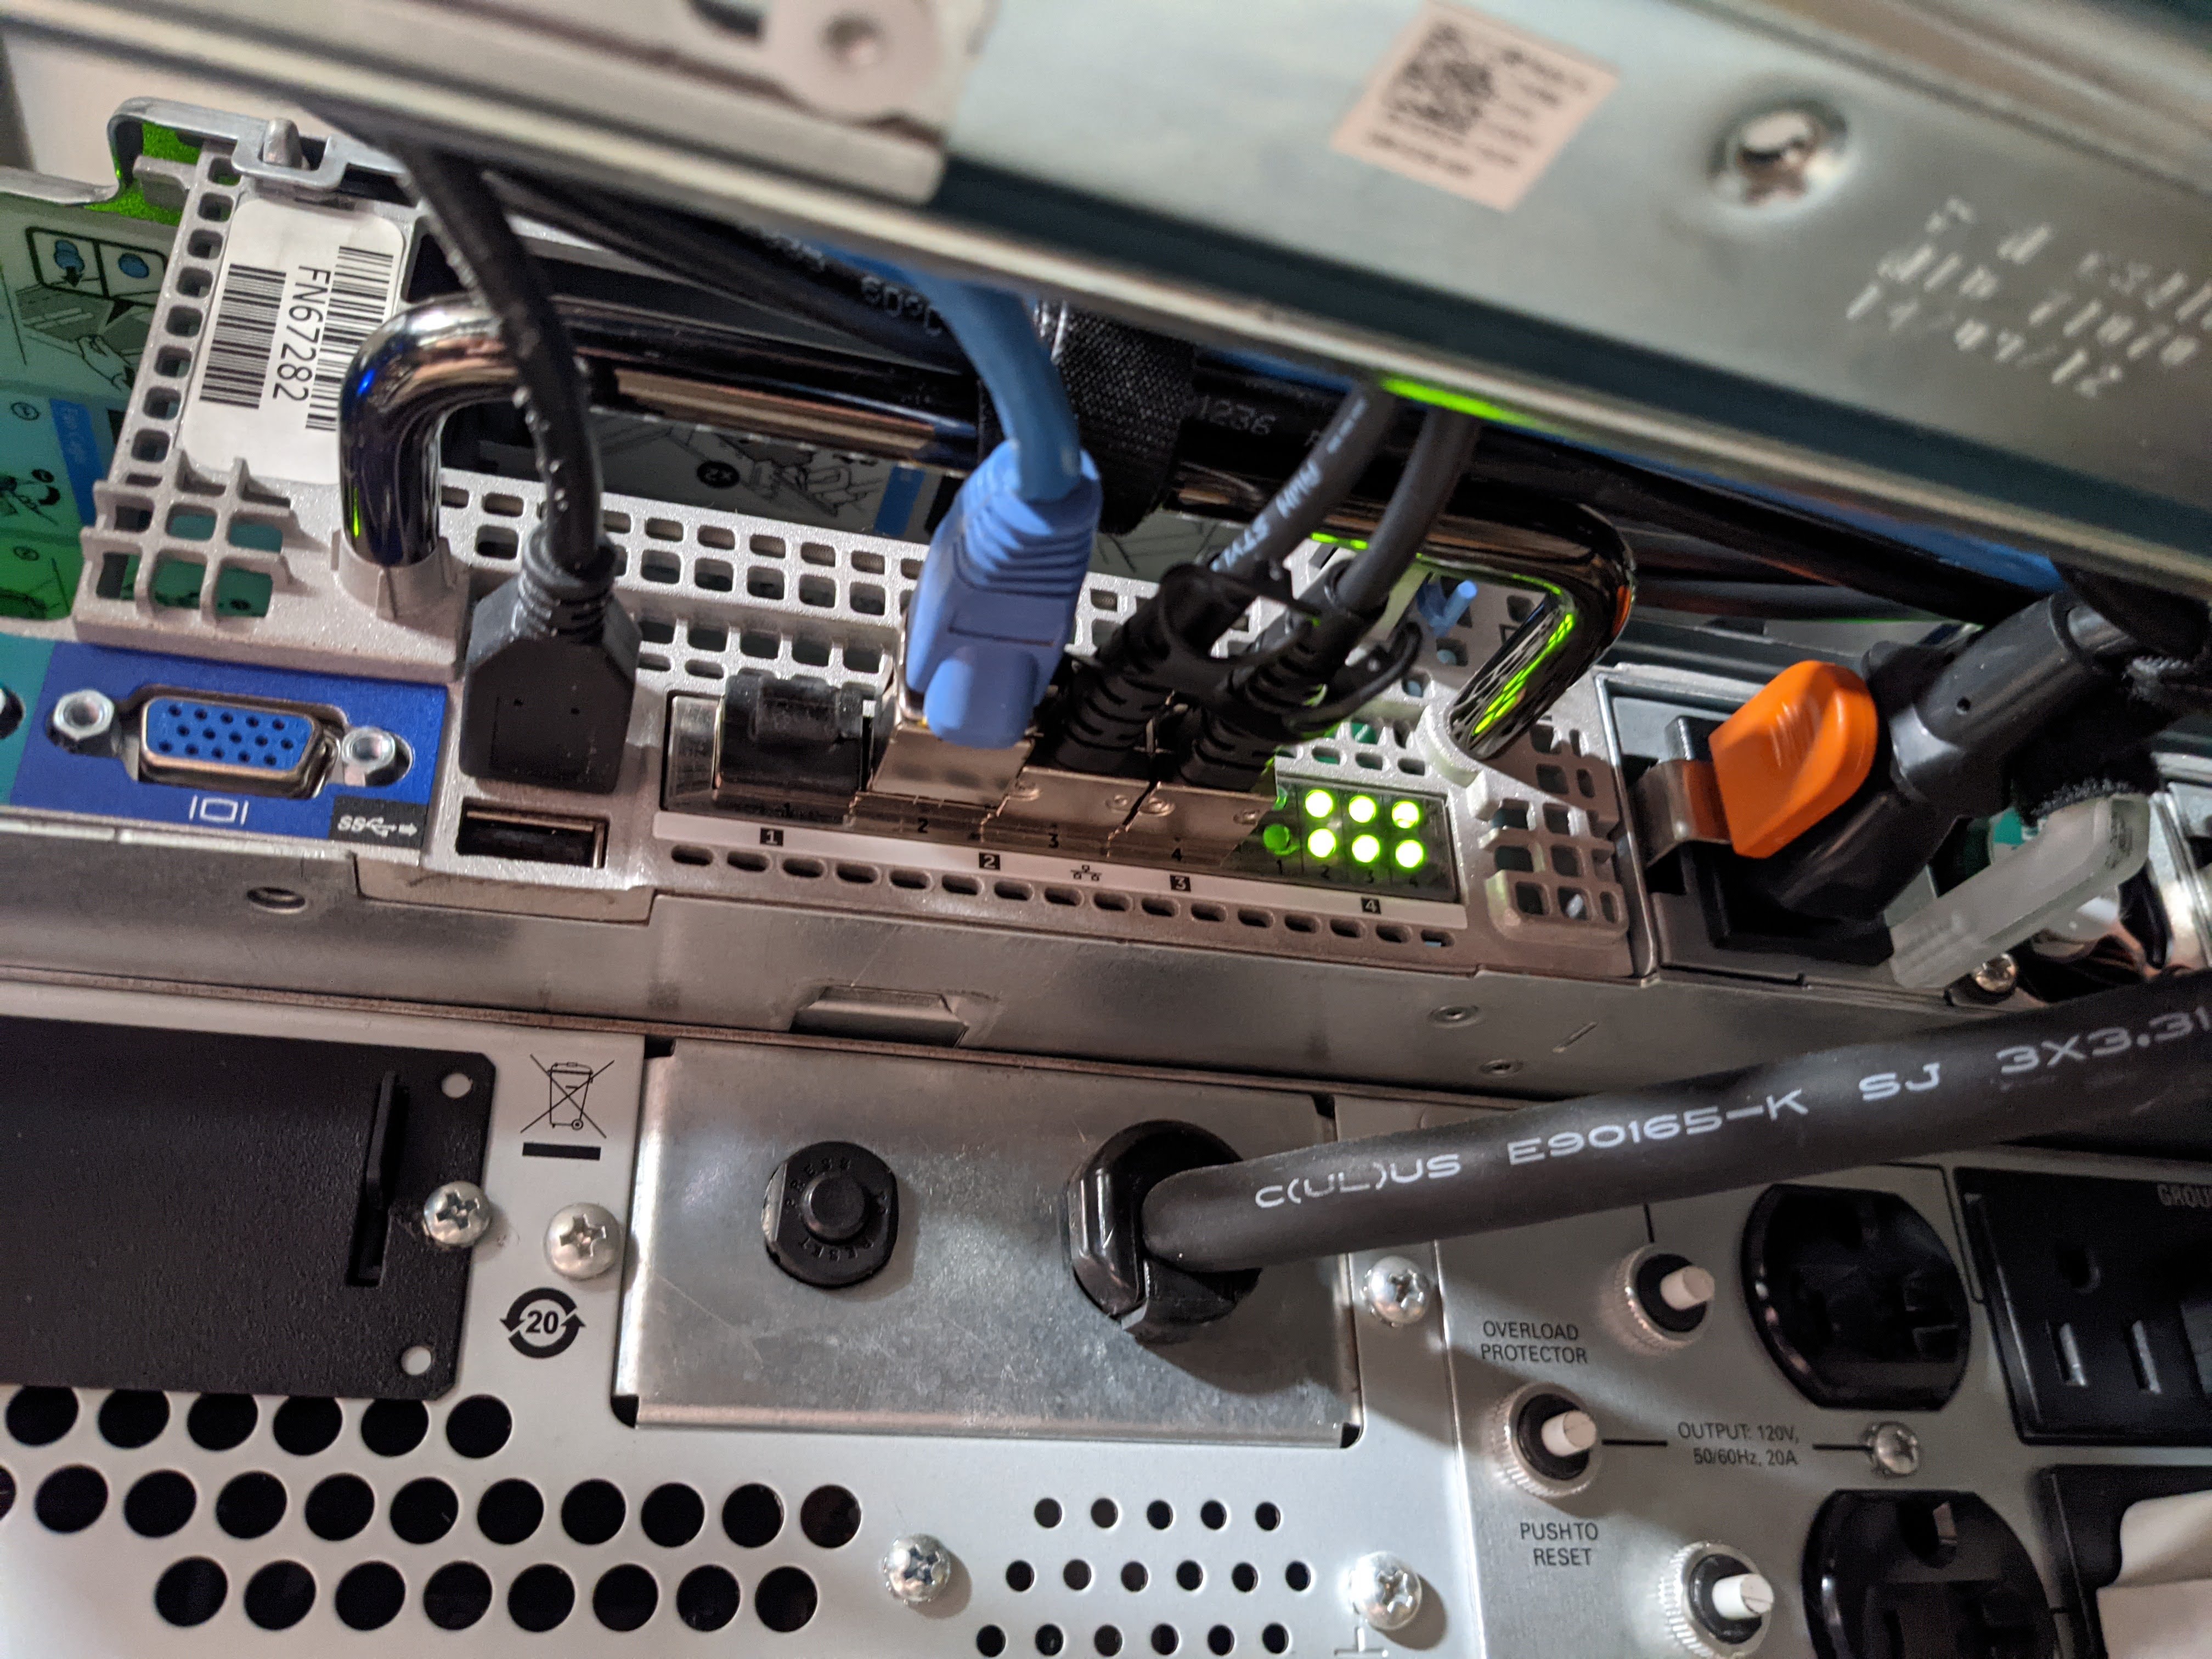
This server hardware has expansion opportunities in all directions, and should suit my needs for quite a few years to come.
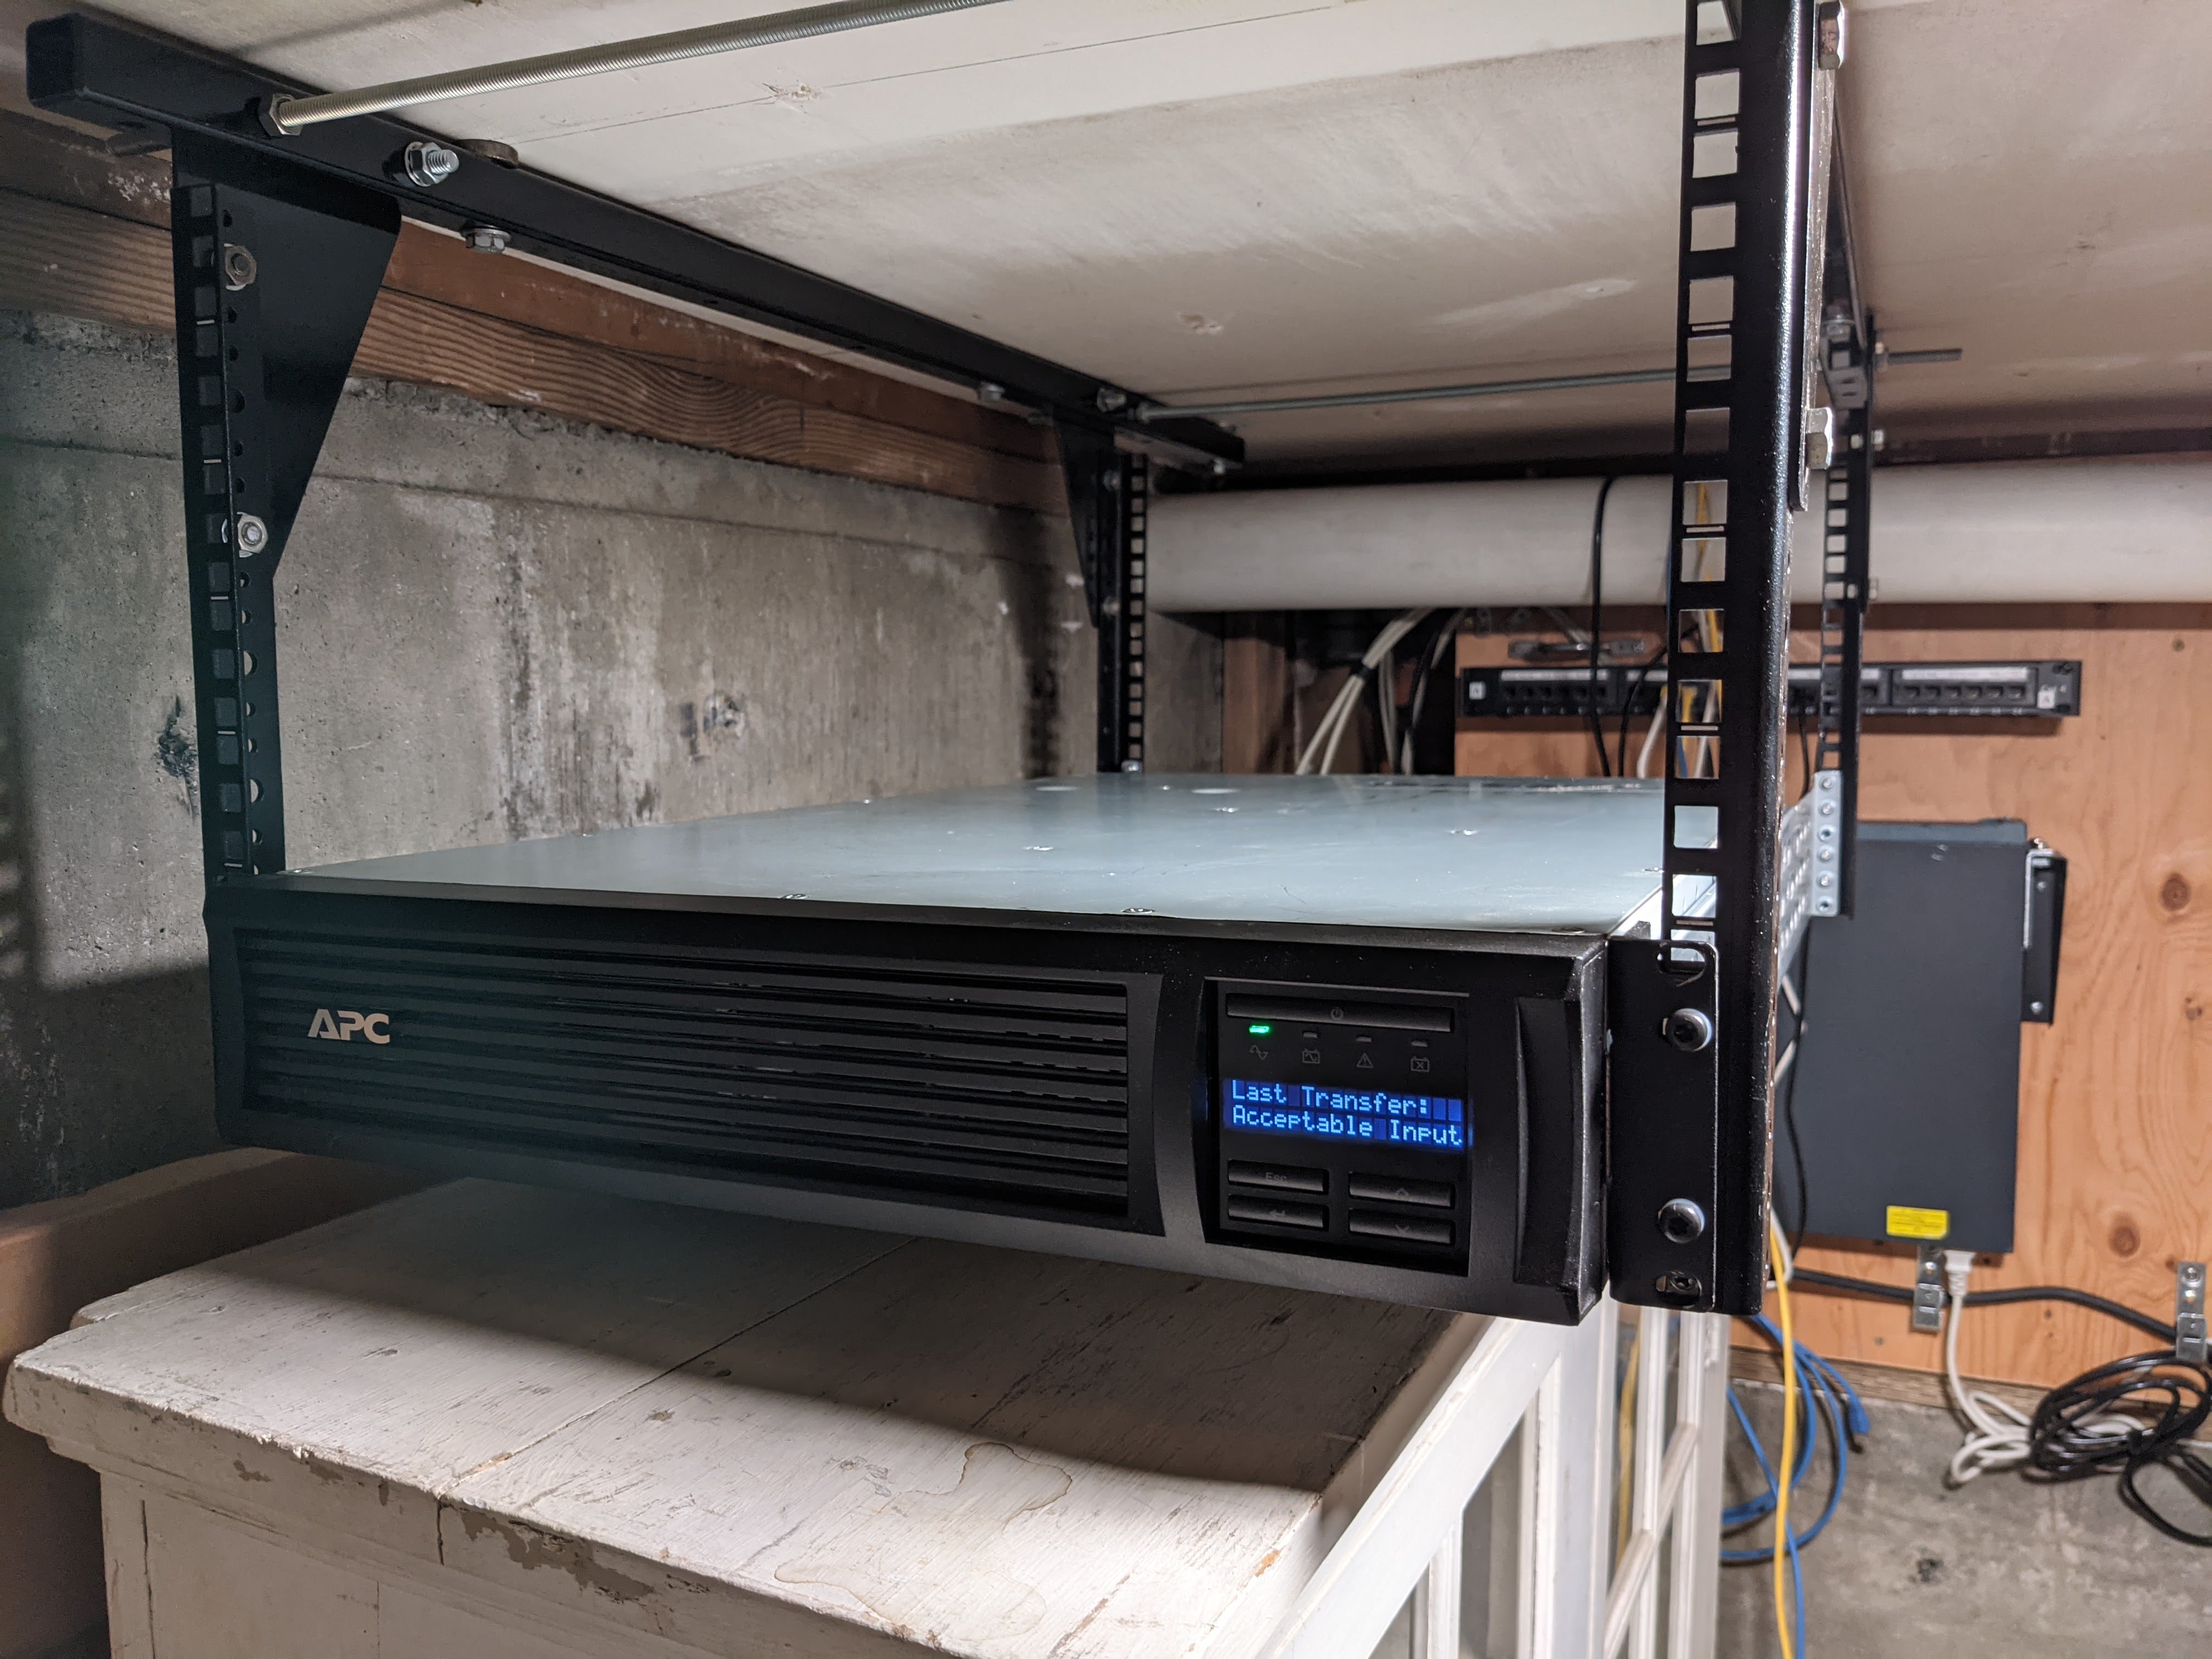
A New Uninterruptable Power Supply
Since the new server was going to be rack mounted to the ceiling next to the demarcation point in the mechanical room, it really made sense to buy a rack mount UPS, as my other UPSes (all desktop form factor) would be out of place there. Used APCs work great, so I picked up an APC Smart-UPS (SMT2200RM2U) for cheap, added new batteries and tested to ensure that it works.
It works.
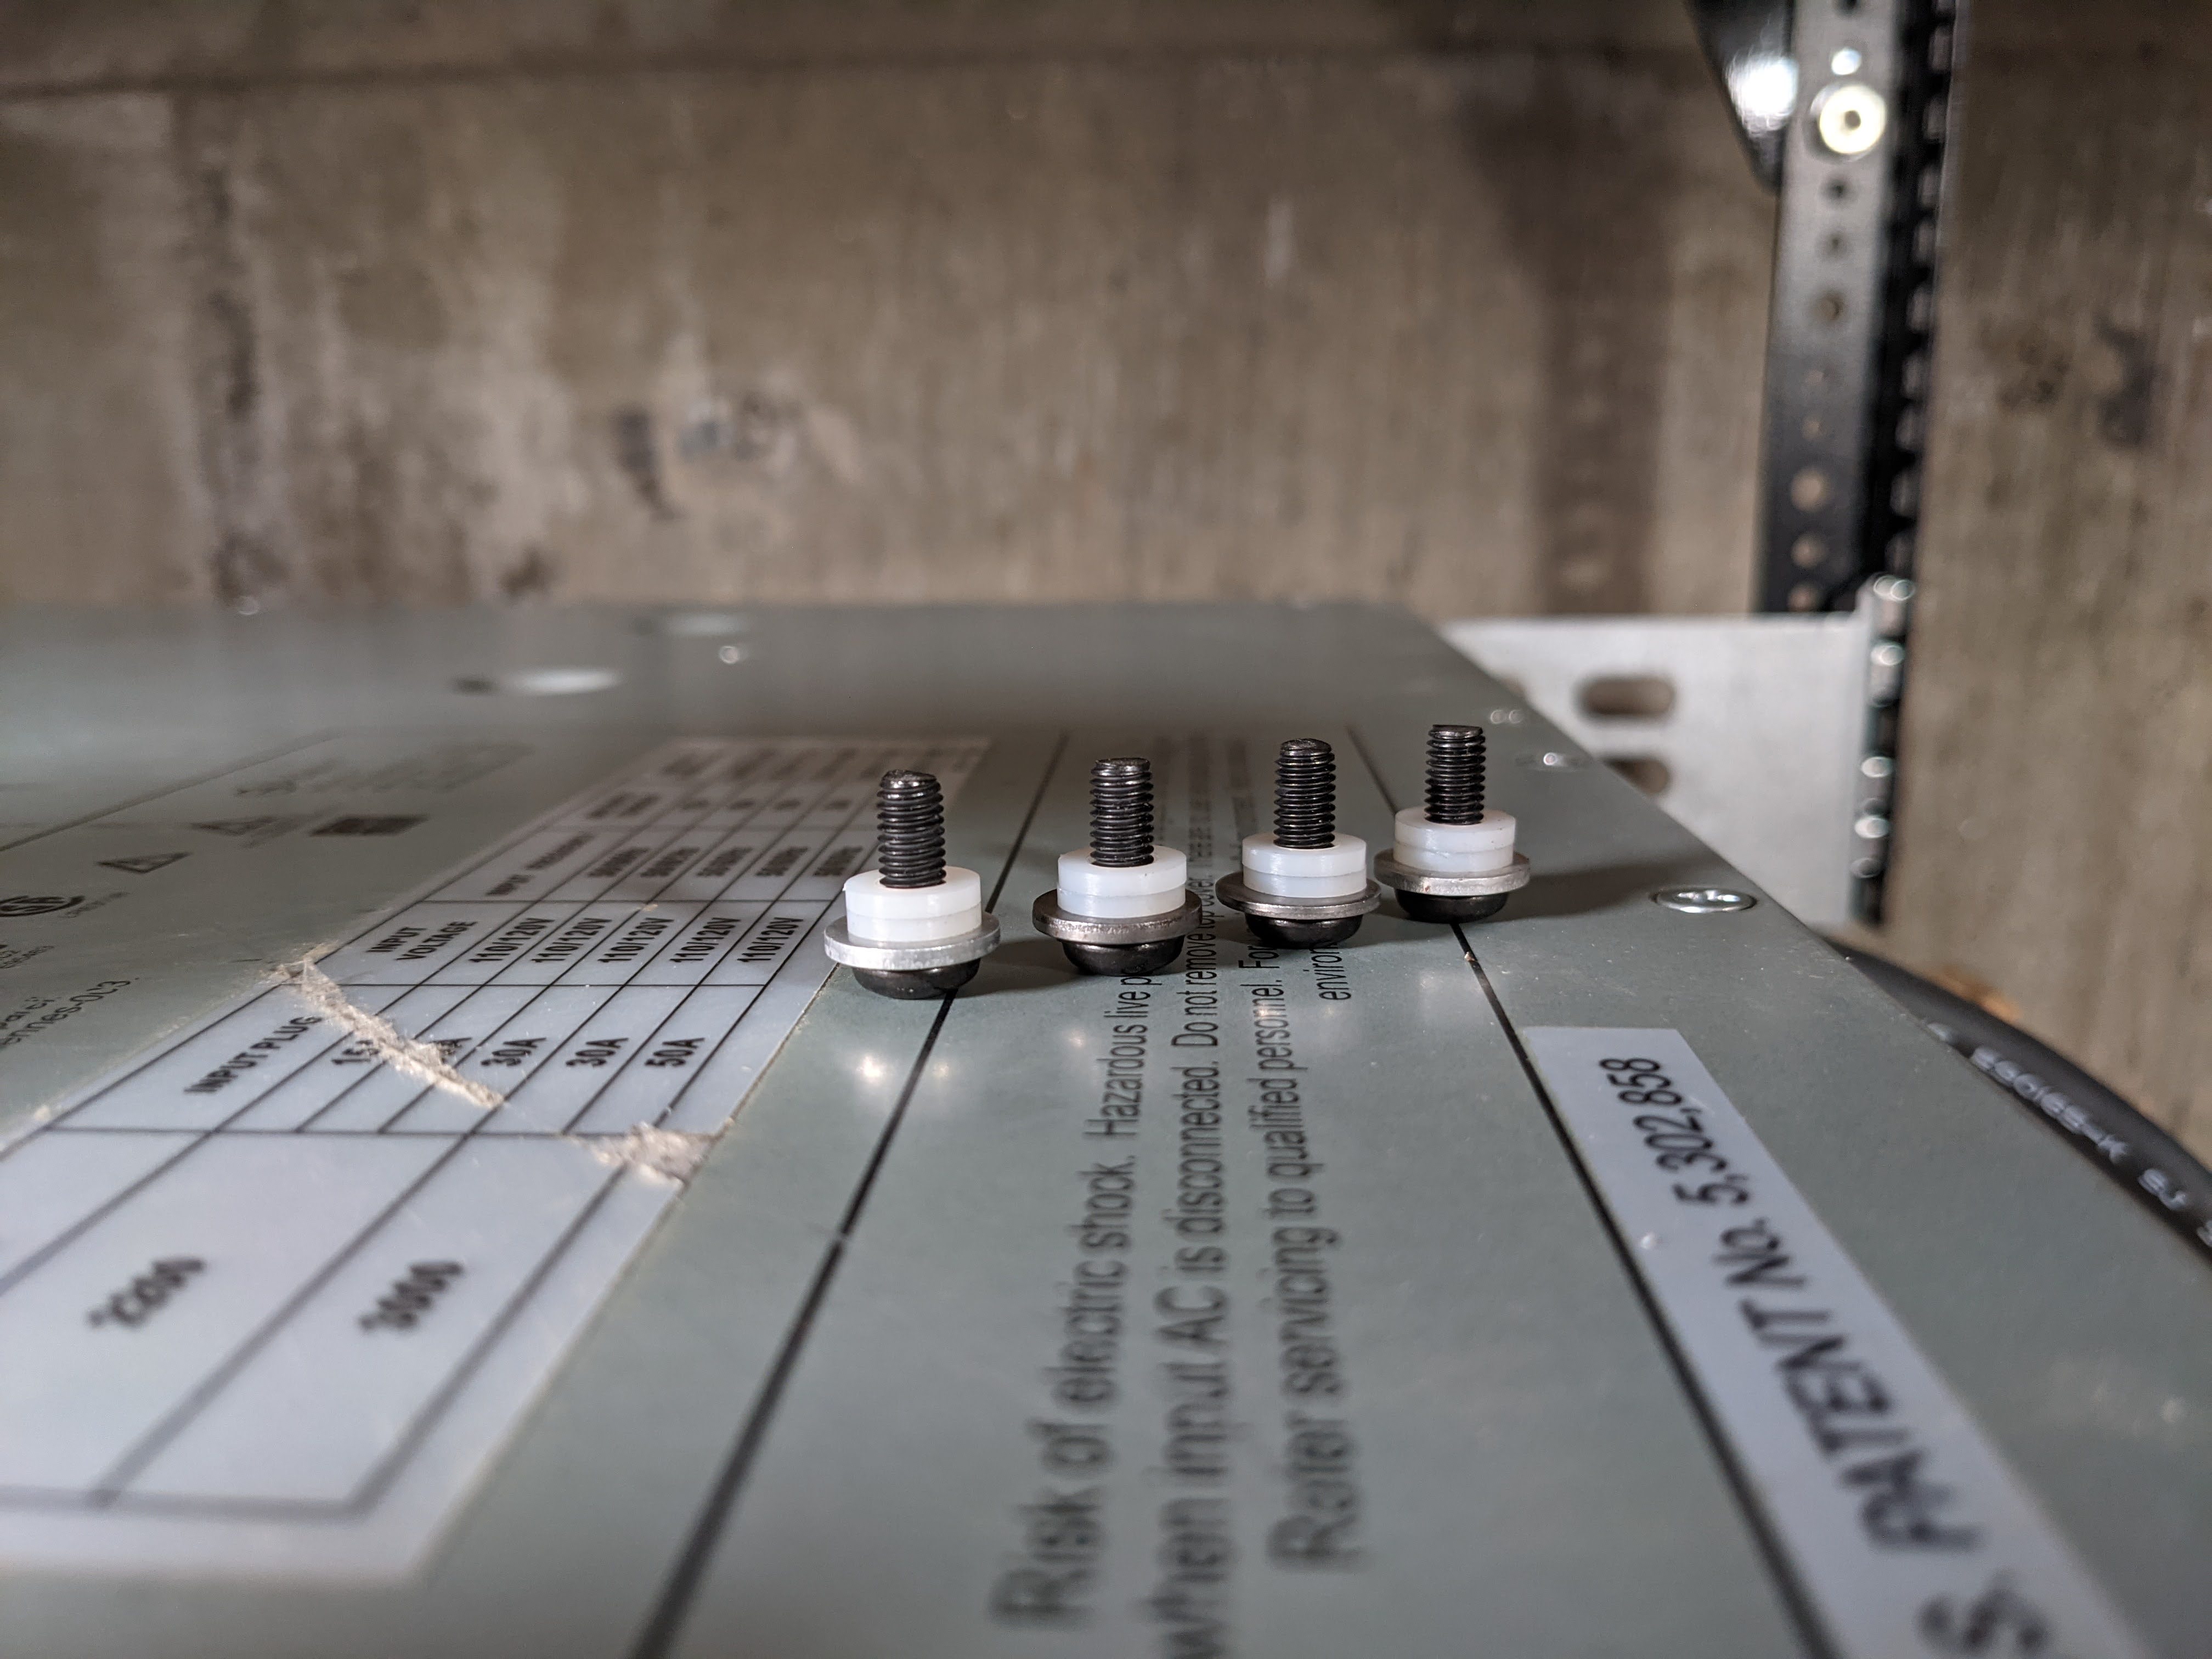
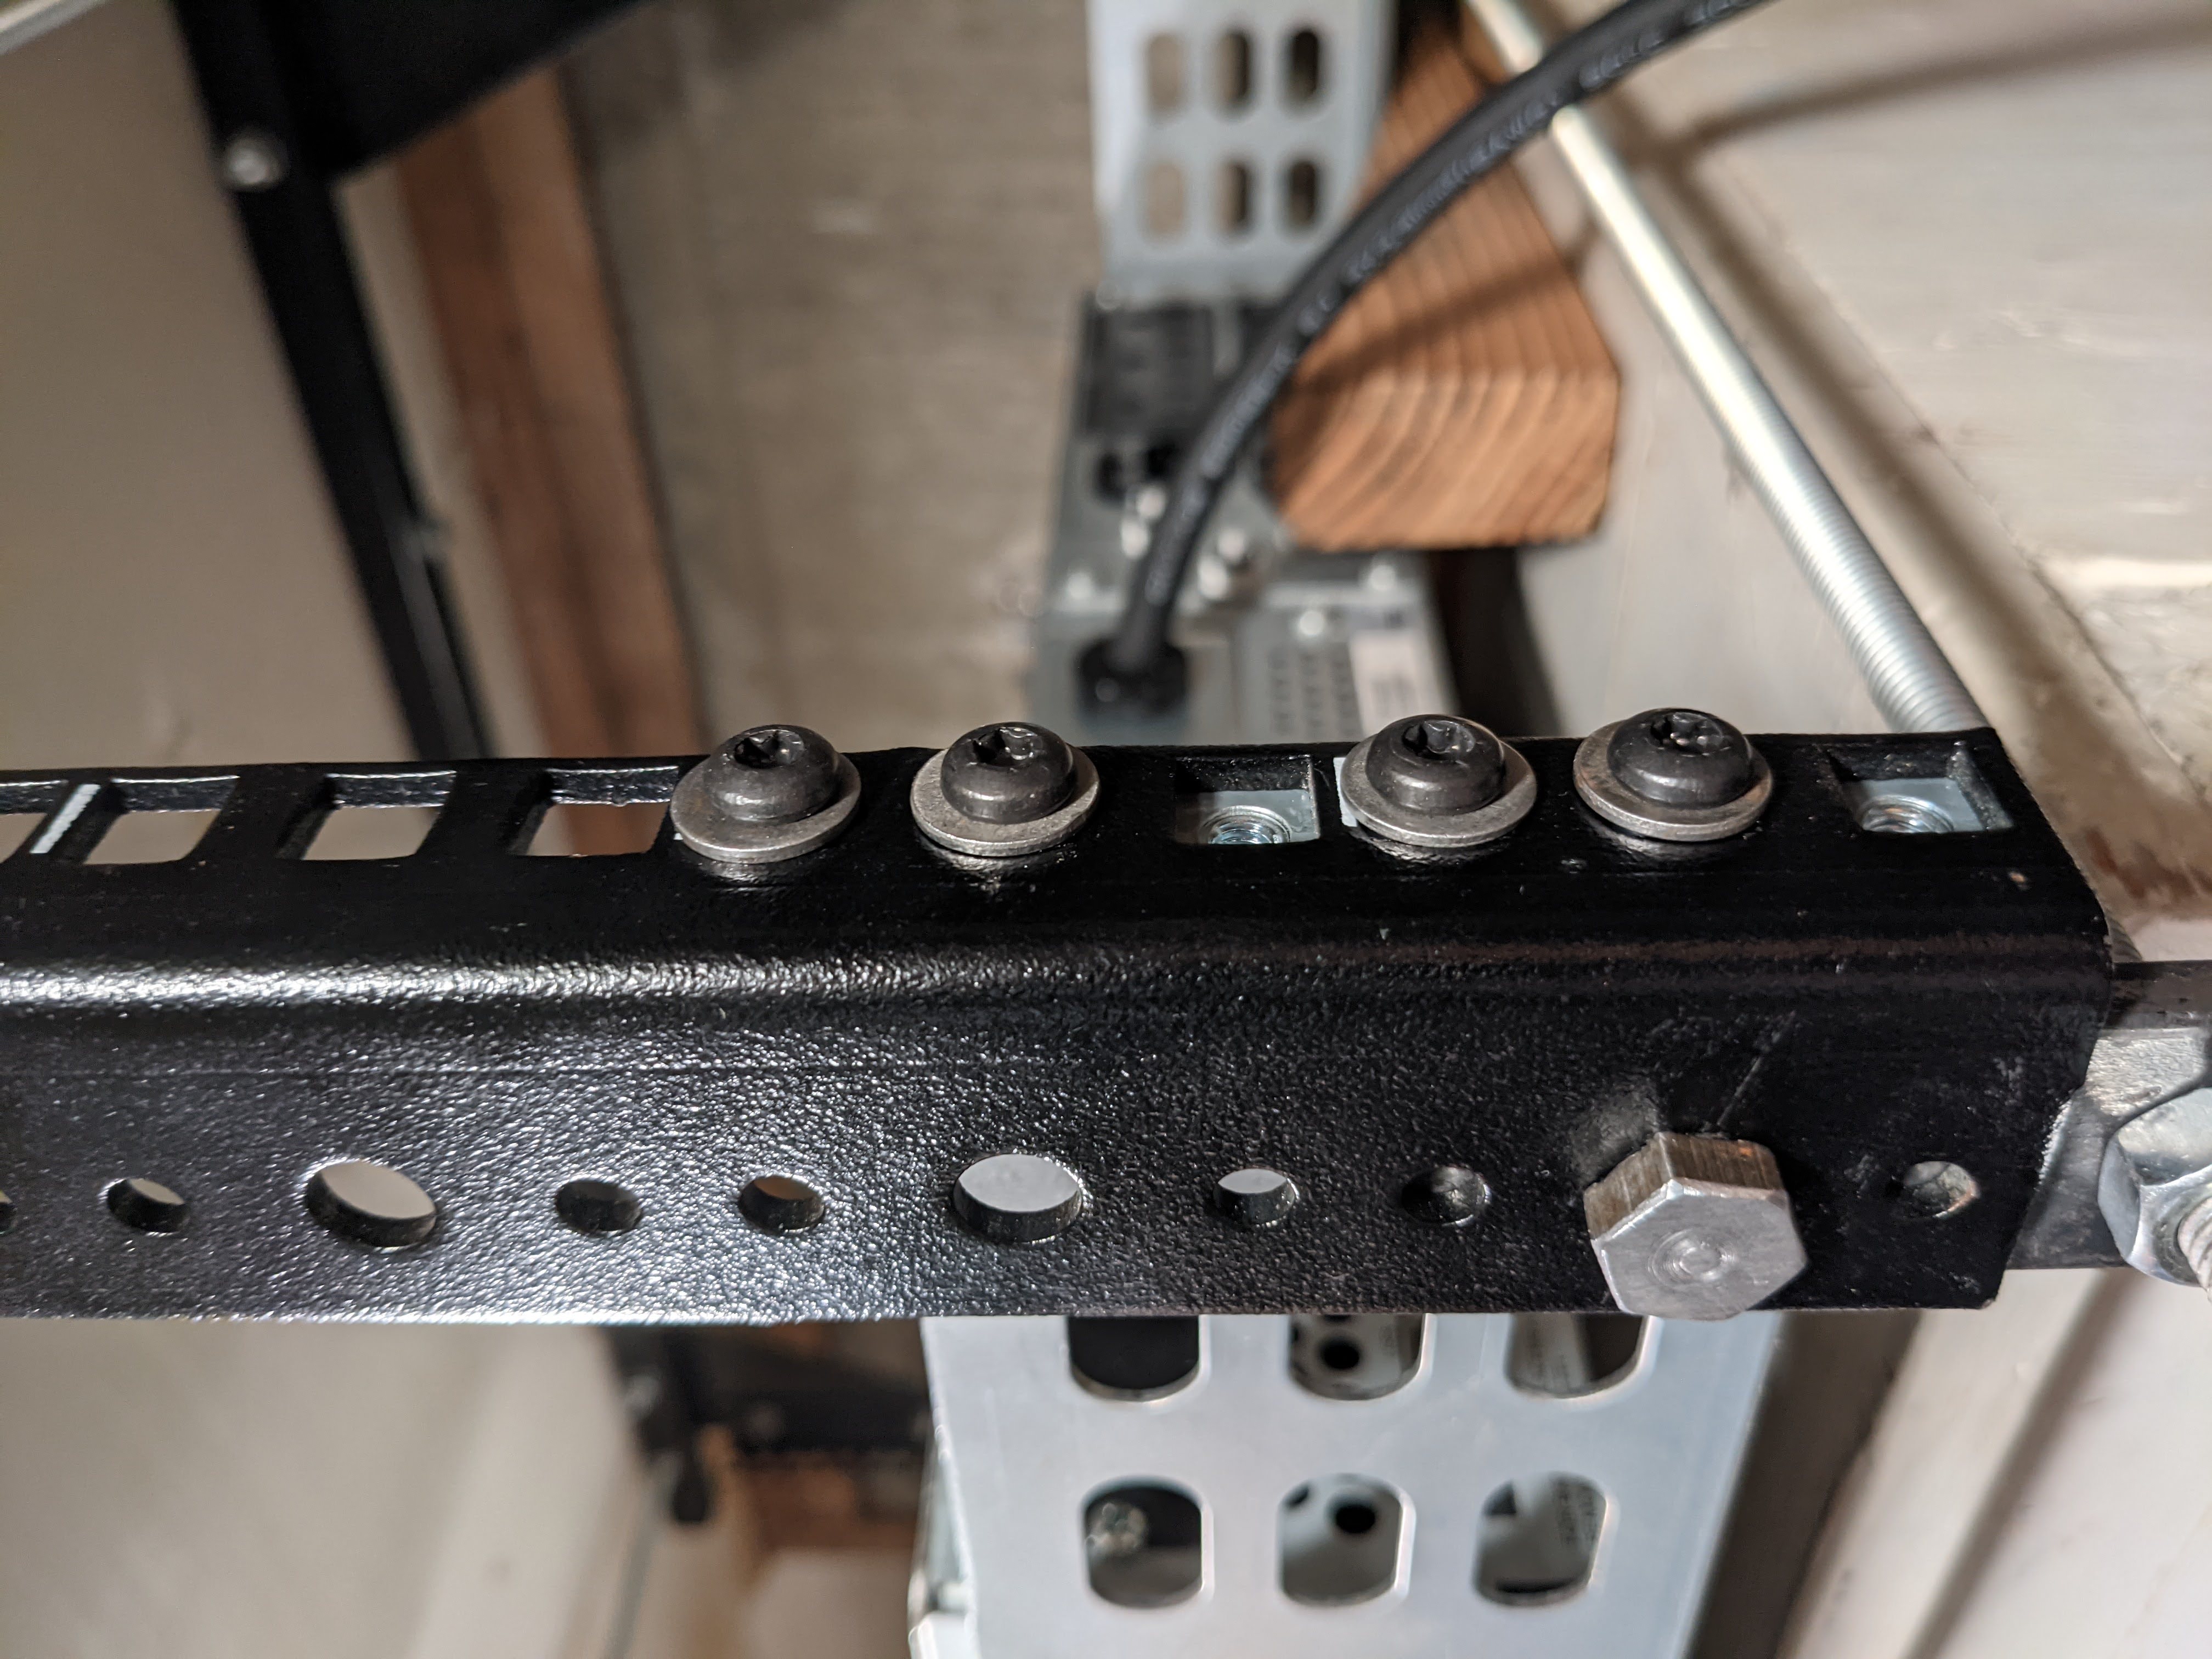
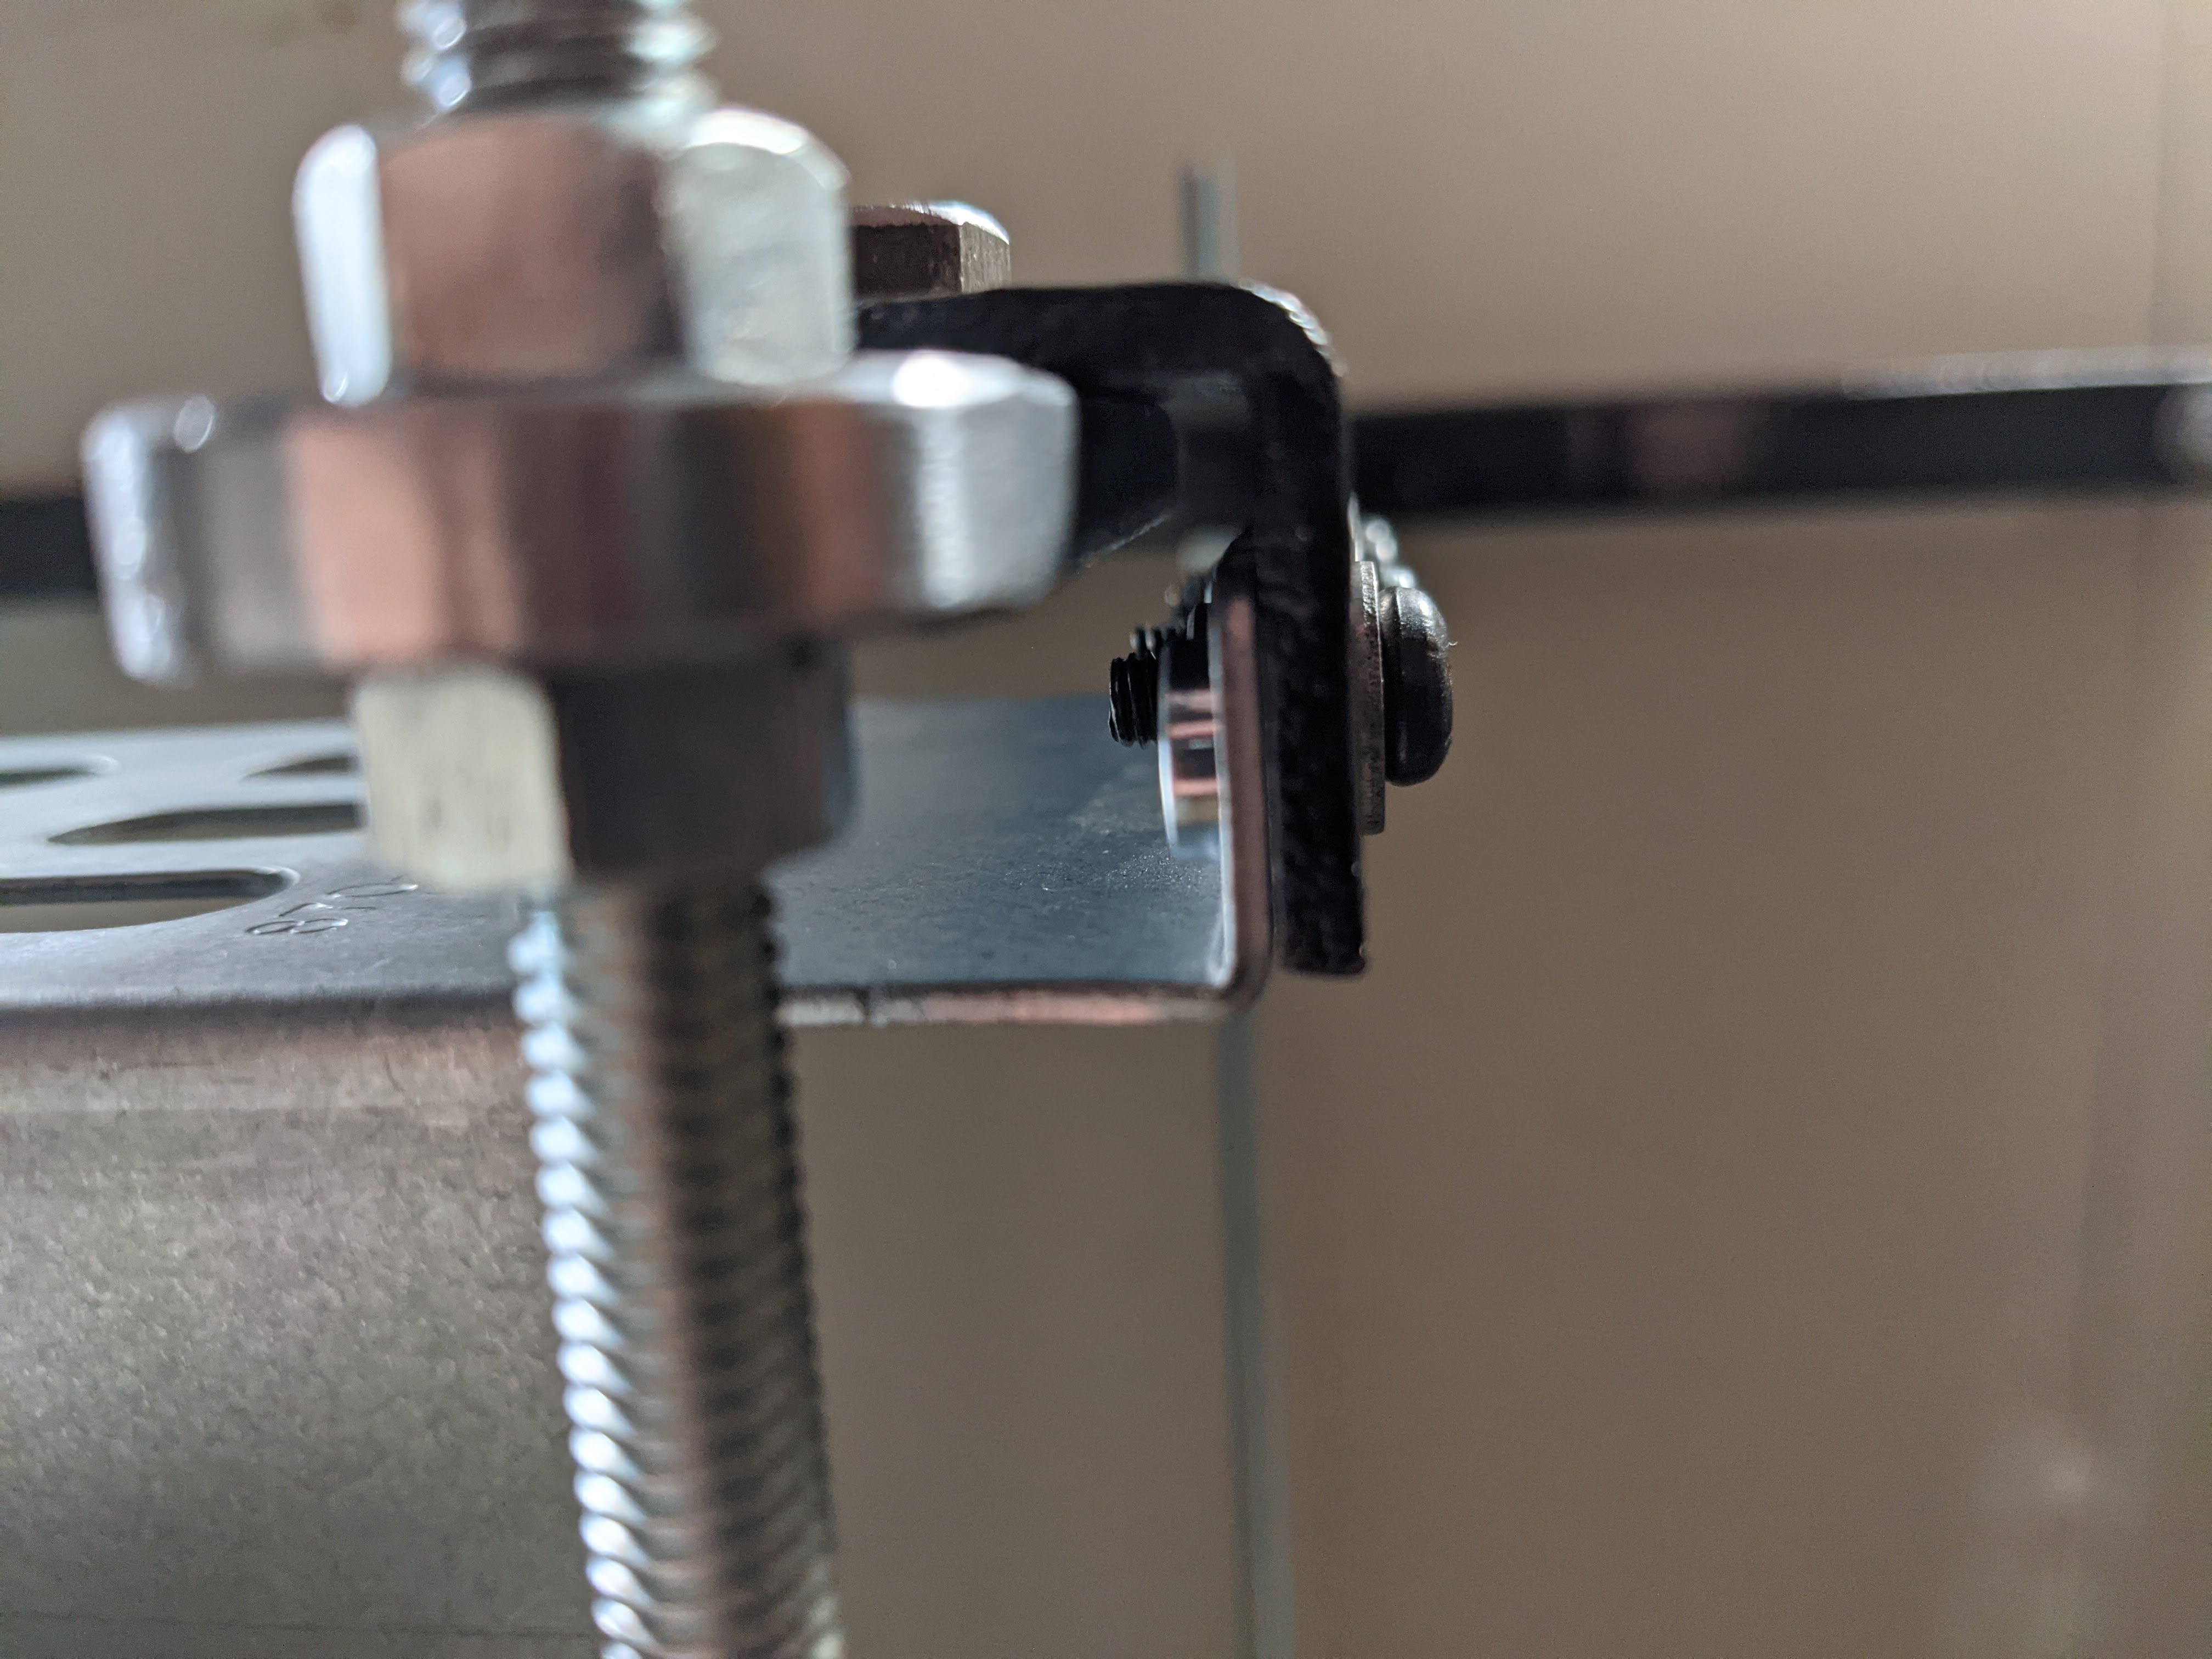
Getting the shelf to mount properly was something else though. The 10-32 screws on the front were milled down to fit just flush on the front rails and pairs of nylon washers were used on the back that also just fit in the rail holes to ensure that the rear screws were perfectly aligned when mounting. It was annoying, and took some work, but ultimately, the UPS mounted perfectly in the rack.
Since the server has dual redundant power supplies, one is plugged into the UPS while the other will be plugged into the upstream surge suppressor once I find the correct length and low-profile NEMA receptacle cable. This may change down the road if I get a second UPS, but this is fine for now, as my switch gear and ONT are also plugged into this UPS: if there's a power delivery issue inside the device, I'm going to have problems across the board.
Conclusion
With this all in place, I can start to focus on software updates and actually starting to make use of this. Look forward to more content next week!
Or maybe next year.