Samba on SmartOS

While TrueNAS is a powerful tool for setting up simple and easy network addressable storage, there's a lot of unnecessary feature overlap between TrueNAS and SmartOS. Both operating systems prefer direct hardware access, and passing through ZFS volumes to HVM for TrueNAS to format as ZFS would just be sacrilege to both parties.
Fortunately, it's trivial to configure a lightweight SmartOS zone to act as a network addressable storage (NAS) provider, albeit without the graphical configuration and monitoring of TrueNAS, but instead with the raw expressive power of configuration files!
Seriously though, the configuration is not that hard, and results in a solution that's both minimalistic and unassuming. Unlike TrueNAS, the approach documented here will bifurcate Samba configuration from snapshots/replication and system resource monitoring, two topics that we will address separately with more robust, hypervisor encompassing solutions in later articles.
Why Samba?
The official SmartOS wiki describes a method for serving SMB from the kernel. While this works, it doesn't quite offer the flexibility that Samba offers you.
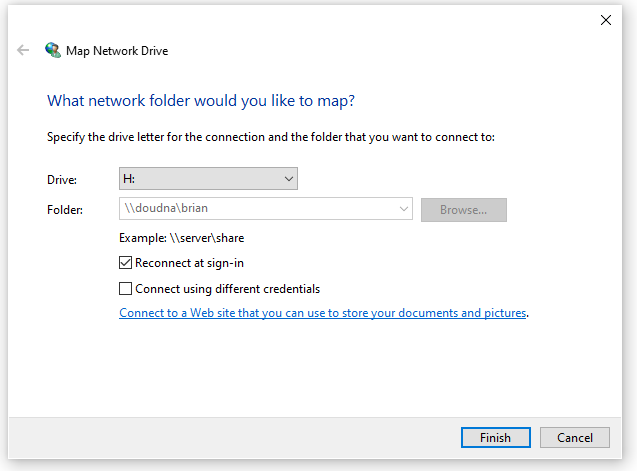
Unmap Drives
Depending on how you've configured Samba, if you're upgrading from a previous SmartOS virtual machine image, it can be helpful to disconnect any drive mappings from your previous NAS before proceeding.

SmartOS Zone Configuration
We'll be providing NAS service from an isolated SmartOS zone. Below is an example manifest:
{
  "image_uuid": "1d05e788-5409-11eb-b12f-037bd7fee4ee",
  "brand": "joyent",
  "alias": "samba",
  "hostname": "samba",
  "cpu_cap": 100,
  "cpu_shares": 25,
  "max_physical_memory": 256,
  "quota": 20480,
  "zfs_io_priority": 25,
  "delegate_dataset": true,
  "resolvers": [ "10.0.0.1" ],
  "nics": [
    {
      "nic_tag": "admin",
      "ips": [ "10.0.0.3/24" ],
      "gateways": [ "10.0.0.1" ],
      "primary": true
    }
  ],
  "customer_metadata": {
    "root_authorized_keys": "ssh-ed25519 AAAAC3NzaC1lZDI1NTE5AAAAIDrStZlHS0yfE8n71meairBGvFnc5mlDFNKAJy7tQMi2",
    "user-script": "/usr/sbin/mdata-get root_authorized_keys > /root/.ssh/authorized_keys"
  }
}
For more details about the properties configured for this manifest, please read this article.
Be sure to set the resolvers, nics and root_authorized_keys parameters as appropriate for your environment. Create the zone, and assign its IP address to a relevant Ansible host inventory.
Samba Configuration
Use the samba ansible role from ansible-smartos-tricks to configure Samba on your zone. This will automatically deploy a ZFS filesystem at /home if a dataset has been delegated, and configure Samba as is normally comes configured when installed directly by pkgin.
Additionally, this role can modify the Samba configuration through the samba variable. Included below is my default Samba configuration modifications that specify a workgroup name, limit remote host access, and include shadow_copy2 on the homes shares, configured to treat any ZFS snapshots as VSS snapshots made available over Samba:
---
- name: 'Configuring Samba Servers'
  hosts: samba
  roles:
  - samba
  vars:
    vim:
      colorscheme: elflord
    samba:
      global:
        'workgroup': 'LOCALNET'
        'hosts allow': '192.168.0. 127. fe80::'
      homes:
        'vfs objects': 'shadow_copy2'
        'shadow:snapdir': '.zfs/snapshot'
        'shadow:sort': 'desc'
        'shadow:format': 'r%Y%m%d%H%M%S'
        'shadow:snapdirseverywhere': 'yes'
        'shadow:crossmountpoints': 'yes'
For a stand-alone server, both system and corresponding Samba users will need to be created in the zone to access the samba share, this can be done as follows:
[root@samba ~]# useradd -m brian
144 blocks
[root@samba ~]# smbpasswd -a brian
New SMB password:
Retype new SMB password:
Added user brian.
At this point, you should be able to connect to the server and login, and access your shares.
Managing ZFS Snapshots
The vfs_shell_snap module can be added to your Samba shares, allowing remote users to manage the manual creation and deletion of snapshots on your shares. I prefer not doing this, instead leaving it to automatic server side processes, as control over this functionality may be hijacked by ransomware and maliciously used against the user.
ClamAV Configuration
Samba also ships with the vfs_virusfilter module that allows for the scanning and filtering of virus files on Samba file servers with an external anti-virus scanner, such as ClamAV. While this may seem cool, ClamAV requires over 1GB of additional memory to operate.
The following ansible play enables ClamAV along side Samba on this zone and configures Samba to scan files with ClamAV before serving them to clients.
---
- name: 'Configuring Samba Servers'
  hosts: samba
  roles:
  - clamav
  - samba
  vars:
    vim:
      colorscheme: elflord
    samba:
      global:
        'workgroup': 'LOCALNET'
        'hosts allow': '192.168.0. 127. fe80::'
      homes:
        'vfs objects': 'virusfilter shadow_copy2'
        'virusfilter:scanner': 'clamav'
        'virusfilter:socket path': '/var/clamav/clamd.sock'
        'shadow:snapdir': '.zfs/snapshot'
        'shadow:sort': 'desc'
        'shadow:format': 'r%Y%m%d%H%M%S'
        'shadow:snapdirseverywhere': 'yes'
        'shadow:crossmountpoints': 'yes'
Dataset Transfer
Datasets from a previous file server zone can be transferred to this new file server zone using some previous documentation on the topic.
Active Directory
Starting from version 4.0, Samba is able to function as an Active Directory Domain Controller. Since this configuration should usually be utilized with multiple DCs for failover reasons, we'll save it for another article.
Remap Drives
Once you are satisfied with your file server zone, be sure to remap any drives you had previously unmapped from your workstations.

Multicast DNS
If you'd like your shares to be auto-discoverable in the MacOS X finder, enable the multicast DNS service with the following command:
[root@samba ~]# svcadm enable svc:/network/dns/multicast:defaultThis should probably be managed via Ansible, but it seems kind of silly to configure a role for it now. Perhaps later.
Conclusion
While this isn't the only way to run a SMB file server from within a SmartOS Zone, it is a nice way to do it. If there's interest, I might end up benchmarking Samba vs the official recommended approach from the SmartOS Wiki.